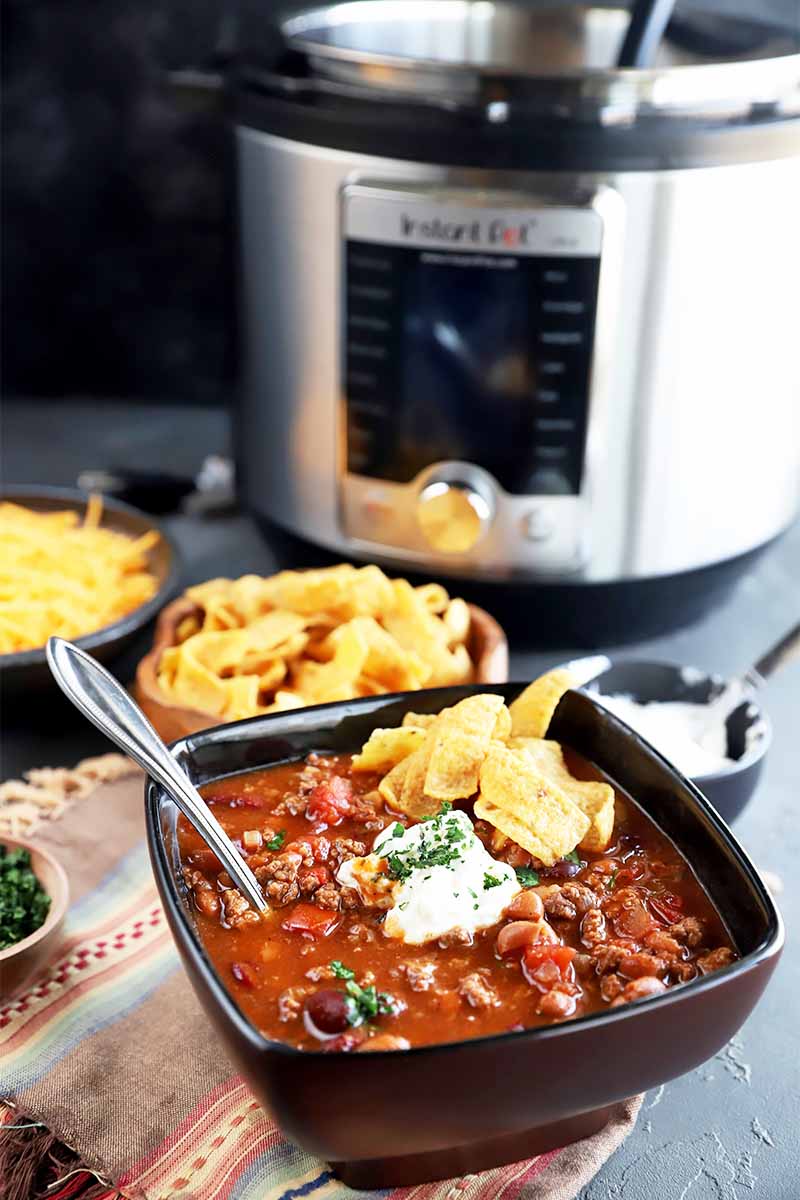
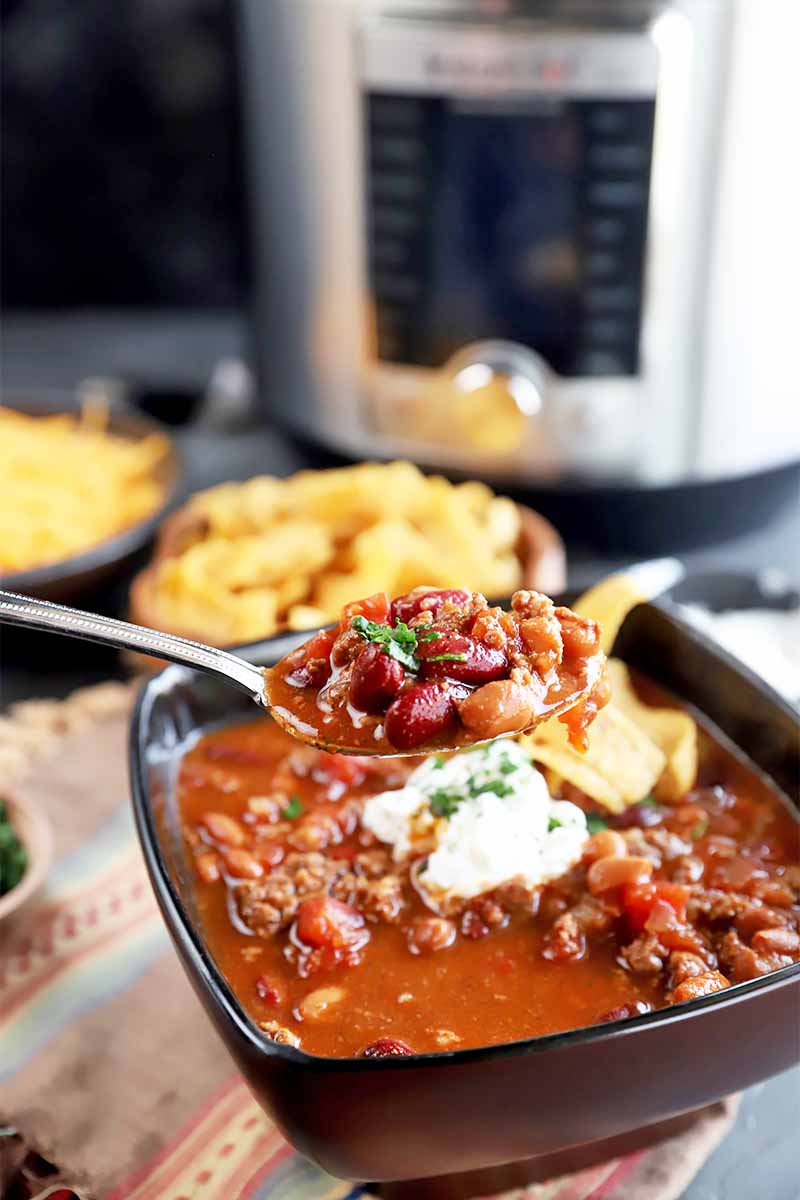
Say hello to a bowl full of comfort, friends – all made in one pot.

Er, in one appliance insert, that is. Because we’re talking about making chili in the electric pressure cooker, whether you have an Instant Pot at home, or some other make and model.
I love to use my pressure cooker regularly to make rice, but lately, I’ve also been all about this heartwarming comfort food dish.
Can you blame me?
This kind of recipe is perfect for easy weeknight meals, or for when tailgating season rolls around. I mean, when you can set out a giant vat of stew and a ton of toppings to keep your friends and family fed on a busy evening or throughout the game, that’s a surefire win.
I also love how hearty this type of meal is, filled with meat (if you wish), beans, and chunky tomatoes. When you eat it, starting with the first spoonful, you can feel yourself warming up from the inside out.
Making this recipe in my electric pressure cooker is actually my favorite way to cook it.
I used to use the stovetop method, but it would take hours to cook everything down together to create a flavorful mixture with a texture that’s nice and thick. As much as I love filling my home with the smell of a tasty meal like this one, I rarely have several hours at a stretch available to prepare it.
If this sounds like you, then let’s dig into the details! Here’s what’s ahead in this how-to guide:
What You’ll Learn
Pro Tips for Making Chili in an Electric Pressure Cooker
How to Cook Chili in an Instant Pot or Electric Pressure Cooker
Pro Tips for Making Chili in an Electric Pressure Cooker
To start, be sure to use lean ground beef, ground turkey, or ground chicken if you are making a meat-based stew – I prefer 93% lean ground beef for making this particular recipe in my Instant Pot. Since you are making everything in the same pot, this is key. You will still be able to impart plenty of flavor without creating a dish that’s too greasy.
You can also make the recipe without beans with this method of cooking. Just make sure that you amp up the amount of tomatoes that you add, along with their juices, to make up for the decreased quantity of liquid.
Alternatively, you can make a vegetarian version without meat – just with beans and vegetables – using the same method. All you have to do is skip browning the meat and saute the onion on its own instead.
Note that you can make white chili in the electric pressure cooker with this method as well. Use pre-cooked shredded chicken or ground chicken browned the same way you would do the prep with ground beef, plus white beans and salsa verde, and skip the tomatoes.
If you’re making a quicker rendition of our slow cooker white chicken chili, cream cheese can be added after you release the pressure from the appliance.
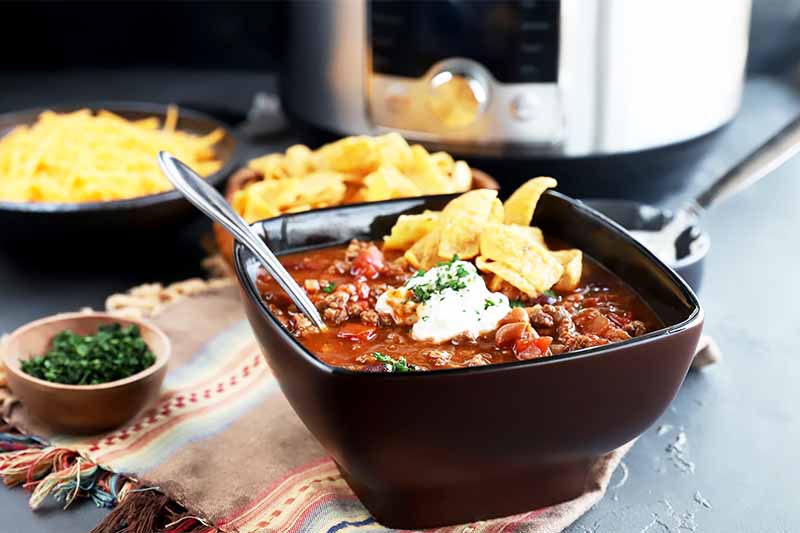
Serve your stew with a variety of toppings. Shredded cheese, sour cream, green onion, and avocado are a few of my favorites, but there are endless options. Play with the combination of textures and flavors on offer, and have some fun.
Spicy Seasoning Suggestions
Do you want to make your meal spicier?

I recommend starting with the recommended amount of spice for whatever recipe you are working with. When everything is finished cooking, this is the time to tinker with the heat level.
I usually like to add 1/4 teaspoon of extra cayenne pepper at a time, and give it a taste after every addition, until the heat level is to my liking.
If you’re not a fan of too much heat, or you’re making this meal for kids with sensitive palettes, I recommend starting small and increasing the spice factor gradually. You can always make the whole batch mild and serve sliced jalapenos, salsa, or hot sauce on the side for the spice lovers to add as they wish.
Increasing the heat level gradually is always the way to go because it’s easier to add more than it is to take too much spiciness away – but it isn’t impossible. If you find that you made your dinner too spicy, read our guide for tips.
Can I Freeze This?
Chili is super easy to freeze, because there isn’t any dairy in the mix to mess with the texture or flavor when you freeze it.
First, allow the entire batch to cool completely. Once it has cooled, store the stew in resealable zip-top bags, pressing out as much air as possible.
I like to freeze mine in individual portions to eat for lunch, but you can also portion them out in larger amounts to feed your whole family for weeknight meals.
To thaw, simply stick the zip-top bag in the fridge the night before to thaw overnight. When you’re ready to eat, add it to a bowl and reheat in the microwave for about 2 minutes, until it’s hot. I like to stir mine after one minute so it reheats evenly throughout.
How to Cook Chili in an Instant Pot or Electric Pressure Cooker
Ready to get started? It’s going to be time to eat before you know it!
Step 1 – Measure Out the Ingredients
To begin, be sure to thaw any ground meat that is frozen.
Next you will measure out and prep all of the ingredients that you will need for the recipe before you get started with the cooking.
Wash any produce, chop any ingredients that require it, like onion and peppers, and mince the garlic.
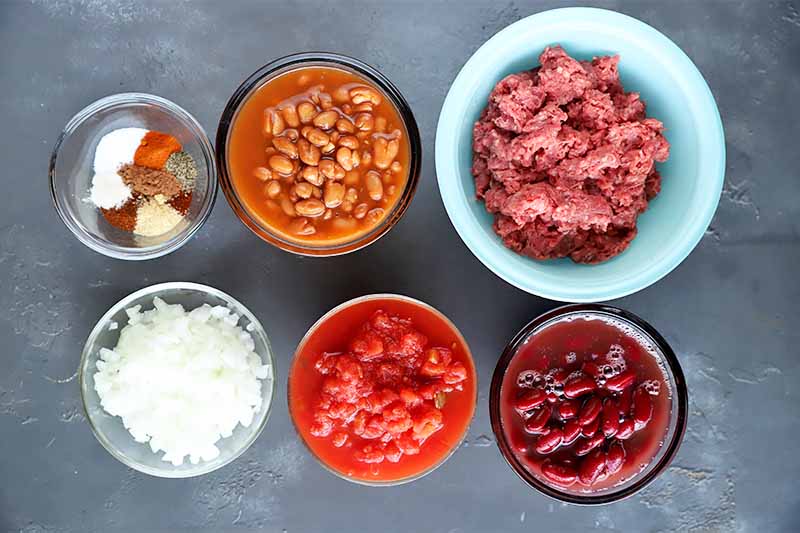
Measure out all of your spices. I like to use a variety of spices like ground cayenne, garlic powder, smoked paprika, black pepper, and a touch of cocoa powder, for example.
Open the cans of beans and tomatoes. I use hot chili beans and kidney beans, and fire-roasted diced tomatoes are the best, if you ask me!
Note that canned cooked beans are the best option to use when you are making this recipe in the electric pressure cooker. If you would rather use dried beans instead, cook these first in the pressure cooker before you proceed with the recipe.
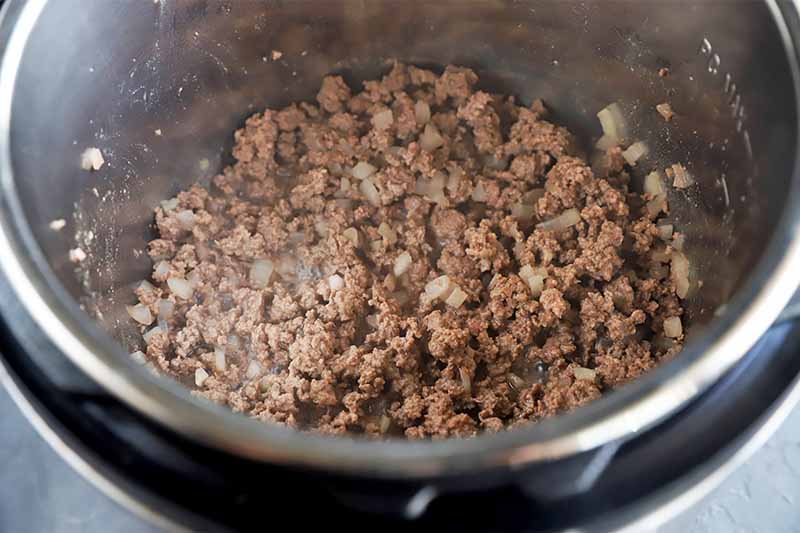
Step 2 – Brown the Meat and Sweat the Onions
Turn on the Saute function on your appliance. Add the ground meat, as well as any chopped onions, if you are using them.
This should take about 4 to 5 minutes per pound of ground beef. You will want to use at least a 6-quart pressure cooker (that’s what I use) as the mini versions are too small to saute a pound of ground meat at a time.
If you have a larger appliance, that will work just fine. Or if you are making a recipe that calls for more than a pound of meat, you can split the meat into batches to brown it evenly.
Once the meat is browned, turn the appliance off.
If you are making a vegetarian version, saute the onion in about 1 teaspoon of olive oil until it has softened and become translucent, stirring occasionally for about 3 to 4 minutes.
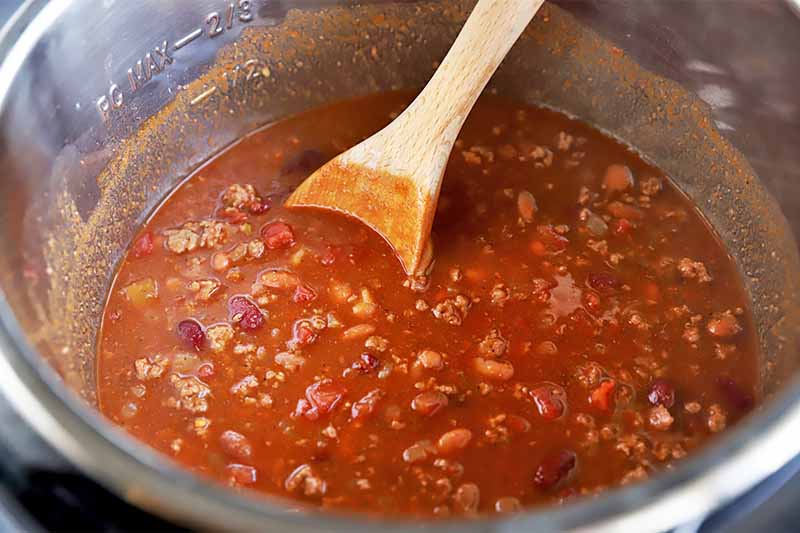
Step 3 – Deglaze and Pressure Cook
Add your liquid to the inner pot. Usually this is about 1 to 2 cups of beef or vegetable broth, depending on the recipe, but you could also use chicken broth or water.
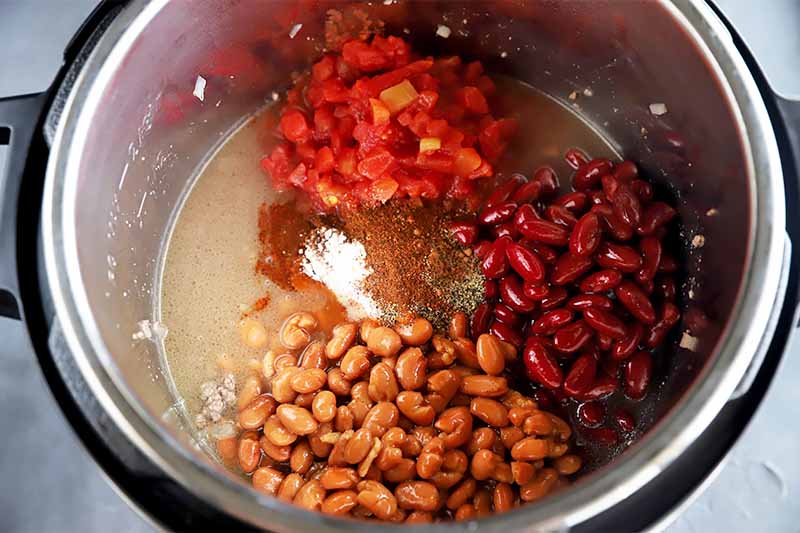
Use a wooden spoon to scrape up any flavorful browned bits in the bottom of the pot.
Stir in all of the remaining ingredients – seasonings, beans (canned or cooked), tomatoes with their liquid, and any other ingredients that you are using. Seal and make sure the valve is set to the “sealing” setting.
Set to Manual and cook on High pressure for 20 minutes.
Let the pressure release naturally, for about 15 minutes.
Manually release any remaining pressure before opening the lid. Stir well, taste, and adjust seasonings as desired.
Step 4 – Serve or Chill and Store
Serve with all of your favorite toppings.

If you aren’t ready to eat right away, you can keep the stew hot using the warming setting on your appliance, or allow it to cool completely before refrigerating or freezing.
Is Your Chili Too Thin?
For me, whenever I make it in the electric pressure cooker, I never have a problem with the consistency. To give you a clearer idea of the basics in terms of ingredients, I use the following general proportions:
- 1 medium onion
- 1 pound ground meat
- 1 to 2 tablespoons tomato paste
- 1 cup beef broth
- 2 15-ounce cans beans
- 1 15-ounce can diced tomatoes
However, I have found some recipes out there can come out a little too thin at the end of the pressure cooking time.
If you run into this issue, the best way to fix this is to make a cornstarch slurry. Whisk together 1 tablespoon cornstarch and 2 tablespoons cold water until thoroughly combined, and add the slurry to the pot.
Stir it in, keep the pressure cooker on warm, and allow it to thicken for about 5 minutes. This should do the trick!
Craving even more delicious chili to make at home? Try these recipes next:
What type of chili will you make in the electric pressure cooker? Tell us in the comments below!
Photos by Meghan Yager, © Ask the Experts, LLC. ALL RIGHTS RESERVED. See our TOS for more details. With additional writing and editing by Allison Sidhu.
About Meghan Yager
Meghan Yager is a food addict turned food and travel writer with a love for creating uncomplicated, gourmet recipes and devouring anything the world serves up. As the author of the food and travel blog Cake 'n Knife, Meghan focuses on unique foodie experiences from around the world to right at home in your own kitchen.