Often used as the edible cement to build gingerbread houses, royal icing breaks from its typical supportive role and takes center stage as a delicious frosting for your sugar cookies this holiday season!
Whether you want an ethereal array of snowflakes, or festive and brightly colored holly, trees, and presents for the holidays, the possibilities are endless! Foodal is here to help you master this icing right in your home kitchen, with our ultimate guide.
Learn all about the required ingredients, tools, consistencies, decorating techniques, and much more. You will be decorating your sugar cookies like a pro for the holiday season in no time!

Meet the Ingredients
Royal icing is a smooth, glossy mixture of three key ingredients: powdered sugar, cream of tartar, and egg whites. Add a few drops of water and your favorite food coloring, and the mixture is transformed into an exciting medley of textures and colors.
The powdered sugar acts as the dry base, and the main ingredient for sweetness. It is used to create a perfectly blended, beautifully homogenized final paste.
A small pinch of cream of tartar helps to keep it pure white, without yellowing after it dries completely.
The liquid egg whites contribute to the final texture. The royal variety does not stay soft like other styles of frosting (buttercream, for example), but hardens instead, creating a solid surface.

If cooking with raw eggs concerns you, and in order for everyone to be able to enjoy your cookies without any health risks, you can use pasteurized egg whites. These are usually sold in cartons, and you’ll find them in most supermarkets in the same section as the regular eggs.
Using the Right Tools
Keep your kitchen (and yourself!) clean and organized by gathering the right equipment and tools to start the decorating process. Below is a list of all the tools you will need to locate before starting:
- Electric mixer with paddle attachment
- Bowls, in multiple sizes
- Mesh strainer
- Spatulas and spoons
- Piping bags and tips
- Scroll tool and/or toothpicks
- Plastic wrap
- Quart containers or cups
- Kitchen or paper towels
- Fan
- Plates or platters
A Few Tips on Piping Bags and Tips
Piping bags and tips used for cake decorating are a perfect tool for decorating your cookies. The soft bags allow you to get a firmer grip for handling and piping.
The downside with using them? They can get messy, especially if you overfill the bag! This is a mistake that rookies and veterans alike are guilty of… myself included.
When filling the bag, go just about halfway and refill when necessary. This keeps everything clean, and you will not risk having sticky, sugary frosting squeezing out the other end of the bag, and all over your hands and arms!
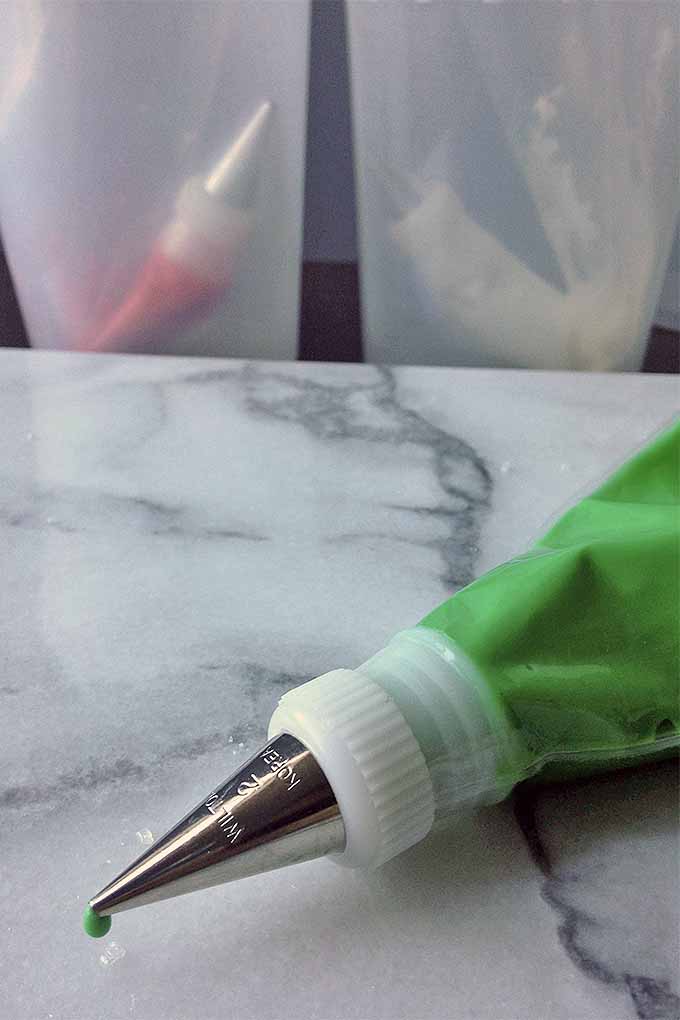
I find it very helpful to place each piping bag in a quart container or cup when it’s not in use. That way, the bag stays upright and won’t cause a mess all over my kitchen counter.
Clogged tips? Keep a few toothpicks handy in case the icing in the very end of the pick dries between uses. Just push the toothpick into the hole, and move it around to loosen the clog.
If you need some extra help with choosing the right tools, read our review of the best decorating tools every baker should own!
Understanding Consistency
The beauty and perfection of royal icing relies deeply on achieving the proper textures.
You can effortlessly decorate all your cookies in a variety of different styles and themes with only two distinct consistencies: medium-stiff, and flood.
We’ll explain each of these easy-to-master textures below.
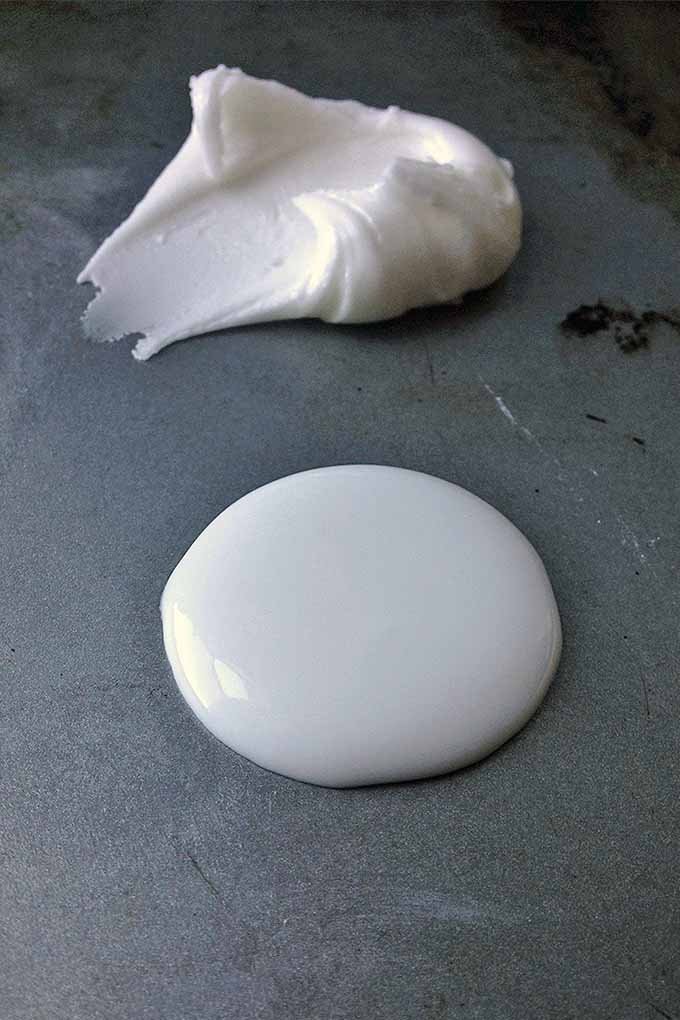
Medium-Stiff Consistency
Medium-stiff consistency is ideal for piping extra details on your cookie that need to hold their shape without spreading. It’s the ideal texture for our detailed flower cookies to create beautiful, realistic petals.
The original recipe we provide already yields the perfect medium-stiff consistency, with no adjustments needed!
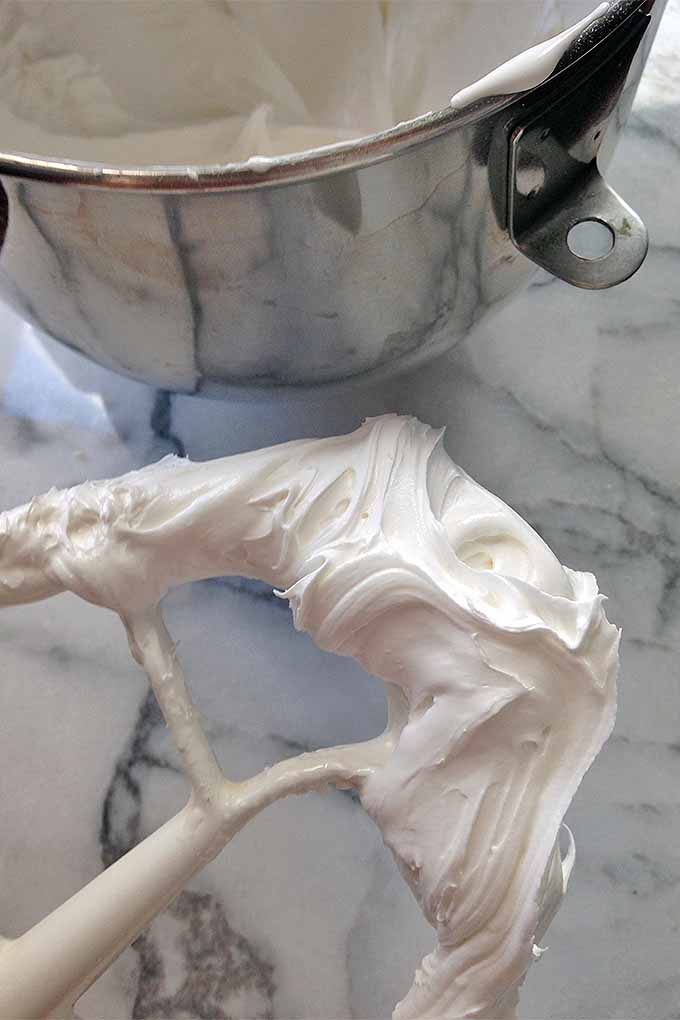
Visual cues to look for when making medium-stiff consistency are a spreadable icing that is able to hold a soft peak. It should be thick, but not so stiff that it won’t be possible to squeeze out of a piping bag.
Depending on how detailed you want the final design to be, I recommend staying in the range of the #1, #2, or #3 cake decorating tip sizes, with #1 being the smallest.
Flood Consistency
Flood consistency, which is much thinner and runnier than the medium-stiff thickness, is used for outlining and filling the base of your cookies.
In order to achieve the proper texture for flooding, the recipe we provide needs to be thinned with water. Start by adding just 1/8 teaspoon at a time – a little goes a long way in altering the thinness!
You do not want it to be excessively thin and liquidy for a few reasons:
It will drain too quickly out of the piping bag tip, and you will therefore lose control when attempting to pipe the cookie. Bye-bye, clean outline!
The whole point of using royal icing is for its precision and neatness. If it is too watery, it will spread all over. Your snowmen cookies will look more like half-melted blobs of snow than perfectly plump holiday treats!
Not only will decorating be too difficult with the wrong consistency, this also negatively affects how it hardens. Even after drying overnight, an excessively thin frosting will still be wet, and more prone to forming unwanted air bubbles.
Get the Right Flood Thickness
The most challenging part of decorating with royal icing is getting the right flood consistency. Use the method below to ensure you get the best texture: not too thin, and not too thick!
Take a spoon, dip it in your bowl of icing, and let a dollop fall off the spoon and back into the bowl. Observe and count the seconds for how long the dollop takes to completely sink back into the icing.
For the best flood consistency, 10-12 seconds is the best length of time for the dollop to blend in completely.
If you added too much water and it blends too quickly, there is a simple solution:
Always keep an extra bowl of plain medium-stiff icing, about 1/8 of a cup. If you ever need to thicken up your icing, just add a teaspoon or two of this until you reach your intended texture. It is a more effective solution than adding powdered sugar.
Correct Drying Techniques
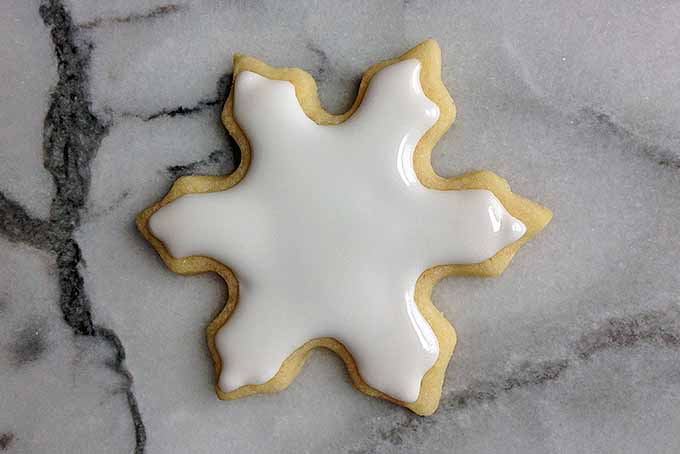
Once you have iced the cookies, they need to fully dry and set. Your decoration will slowly transform from being shiny and glossy into icing with a perfectly smooth and matte appearance.
Follow the guidelines below to ensure your cookies dry as quickly and effectively as possible.
Leave the cookies on a tray, uncovered and away from any sources of heat or humidity. Do not cover them whatsoever – no cling wrap, no airtight bags, no containers. Allow the cookies to breathe and set properly!
The very best advice I can offer you is to use a fan that’s blowing in the direction of the cookies. The cool, powerful, steady airflow from the fan helps to create the perfect drying atmosphere to set them properly.
The cookies need at least 3 hours to set correctly. Yes, I know, it does take time. But you’ll regret hastening the process when wet frosting smears all over, ruining your gorgeous design!
Icing Storage
Proper storage during and after decorating extends its freshness and usability.
While you are decorating with open bowls of icing, be sure to cover them with cellophane wrap to eliminate any air exposure. You’ll be good to go for the rest of the decorating procedure!
If you have finished decorating and still have extra left over, don’t throw it out. You can definitely store any extras for later use.
Keeping the colors and consistencies separate from each other, remove them from the piping bags or squeeze bottles and place them in individual airtight containers. Refrigerate for up to one week.
When you are ready to use them, let them come to room temperature for about 20 minutes. Give the icing a good stir to remove any air bubbles, and redistribute the color and any water that has separated.
Transport them back to clean and dry cake decorating bags and start Round 2 of decorating!
Decorated Cookie Storage
Once the cookies have completely dried, they can be stored either in an airtight container with waxed paper in between each layer, or in an airtight bag in a single layer. You can store them at room temperature for up to one week.
Royal icing does not freeze well. If you need to plan for long-term storage, I recommend you freeze plain sugar cookies ahead of time and decorate them when needed.
Common Problems and How to Avoid Them
There are a few common problems that can happen with your decorations:
Air Bubbles
Tiny air bubbles may develop on your cookies, something that you can’t fix once they are completely dry. But you can prevent this from happening!
Remember – make sure you do not make your flood consistency icing too thin, as watery icing tends to develop more air bubbles.
Another method to avoid air bubbles is to let your icing rest before piping with it. Allowing it to rest for at least 30 minutes (an hour is even better!) allows the air bubbles to reach the surface. Simply stir the icing to eliminate the bubbles, and you are well on your way to smoothness.
Cracked Surface
Once the cookies have dried, you may see some cracks on the surface of the icing. This usually occurs if the cookies have been moved around a lot during the drying process.
An easy solution is to keep your cookies in a set place while drying. Set up a location dedicated to drying them, and do not move them until they have dried fully.
Color Bleeding
You may encounter color bleeding when using deep, bright colors like true red or green for your holiday-themed desserts. There will be a slight discoloration and variation of color that resembles an ombré appearance once the cookie has dried, and this becomes more noticeable as it ages.
If you are using darker hues, you can let the icing sit for at least an hour covered in cellophane wrap once you have mixed in the food coloring. When you are ready to decorate, thoroughly remix it to further redistribute the color.
Another option is to use the minimum amount of food coloring to get the color you want. The more color you force into the icing, the more of a risk you have of color bleeding.
Basic Decorating Techniques
Now that you’re familiar with all of the fundamentals, from ingredients to troubleshooting, let’s go over some basic decorating methods!
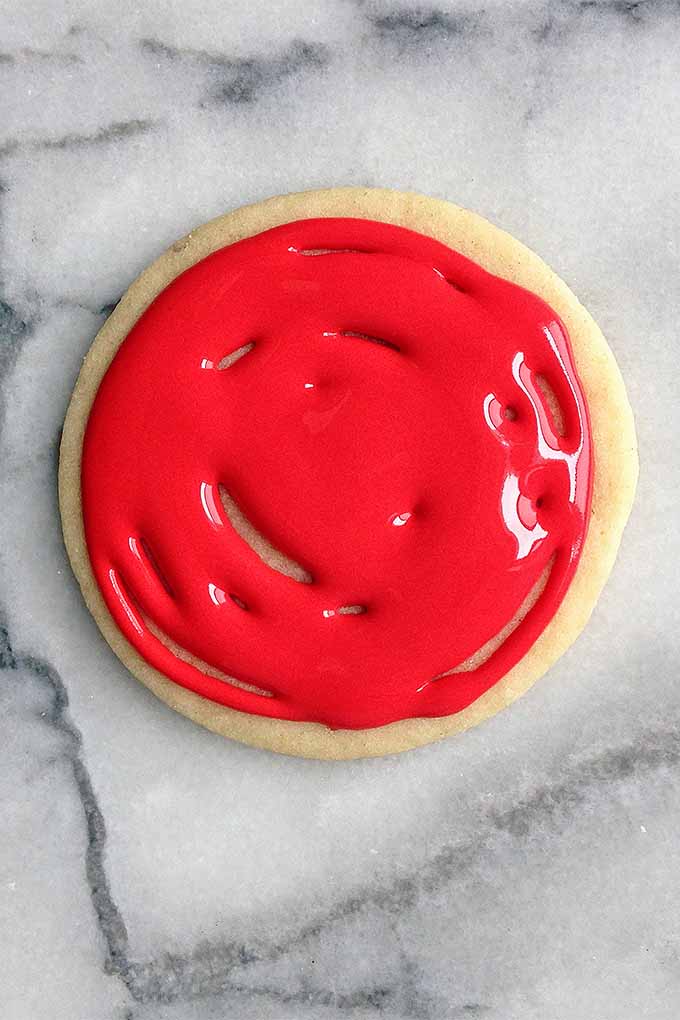
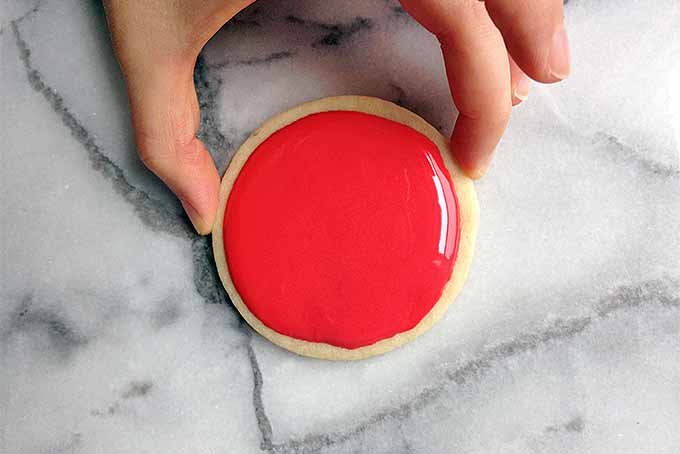
Outline and Fill
For a flawless base, follow these steps below to learn how to outline, fill, and blend:
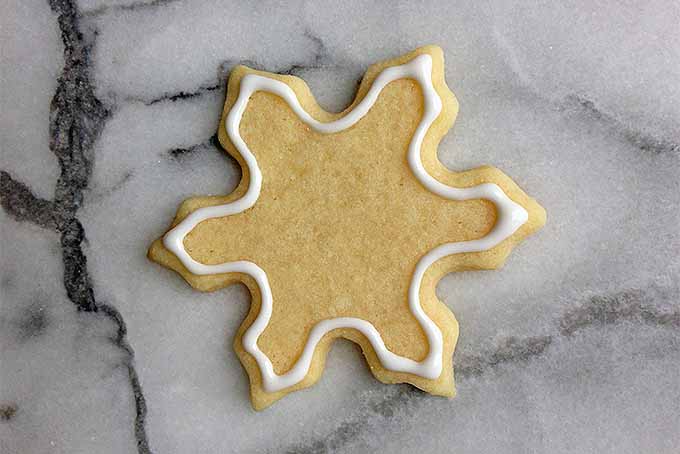
1. Fill a piping bag fitted with a #2 tip with prepared royal icing at the flood consistency level.
2. Leaving a border of 1/8 inch, carefully pipe the entire outline of the cookie.
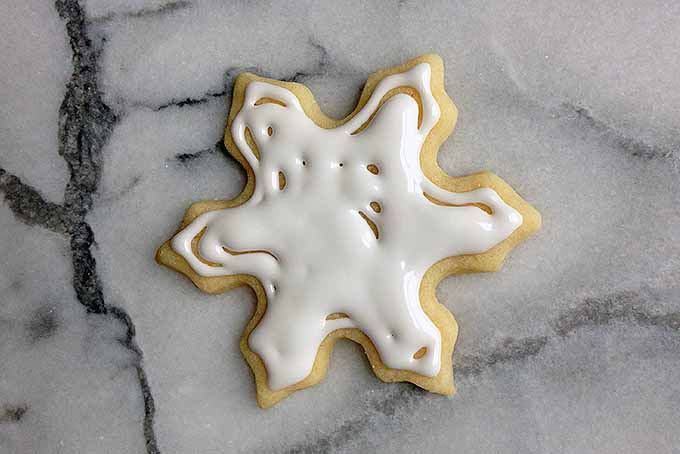
3. Immediately fill inside the outline with more icing, making sure not to go beyond the outline.
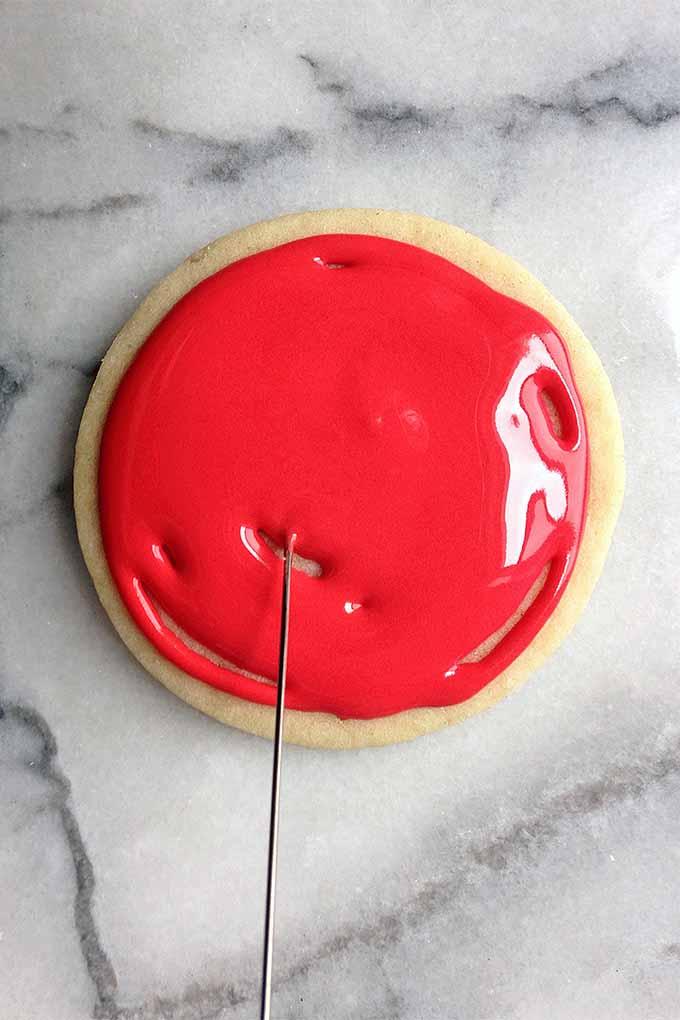
4. Using a scroll tool or toothpick, blend the icing together with the outline, filling in any open spots.
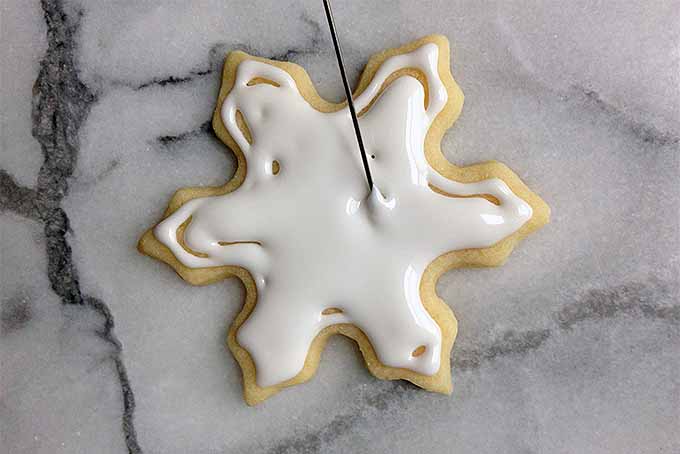
5. Gently tap the cookie on the work surface to remove any air bubbles, and to equally distribute the icing.
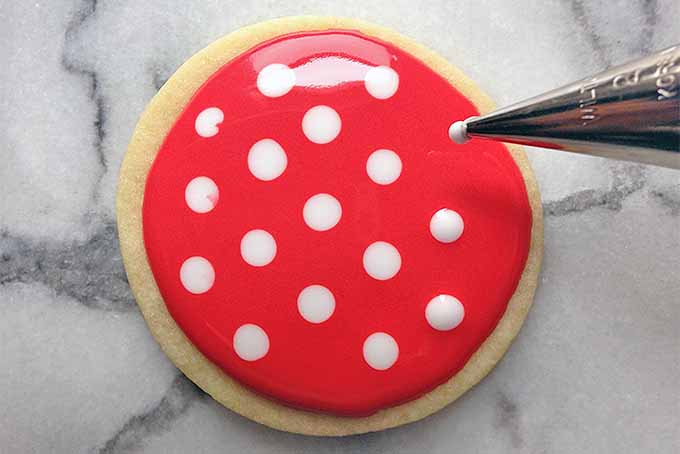
Wet-on-Wet Technique
If you like to have a fun, bold pattern on your cookie, but still want to coat it with a completely smooth layer, try the wet-on-wet technique!
Once you decorate the cookie with the base coat, work quickly to pipe out a pattern with a flood consistency in a different color. You want the base to still be very wet, so that there are no problems with the pattern settling seamlessly into it.
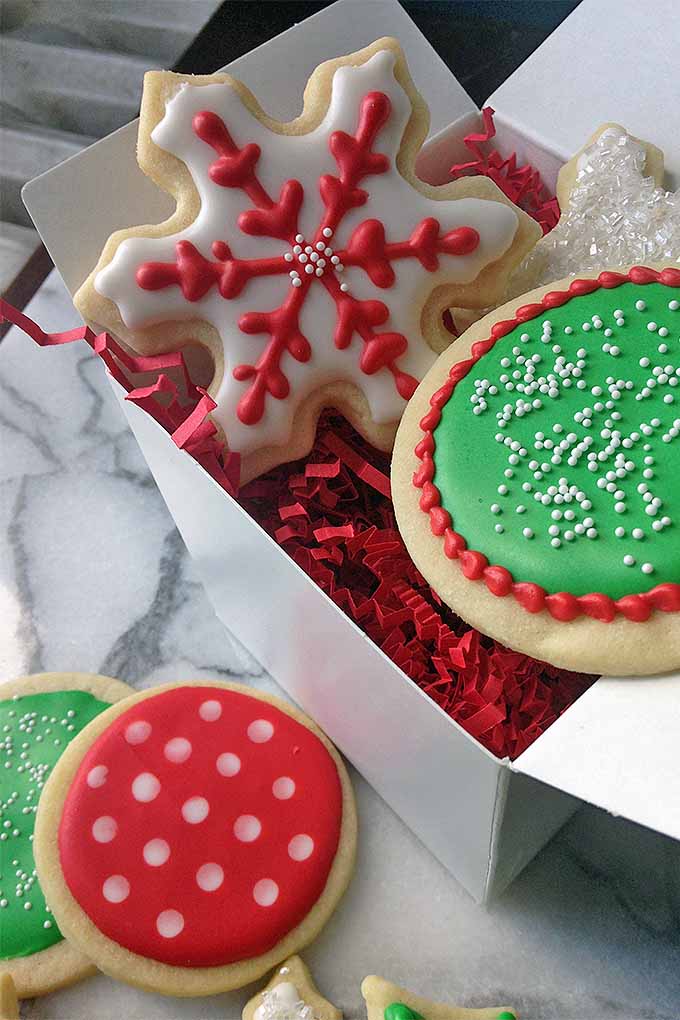
Polka dots are a fun introduction to this technique. Be sure to space them out enough – a small amount of spread will occur, so you want to be mindful of this to avoid overlap.
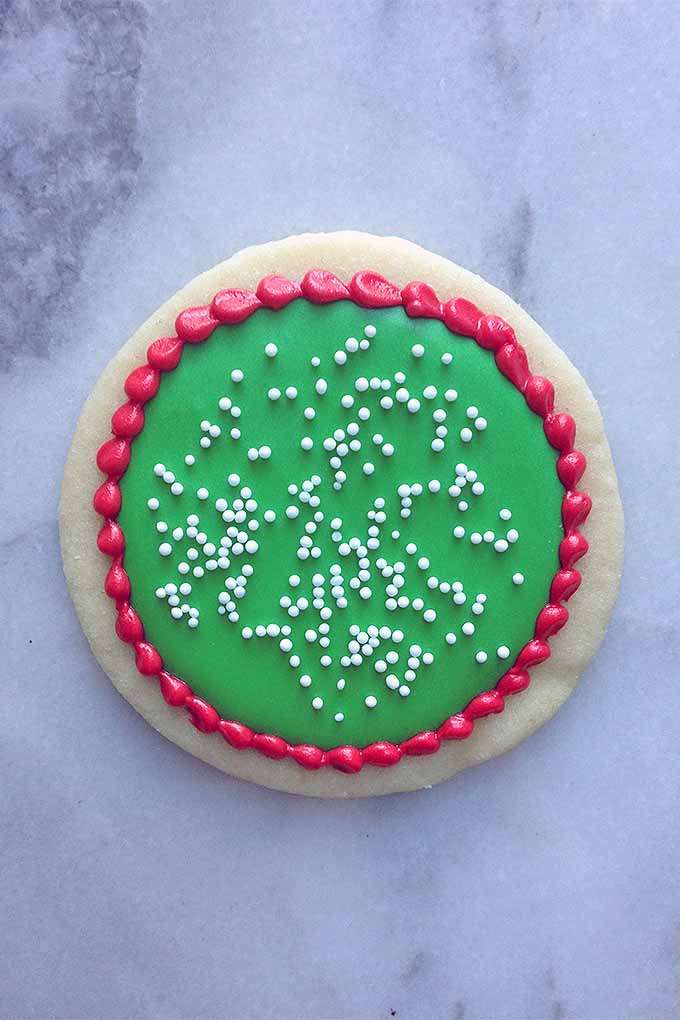
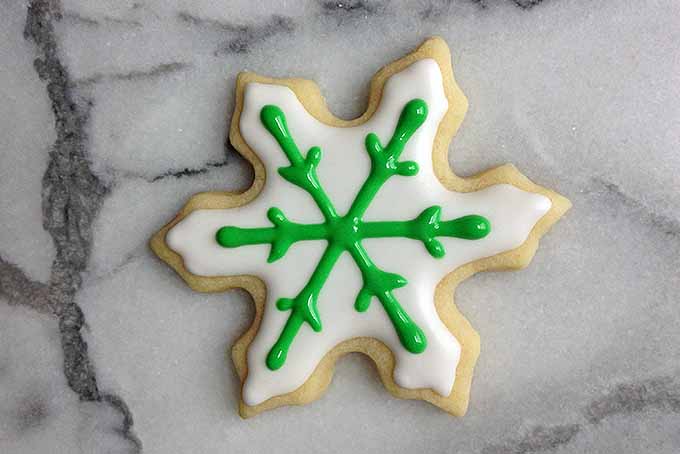
Layering
To create more dimension (and more fun!) with your iced cookies, you can pipe on another layer of decorations once the base has dried enough. Use the medium-stiff consistency to pipe out your decorations.
The base typically needs at least one hour to set enough that you’ll be able to add another layer without it blending into the base.
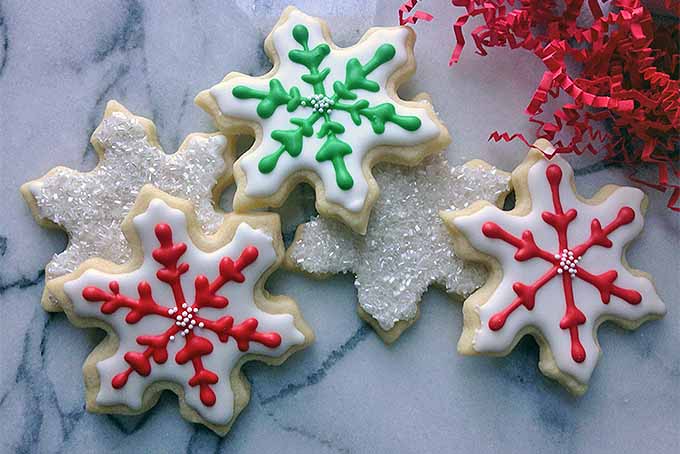
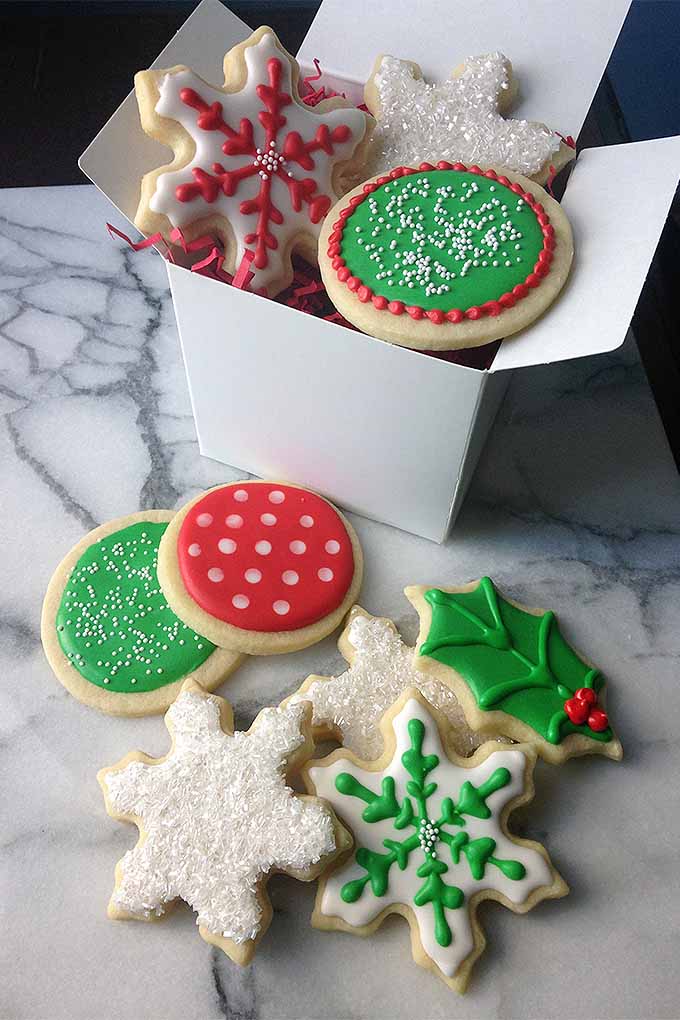
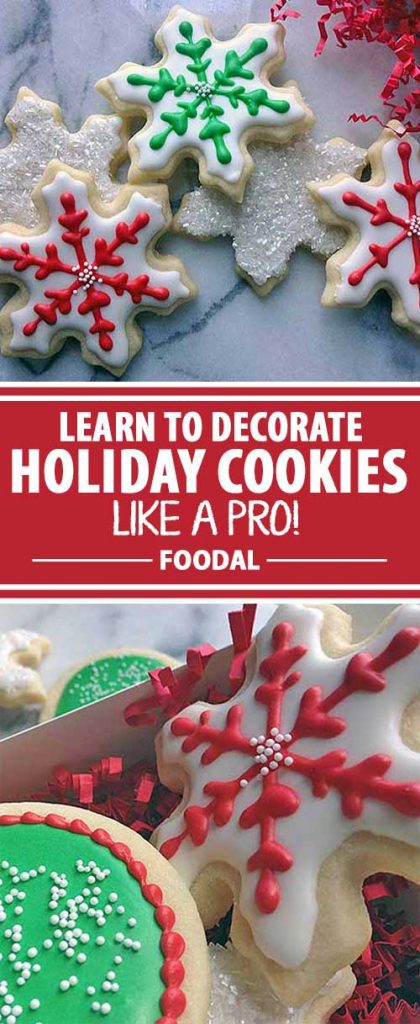
Take a look at these snowflake cookies – they are a perfect example of layering on top of the base! And how adorable are they for the winter months? Jack Frost could not be more proud!
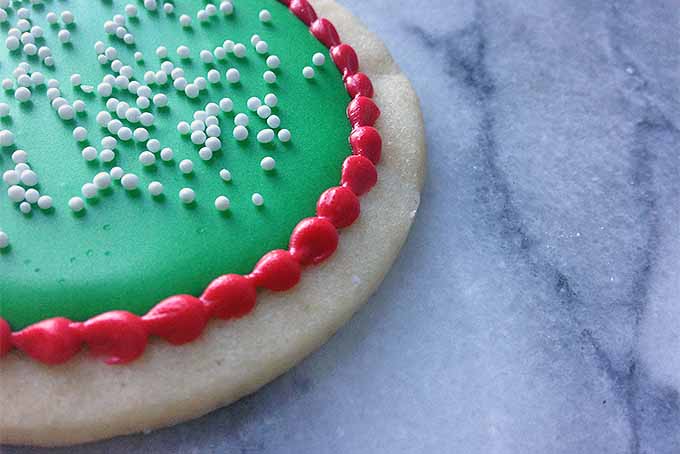
You can also pipe a border around the cookie, which looks best in a contrasting color.
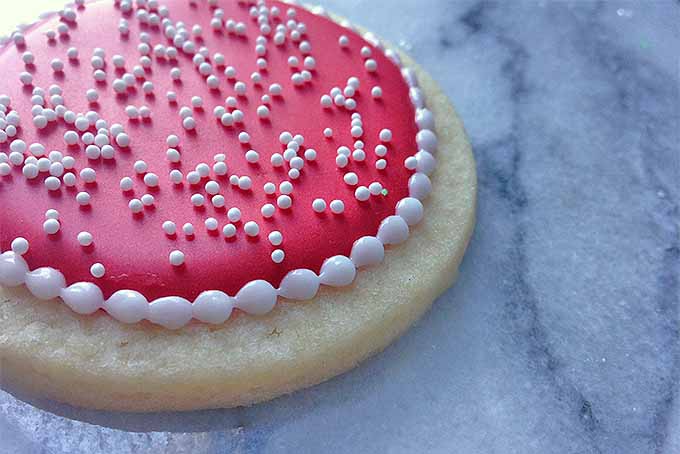
Adding Décor: Nonpareils, Jimmies, Sprinkles
If you love decorating with sprinkles (and who doesn’t have a few containers of nearly expired sprinkles hiding in the back of at least one kitchen cabinet?), royal icing is the perfect glue to use for all of your favorite fun and sparkly add-ons!
Go minimalist with just a pinch of nonpareils, or cover an entire snowflake with sanding sugar.
You know the ingredients. You know the techniques. Now it’s time to make the recipe! Check it out below, and have fun!
The Recipe

- 4 cups confectioners’ sugar
- 1/4 teaspoon cream of tartar
- 1/2 cup pasteurized egg whites
- Food coloring
- water
- Sift the sugar and cream of tartar together. Transfer to the bowl of a mixer fitted with the paddle attachment.
- With the mixer running on low speed, gradually add the egg whites until they are incorporated. Increase the speed to medium-high, and continue to mix until the ingredients are well blended, and the mixture thickens and forms smooth and glossy peaks that can hold their shape. This will take at least 7 minutes.
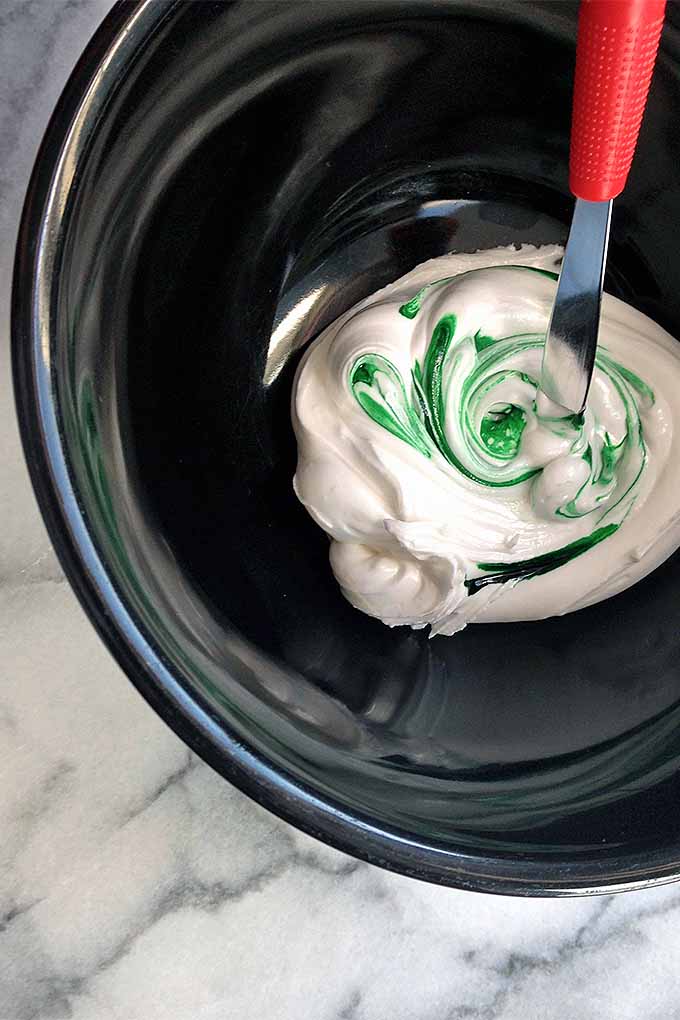
- Adding just a few drops at a time, mix in food coloring to the desired color.
- Adding just a few drops at a time, adjust to the desired consistency with water.
- Let it rest for 30 minutes, covered in plastic wrap. Air bubbles will rise to the surface. Stir until all of the air bubbles are removed.
- Spoon into piping bags fitted with the desired tips, and decorate! Keep unused icing covered with plastic wrap to prevent hardening.
- Store any extra icing in airtight containers in the refrigerator for up to one week.
This recipe yields 1 pound, 3 ounces of icing –or enough to decorate one batch of sugar cookie cutouts.
Cooking by the Numbers…
Step 1 – Sift the Dry Ingredients
Sift together the powdered sugar and cream of tartar. Powdered sugar tends to get very lumpy, so this step is crucial to remove any lumps, and aerate the sugar in order to equalize and lighten its texture.
The cream of tartar has a texture comparable to that of the powdered sugar. Sifting it along with the sugar similarly helps to aerate the cream of tartar, and this evenly distributes both of the dry ingredients in the mixture.
Add the dry ingredients to a bowl of a stand mixer that has the paddle attachment inserted.
Step 2 – Mix in Egg Whites
Keep the dry mixture running on low speed as you gradually add the egg whites. Because the dry ingredients are heavy with a small quantity of egg whites in comparison, you will need to stop the mixer every minute or two at the beginning to scrape down the sides of the bowl.
Once the egg whites are thoroughly incorporated, increase the mixer to medium-high speed and let it run continually for at least seven minutes. As the paddle beats the egg whites with the sugar, you will slowly see the mixture transform from a powdery bowl of odd lumps to a glossy, smooth icing.
The proteins in the egg whites are hard at work now, increasingly stiffening the mixture the more it blends at a high speed.
You will know it is ready when you can form soft peaks that hold their shape. This is the perfect medium-stiff consistency for decorating!
Step 3 – Adjust Color and Consistency
Before you add any more water to adjust the final texture, I highly recommend that you add your desired food coloring. Food coloring adds more liquid to the frosting, slightly altering the texture on its own even without the addition of water.
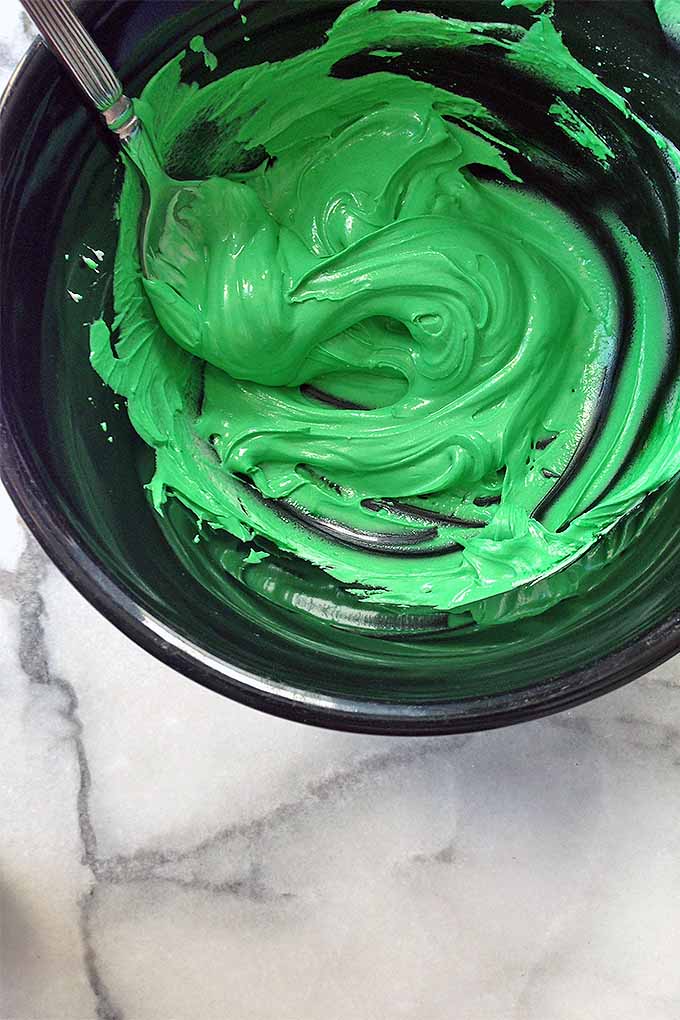
It’s better to get the desired color you want first, then make any necessary adjustments to the texture by either adding more water to attain flood consistency, or adding a little more powdered sugar to regain the medium-stiff consistency.
Weather can also affect the final textural outcome of your royal icing. If you live in a hot and humid climate, you may need to add a little more powdered sugar to stiffen the icing, which can attract moisture from the air.
Be sure to let your icing rest, covered, for at least half an hour. This helps to let the color settle and allows any air bubbles enough time to rise to the surface.
Simply give the icing a good stir to redistribute the color and pop any air bubbles that have formed when you are ready to use it.
Step 4 – Decorate
Now for the fun part… almost!
Before diving right on in to sparkles, sprinkles, and snowflakes, remind yourself to stay clean, organized, and focused! Make sure you have everything you need before you start decorating, including decorating utensils, plates and bowls, a fan, and cleaning supplies.
Decorate to your heart’s content, being sure to keep any unused icing covered with plastic wrap to prevent it from drying out.
Step 5 – Store Any Extras
I know you want to keep the fun going, but you ran out of cookies to decorate! If you have any extra icing left over, you don’t need to throw it out. Save it for another round of decorating – it will give you an excuse to bake another batch of delicious cookies!
To properly store extras, the cleanest and most long-lasting method is to remove the icing from the pastry bag and place it back with its corresponding color, if any more is left. Transfer the icings from the bowls into individual airtight containers, and place in the refrigerator. Stored in this manner, they will last for another week.
Spoil Santa Claus This Christmas
We hope you use our ultimate guide this year for your cookie decorating. Santa Claus will surely adore the perfectly decorated cookies that he finds next to his glass of milk!
And you probably won’t mind saving a few for yourself either.

If you loved icing up your cookies but want something a little different but holiday-themed, give these Amerikaner cookie cakes, black and white European cookies, or melt-in-your-mouth snowflakes a try!
Need some ideas for other momentous times throughout the year? Use this tutorial for decorating the following:
Looking for something more simple? Our easy, no-bake chocolate butter balls are super fast to make. And you might want to look into our easy frosting-free way to decorate cupcakes. No complicated icing required.
Have you ever used royal icing to decorate your holiday cookies? Share your own advice and ask your own questions about the technique below!
And don’t forget that we have tons more Christmas recipes, dessert ideas, and a huge index of cookies recipes to try out. Get your aprons on and some flour dust on your fingers!
Don’t forget to Pin It!
Photos by Nikki Cervone, © Foodal / Ask the Experts, LLC. ALL RIGHTS RESERVED. See our TOS for more details.
About Nikki Cervone
Nikki Cervone is an ACS Certified Cheese Professional and cheesemonger living in Pittsburgh. Nikki holds an AAS in baking/pastry from Westmoreland County Community College, a BA in Communications from Duquesne University, and an MLA in Gastronomy from Boston University. When she's not nibbling on her favorite cheeses or testing a batch of cupcakes, Nikki enjoys a healthy dose of yoga, wine, hiking, singing in the shower, and chocolate. Lots of chocolate.


Thanks for this tutorial! I’ve been meaning to try royal icing for some time now. I was wondering what type of food dye do you use? I usually use the gel type from Wilton, but will that interfere with the consistency of the icing? Do you have any recommendations?
Hi, Leigh! Because they are thicker than typical liquid food colorings, I do like to use the concentrated gels, and Wilton is a great brand that makes a phenomenal gel product. You can use liquid food coloring, but you may need to slightly re-adjust the final texture.
I advise you add the food coloring first before adjusting the consistency of the icing with water. Get the desired color you want first. If you do find that it is still too thick, you can then add water. If it is loose, add more of the plain medium-stiff icing teaspoon by teaspoon to re-thicken to your desired consistency.
How many egg whites is 3oz?
Hey, Jill – thanks for checking out our guide!
Pasteurized egg whites are typically sold as liquid egg products in a carton. For the most accurate measurement, I recommend weighing out 3 ounces of the liquid on a scale.
If you are using pasteurized eggs still in the shell, the approximate amount is about 1 ounce per egg white – so 3 egg whites for 3 ounces.
Hello! Can I substitute egg whites for meringue powder? And how much? Thank you!
I’m also wondering if I can use meringue powder instead of egg whites (and how much). Is it safe to use raw egg, if pregant?
Yes, you can, Lorena! Just follow the instructions I gave to Mariana.
Raw egg, as long as it is pasteurized, is acceptable to eat while pregnant. Pasteurization sterilizes the raw egg, eliminating the majority of harmful microorganisms present. Typically, most cartoned egg whites (what I use in this recipe) are pasteurized. Just be sure to check the label! There will be a message on the label that the eggs have been pasteurized.
Yup, you can absolutely substitute meringue powder, but you will also need to add warm water to create the icing:
Use 2 tablespoons meringue powder instead of the egg whites. One teaspoon at a time, add warm water to get your desired consistency.
What an awesome post! I’ve been making sugar cookies with royal icing for years and you covered all the bases! Very helpful and informative ????
Thanks so much, Brittany. Royal icing really has transformed the way I decorate cookies – let us know if you have any other pieces of advice, from your years of experience!
Thank you for this tutorial! I have never successfully created royal icing and now I understand why! Can’t wait to try it out on my favorite Christmas gingerbread cookies!
I just decorated 50 wedding cookies with lots of details, thinking that I’ll freeze them till I need it for my friends bridal shower, in 3 weeks. I used meringue powder, not egg white..
I hate leaving things for the last min. Now im reading, that they won’t freeze well. It took me a week of work. How can I keep them fresh? Now im panicking.
Don’t panic, don’t panic! Nikki to the rescue! As I wrote in the article, freezing the cookies after they’re decorated is personally not my top choice, since all that pretty icing and all those details can easily get damaged while in storage, and condensation as they thaw may affect the final look/texture of the icing. However, as long as you take all the necessary precautions to ensure that they are stored carefully and safely, you certainly CAN freeze them with minimal risk.
Here is what I would do:
Ideally, you should freeze and store these cookies in a single layer in freezer-friendly containers or on a baking sheet wrapped in two layers of plastic wrap. But since you have so many cookies, and depending on their size, you might not have enough room.
For your situation, freeze cookies in a single layer until completely solid. You might need to do this in batches. Once they are frozen, carefully layer them, alternating a single layer of cookies with two layers of parchment paper, in freezer-friendly storage containers or on a baking sheet pan covered in two layers of plastic wrap. The two layers of parchment paper will give you a “pillow” to lower the risk of damaging any decorations.
I would not store them in freezer-friendly bags, since the bags are flimsy and will not protect the cookies if they get bumped around in your freezer.
To thaw, place the containers or pans in the refrigerator to thaw overnight.
After following all of these steps, you should still have 50 of the most beautifully decorated wedding cookies! If you have any other questions or concerns, please don’t hesitate to send another message. And let us know how everything turns out for the wedding!
Hey, I’m new to baking and I just wanted to make sure it’s safe to leave the decorated cookies in an airtight container out of the fridge and on the counter and if so for how long are they good for?
Hi, Lilly!
Yes, it’s completely fine to leave the cookies at room temperature – we actually have storage instructions close to the end of the article! As a reminder: once the cookies have completely dried, they can be stored either in an airtight container with waxed paper in between each layer, or in an airtight bag in a single layer.
You can store them at room temperature for up to one week!
Hi Guys, do u maybe know where the actual recipe is for the royal icing, like the amounts, i cant see it anywhere.
Thanks in advance
Oh wow im so blind! i found the recipe right at the top!
Thanks anyway