We occasionally link to goods offered by vendors to help the reader find relevant products. Some of these may be affiliate based, meaning we earn small commissions (at no additional cost to you) if items are purchased. Here is more about what we do.
Can’t keep flowers alive for more than a few hours? Same. If you want to enjoy something pretty that won’t immediately wilt, these cookies will beat any botanical!
Every single time I’m gifted a bouquet of flowers, I’m always shocked by how quickly they start to droop into a wilted clump of faded sadness.
And it seems like as soon as I plant some beautiful flowers in my backyard, all kinds of woodland creatures are sniffing out their next snack.
But then again, I really don’t pay close attention to how I should be taking care of them.
Soooooo… I guess it is my fault. I should expect that this would happen to me. Gardening has never been a strength of mine.
I even avoided floral arrangements at my own wedding, and chose to use hardy eucalyptus leaves instead. Not one little flower petal in sight.
But what I severely lack in a green thumb, I make up for in a sweet tooth!
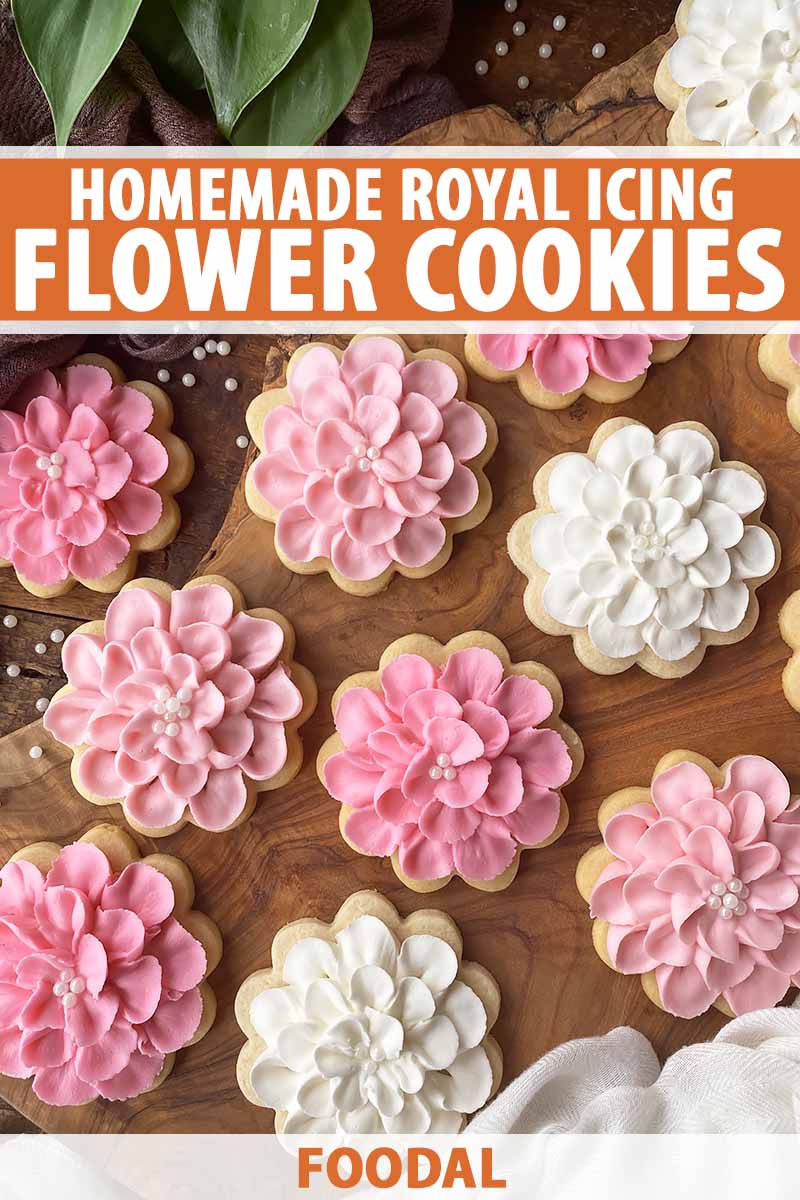
Luckily, these royal icing flower cookies mimic gorgeous fresh flora, but they will keep their beautiful appearance for far longer than any plucked petunia!
There is nothing too complicated about my technique for decorating them with royal icing – you only need one type of piping tip to create the petals, and just a few precisely placed sprinkles.
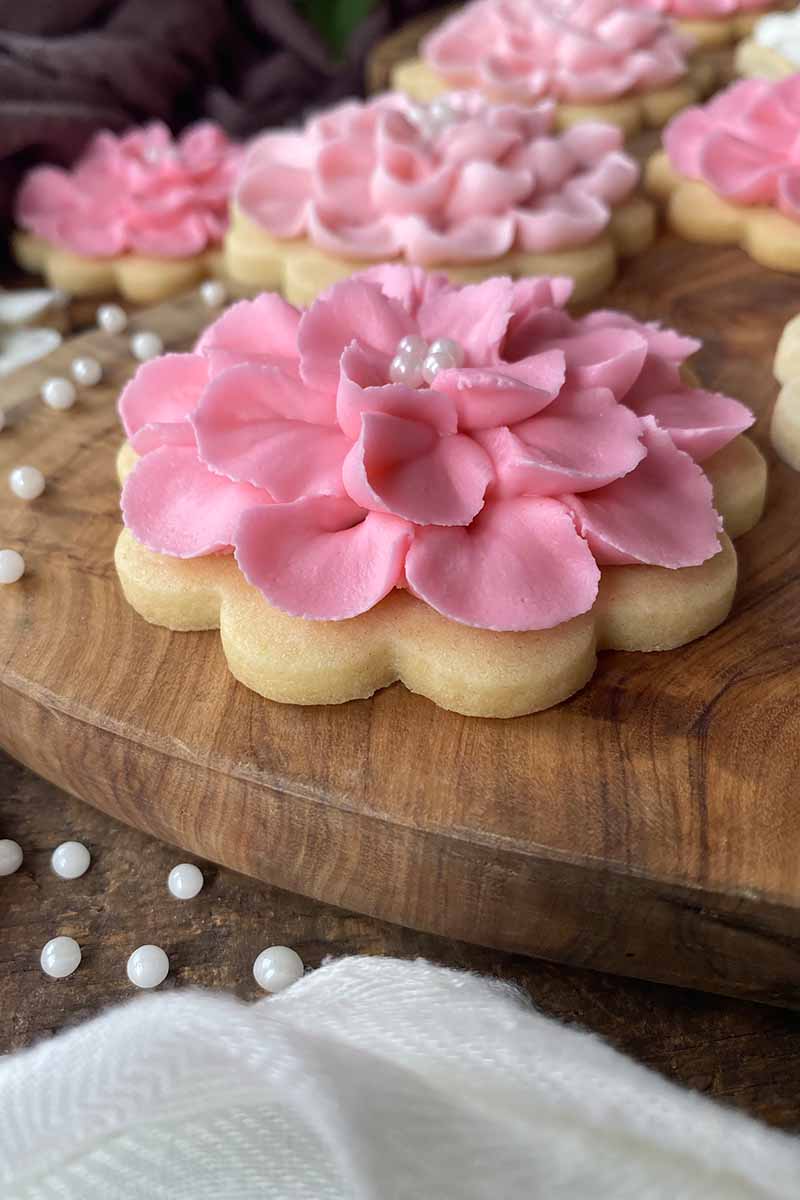
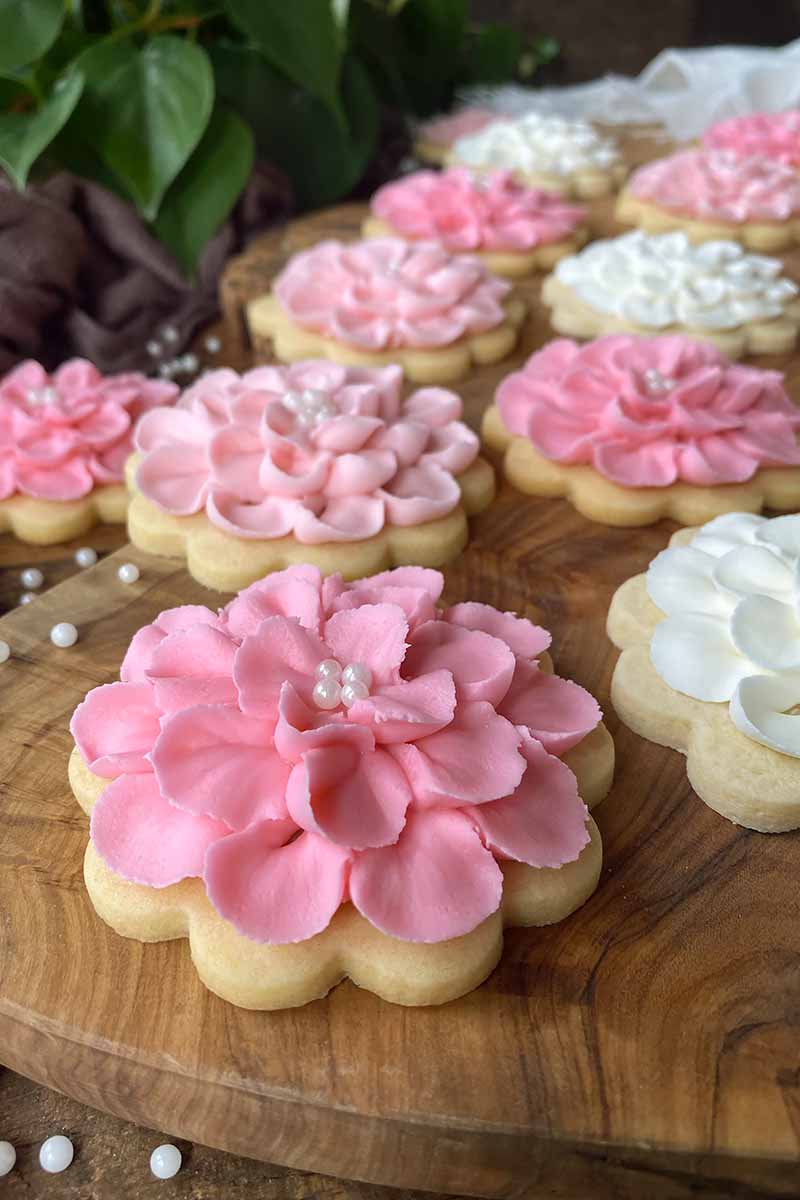
Instead of decorating them with just one flat coating of icing, you can layer the petals in three concentric tiers to achieve a look of realism with each flower.
And don’t be nervous about making mistakes! Since you’re working on a solid surface, it’s so easy to fix any slip-ups.
Just scrape off your boo-boo with a small offset spatula or butter knife when the icing is still wet. Any residual icing that remains on the surface will be covered up when you start over.
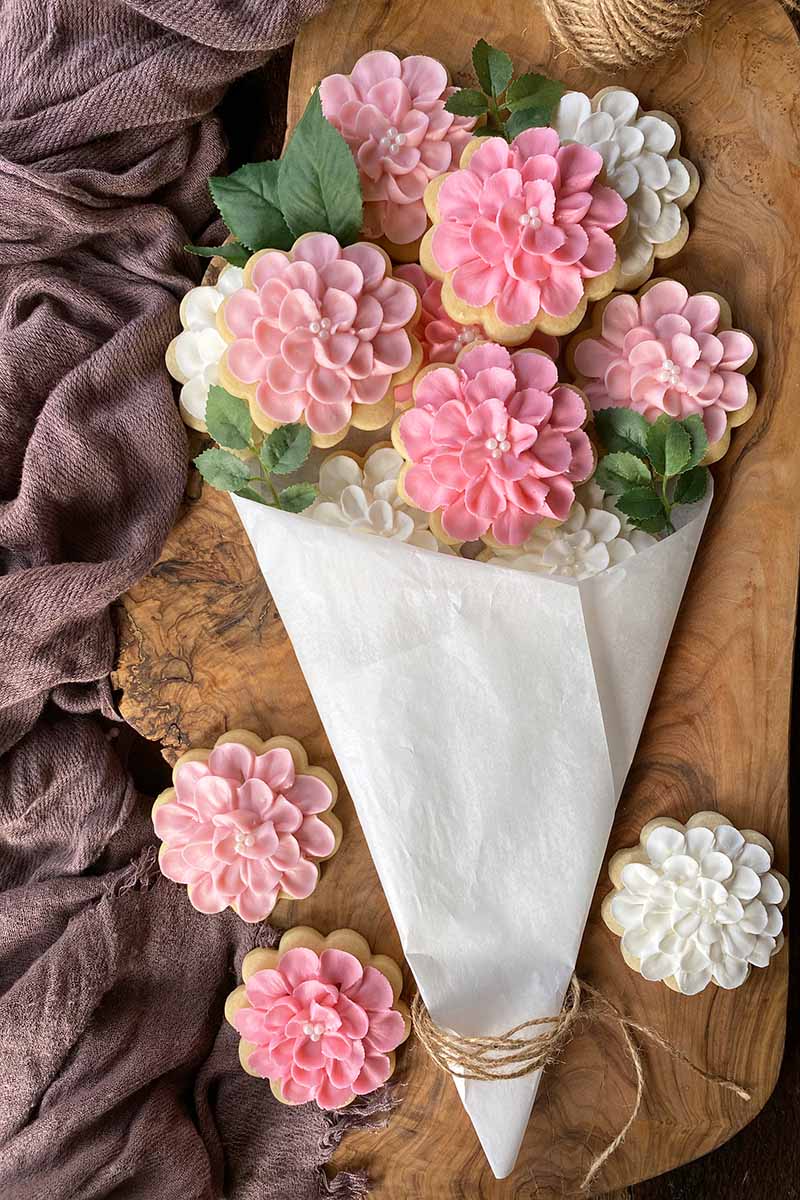
Because the royal icing sets dry and hard, the floral design on the cookies will look as beautiful as it did on the day you made them for weeks – though they should be eaten within about a week for maximum freshness.
Try doing that with a bouquet of real flowers!
While it is possible to munch on a few crunchy sugared flower petals, who could argue against the sweet satisfaction of enjoying an entire homemade cookie instead?
Print
Flower Power Sugar Cookies
- Total Time: 4 hours, 40 minutes
- Yield: About 24 3-inch cookies 1x
Description
Our pretty flower cookies look fresh as a daisy. Learn how to make these beautiful botanicals with royal icing and sprinkles.
Ingredients
- 1 batch sugar cookie dough for 20–24 cookies
- 2 batches royal icing, about 6 cups
- Powdered sugar, for adjusting the icing as needed
- Assorted food coloring
- 1/4 cup assorted nonpareil sprinkles
Instructions
For the Cookies:
- Prepare one batch of sugar cookie dough. Form into a large flat disc and tightly cover with plastic wrap. Refrigerate for about one hour.
- Remove the dough from the refrigerator and place on a lightly floured large flat work surface. With a rolling pin, spread and flatten out the dough until it is between 1/8 and 1/4 inch thick.
- Using a floral cookie cutter with about a 3-inch diameter, cut out shapes from the dough to make about 24 cookies. Dip the cookie cutters in flour if the dough sticks. Re-roll the remaining dough once and cut again. Discard any excess.
- Transfer the cookie dough cut-outs to two baking sheets lined with parchment paper or silicone mats, placing 12 cookies on each baking sheet. Place the pans in the refrigerator for about 30 minutes to chill.
- Preheat the oven to 325°F while the dough chills.
- Remove the trays from the refrigerator and immediately bake for 8-10 minutes, depending on the thickness of the dough. They will still be pale white and soft to the touch.
- Remove from the oven. Let stand on the baking sheets for about 5 minutes, then transfer the cookies to wire racks to cool completely before decorating.
For the Royal Icing and Decorating:
- Prepare a double batch (about 6 cups) of royal icing with a medium-stiff consistency. Color with your desired food coloring. The icing should be able to hold its shape, like a traditional buttercream. Add more powdered sugar in 1/4-cup increments if the icing is too runny.
- Prepare a pastry bag fitted with a #104 petal piping tip. Fill the pastry bag with the prepared royal icing, covering any remaining icing in the bowl with plastic wrap.
- Position the pastry bag so the thinnest end of the piping tip is facing the top when you hold the pastry bag.
- Starting with the outside border of one cookie, pipe small individual petals in a complete circle following the curves of the cut-out.
- Moving closer to the center of the cookie, pipe a layer of smaller individual petals in a complete circle, covering the bottom half of the first layer.
- Moving to the center of the cookie, pipe a layer of even smaller individual petals in a complete circle, covering the bottom half of the second layer and the entire center of the cookie. The cookie will now have three layers of petals.
- Immediately and carefully place nonpareil sprinkles in the center of the cookie while the royal icing is still wet.
- Set the cookie aside to dry. Repeat the decorating process with the remaining cookies.
- Let the cookies sit at room temperature until the icing is completely set and hardened, about 2-3 hours.
- Store the cookies in a single layer in an airtight container at room temperature for one week.
- Prep Time: 1 hour, 30 minutes
- Cook Time: 10 minutes
- Category: Cookies
- Method: Baking
- Cuisine: Baked Goods
Keywords: cookies, flower, royal icing, dessert
Cooking by the Numbers…
Step 1 – Make the Cookies
Follow our recipe to make a classic sugar cookie cut-out dough. Be sure to not overmix the dough, to keep them soft and tender with minimal gluten development.
Make sure you use a cut-out dough recipe, and not a drop sugar cookie dough, as you want a perfectly flat surface for decorating.
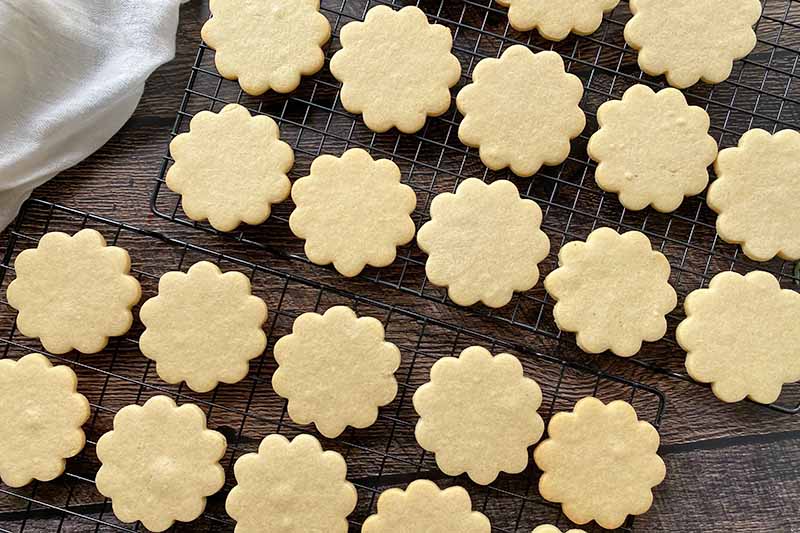
Once you have mixed the dough, form it into a flat, compact disc by hand and wrap it tightly in plastic wrap to prevent the dough from drying out as it chills. Place it in the fridge for at least one hour to fully chill it.
This process helps to re-harden the unsalted butter, which makes it much easier to roll and cut the dough in the next step.
Place the chilled dough on a lightly floured work surface. With a rolling pin, roll out the dough into an even layer between 1/8 and 1/4 inch thick. You may need to lightly flour the top of the dough and the work surface to keep it from sticking.
For a thicker end result, roll out the dough closer to 1/4 inch thick. If you prefer something a little thinner, roll it out closer to 1/8 inch thick.
Using cookie cutters in the shapes of flowers, cut out shapes from the dough, dipping the cutter in flour to prevent sticking. Re-roll the dough once and cut again. Discard any excess dough.
You can use any variety of floral shape. For a yield of 24 cookies, use a cutter that is about 3 inches in diameter.
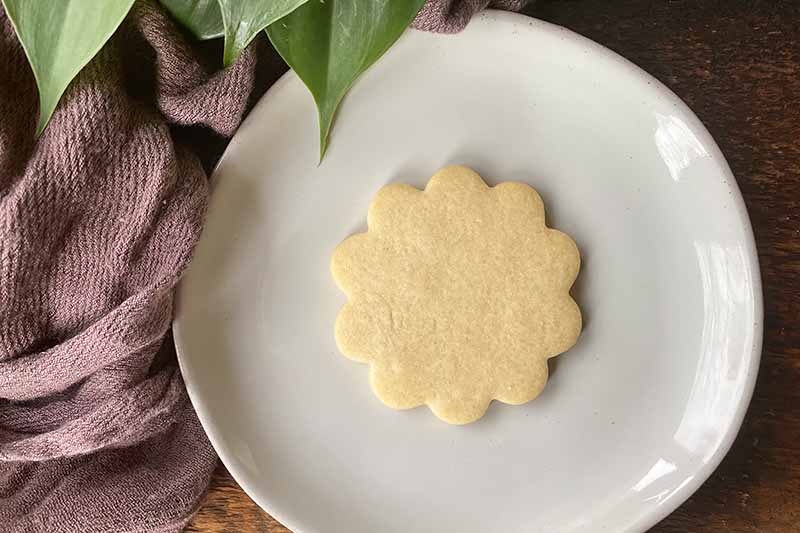
For the ones in these photos, I used a 3-inch round flower cutter with 10 petals like this option from Wilton, available on Amazon.
Place the cut-outs on two baking sheets lined with parchment paper or silicone mats, leaving about 1/2 inch of space between each to allow ample room for even baking. You should be able to fit 12 cookies on each baking sheet.
Place in the refrigerator to let the shaped dough re-chill and set.
While the cough is chilling, preheat the oven to 325°F.
Bake for 8 to 10 minutes, depending on the thickness of the dough. They will still look very white and puffy on top.
Remove from the oven and let cool on the pans for just one minute before removing and letting them cool completely on wire racks.
This short baking time will yield soft sugar cookies. If you prefer a crispier treat, bake them for an additional 5 to 10 minutes, until they start to brown around the edges.
Step 2 – Make the Royal Icing
Follow our recipe for a double batch of homemade royal icing to get all the details you need on this process.
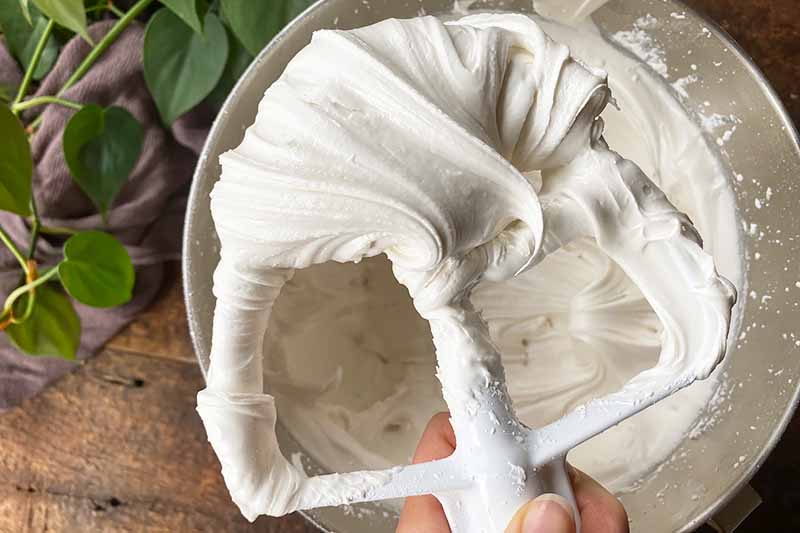
This may seem like a lot of royal icing, but you will be adding the icing in layers on each cookie. And it is always a good idea to make a little extra for practice, and to allow for any mistakes.
Because we will be piping petal details, you want to work with a medium-stiff consistency – the icing should be very thick and it should be able to hold its shape. The texture should resemble that of a buttercream frosting.
Be sure you really take the time to whip the icing in your mixer to stiffen it as much as possible to achieve this texture – this will take about 7 to 10 minutes.
Add your desired food coloring.
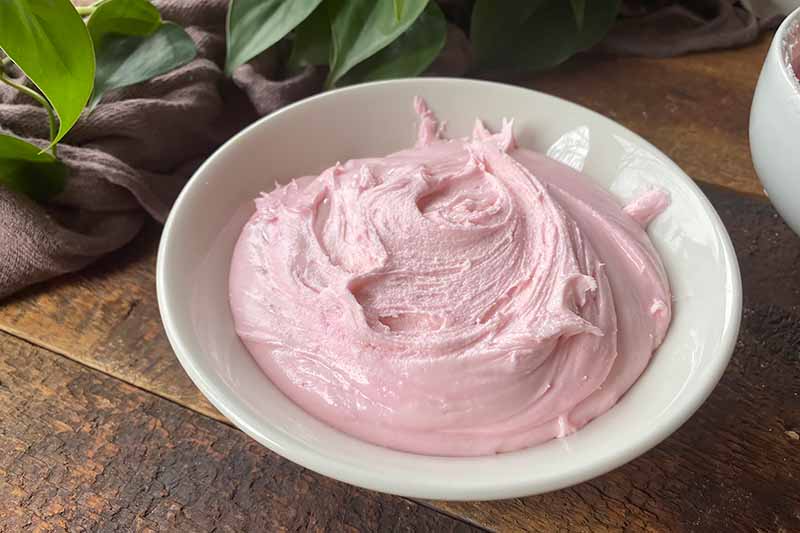
Keep in mind that the more food coloring you add to the base, the more liquid you are adding. You may need to add more powdered sugar to the mixture to re-stiffen the icing.
If the icing is still on the runnier side, add 1/4 cup powdered sugar at a time and remix until it thickens.
Step 3 – Decorate
Prepare a pastry bag fitted with a #104 petal piping tip, available on Amazon. Fill the pastry bag with the prepared royal icing, covering any remaining icing in the bowl with plastic wrap. This is to prevent the icing from drying out, so make sure you tightly cover the bowl.
For more information on decorating tools, check out our lineup of essentials to buy for your home kitchen.
Position the piping bag so the thinnest end of the piping tip is facing the top when you are holding the bag. The thicker end of the tip should be facing the bottom.
This position will give you the exact shape you need when you are piping the individual petals, so double check the position of the piping tip regularly as you decorate!
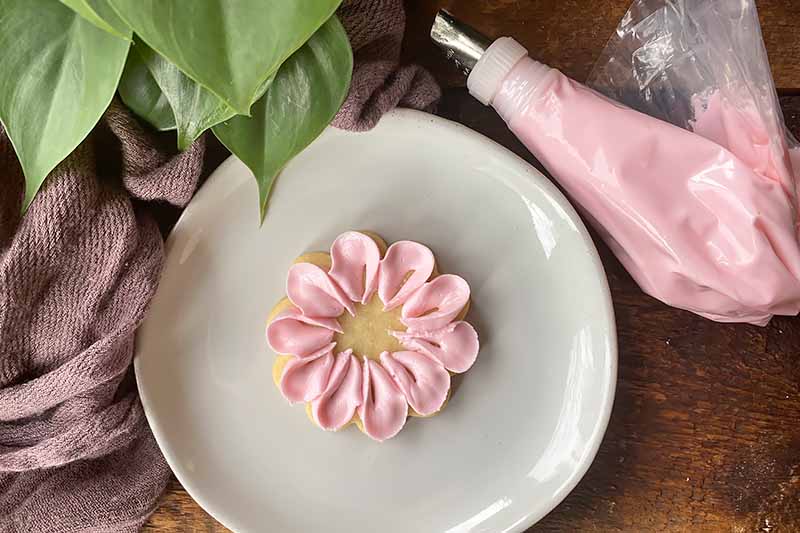
Work with one cookie at a time. Starting with the outside border, pipe small individual petals in a complete circle following the curves of the cut-out.
Moving closer to the center of the cookie, pipe a layer of smaller individual petals in a complete circle, overlapping with the bottom half of the first layer.
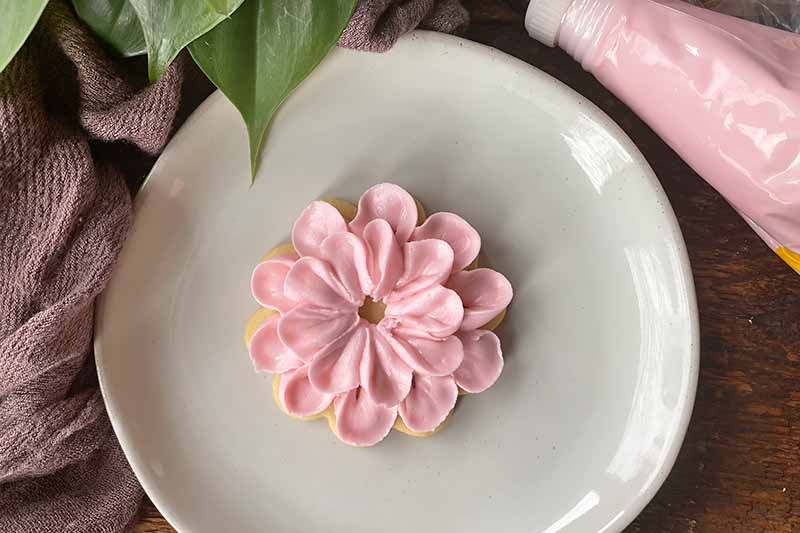
You want to still be able to see the tops of the petals in the first layer to create that multidimensional floral look, so make sure you pipe the second row about halfway down from the bottom layer.
Moving to the center, pipe a layer of even smaller individual petals in a complete circle, covering the bottom half of the second layer and the center of the cookie.
You will now have three concentric layers of piped petals.
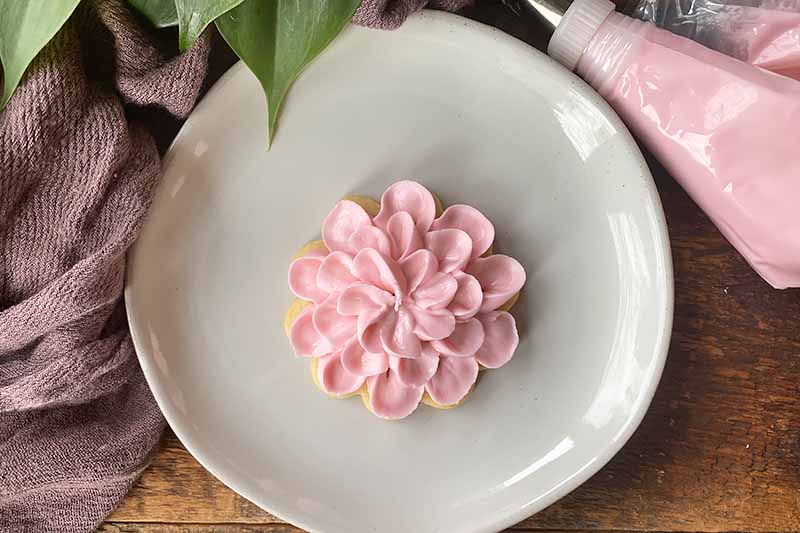
Carefully place nonpareil sprinkles in the center while the royal icing is still wet. This is when I whip out my kitchen tweezers!
You can use any number of sprinkles, but I like to use at least 3 for the center.
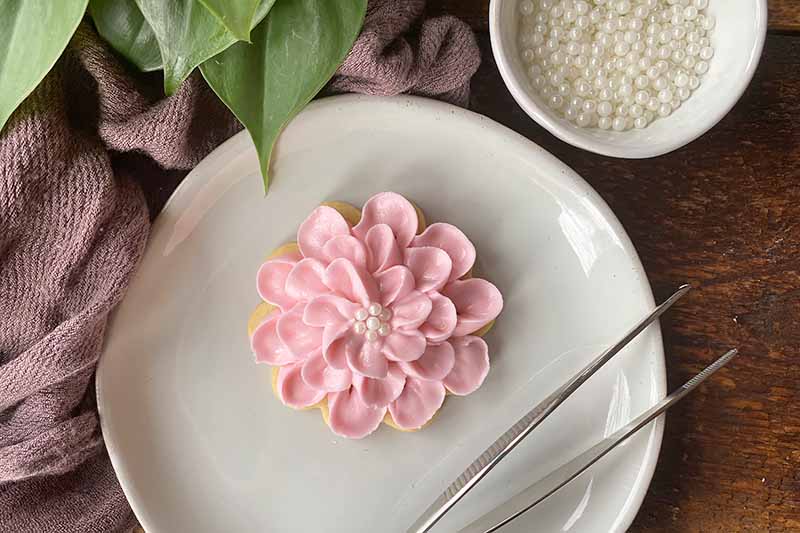
Repeat with the remaining cookies.
Step 4 – Set
Let the icing set at room temperature until it is completely set and hardened, for about 2 to 3 hours. You should be able to gently touch the petals with your fingertip, and feel that they are totally dry to the touch.
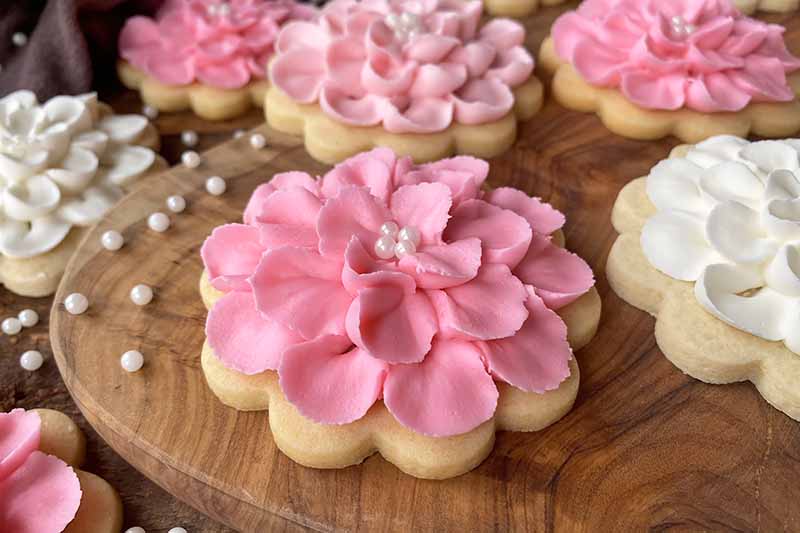
Serve when they are fully set, or store at room temperature in an airtight container for up to one week for maximum freshness.
Focus on a Color Scheme
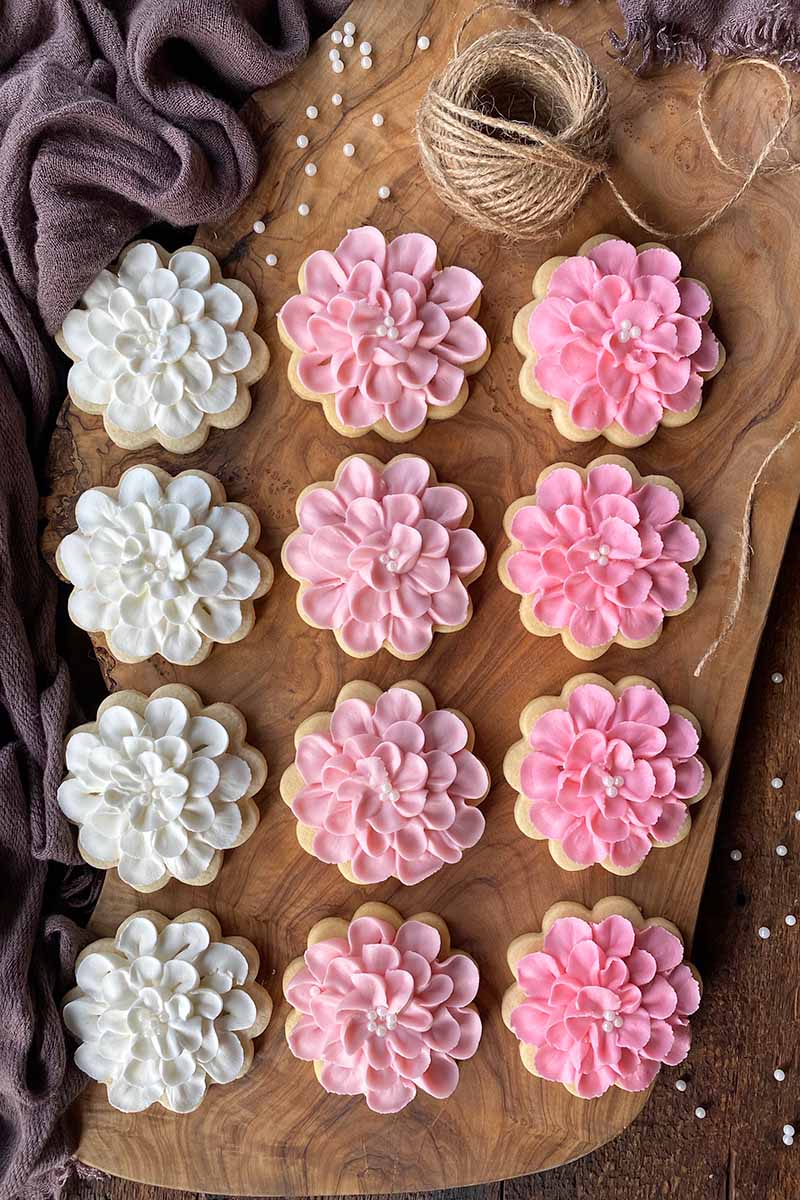
Can you imagine the endless possibilities of fun color schemes that you can create for so many different events?!
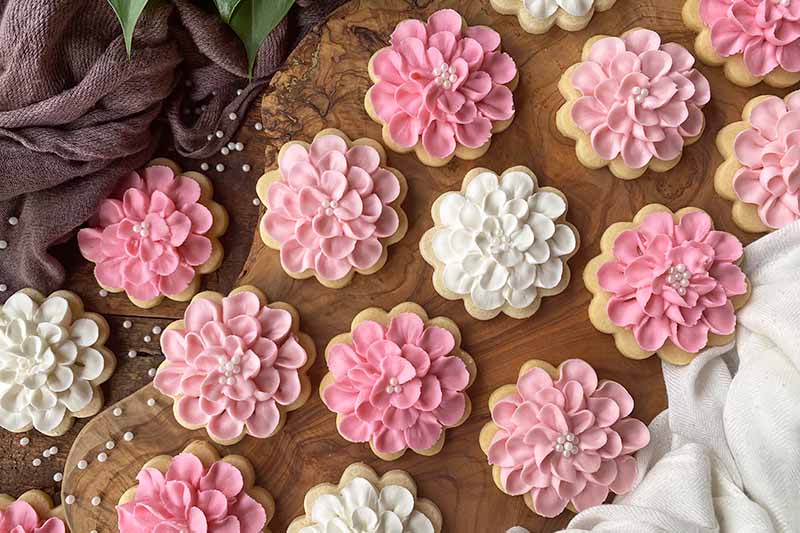
As long as you strategize and decide on the colors you want to use before starting to decorate, you will have a well-designed, beautiful collection of cookies centered around your chosen theme.
These would be lovely for a baby shower, graduation party, or wedding – and the fun doesn’t stop there! They are easily adaptable to fit the color scheme of any party.
I’m already thinking about decorating them for holiday parties on Christmas (red and green!), Halloween (orange and black!), and St. Paddy’s Day (green and white!).
What about you? What do you think about this pretty technique with royal icing? Do you have any ideas for making these flower cookies your own? Let me know in the comment section below.
For more royal icing designs, take a look at some of these beauties among our delicious selection of homemade cookies:
Photos by Nikki Cervone, © Ask the Experts, LLC. ALL RIGHTS RESERVED. See our TOS for more details. Originally published by Shanna Mallon on July 22, 2009. Last updated on March 8, 2022.
Nutritional information derived from a database of known generic and branded foods and ingredients and was not compiled by a registered dietitian or submitted for lab testing. It should be viewed as an approximation.
About Nikki Cervone
Nikki Cervone is an ACS Certified Cheese Professional and cheesemonger living in Pittsburgh. Nikki holds an AAS in baking/pastry from Westmoreland County Community College, a BA in Communications from Duquesne University, and an MLA in Gastronomy from Boston University. When she's not nibbling on her favorite cheeses or testing a batch of cupcakes, Nikki enjoys a healthy dose of yoga, wine, hiking, singing in the shower, and chocolate. Lots of chocolate.


your cookies look divine, crisp without hurting the teeth but sweet with the extra icing and colored sugar, coming all together to make one hell of a sweet snack. 🙂
These cookies are so pretty – must find more excuses for digging out the cookie cutters.
these look easy enough for even ME to make!
WIsh I was in the area and could attend! Because a cookie table? Is something I can definitely get behind. And stay behind. Until all the cookies are gone.
Those are too cute!
Lovely cookies.
These cookies look fantastic! I love how you decorated them; I imagine cut-out cookies to be reserved for holidays, but these are so nice and summery. Thanks for sharing!