
It’s time to reveal a surprising fact about that store-bought cake you’re eating:
Many professional bakeries and restaurants use premade cake mixes. Gasp!
Mom-and-pop grocery shops? Boxed mix.
High-end luxury resort hotels? Boxed mix.
Gourmet specialty food stores? Boxed mix!
I’ve worked in many bakeries. While there are some that work completely from scratch, far more choose to bake with the premade stuff.
But there’s no need to be upset!
There are valid reasons why busy, high-volume businesses prefer this option over homemade: it saves time and labor, it provides consistency with each batch, and the final product really does taste delicious!
Come on, don’t blame them. Who doesn’t love those boxes of yellow cake mix? I’ve used them tons of times – all those cake pops I made? I usually opt for the boxed stuff to make the base.
You just dump it in a bowl, add eggs and oil, and the next thing you know, you’re pulling out a warm, perfect cake from your oven. It’s almost too easy.
The downside to those lovely little boxes is that you get a whole lot of artificial ingredients and preservatives. Eww.
So, what are we to do?
We still need to make 2 dozen last-minute cupcakes for school or potlucks, or make a pretty birthday cake for a party – all those little occasions that life throws at us.
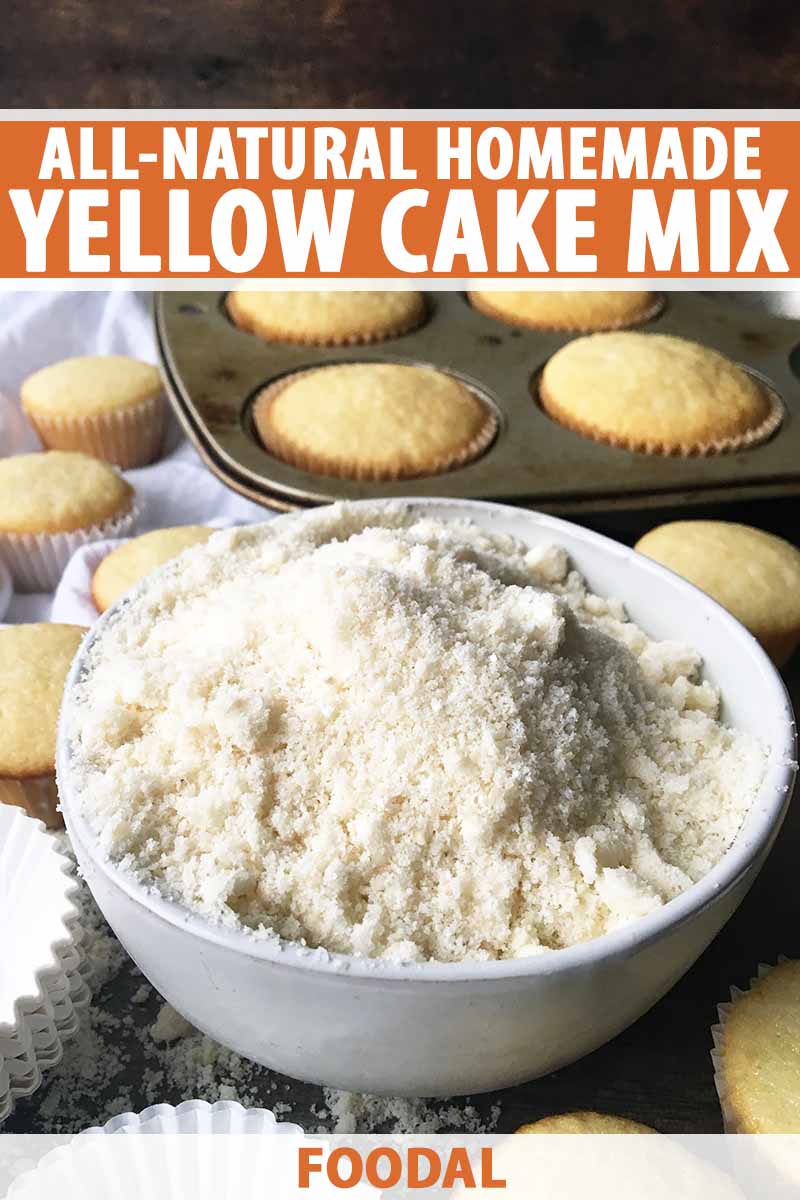
Here’s the answer… an easy, DIY, all-natural yellow cake mix!
There are at least a zillion flavors in the world, but nothing beats the flavor of an old fashioned yellow cake. It’s so sweet, and has that subtle, sentimental essence of childhood memories and fun birthday parties every time you get that whiff of sugar and aromatic vanilla.
But I’m telling you, you’ve never tasted anything like the flavor of a completely homemade version.
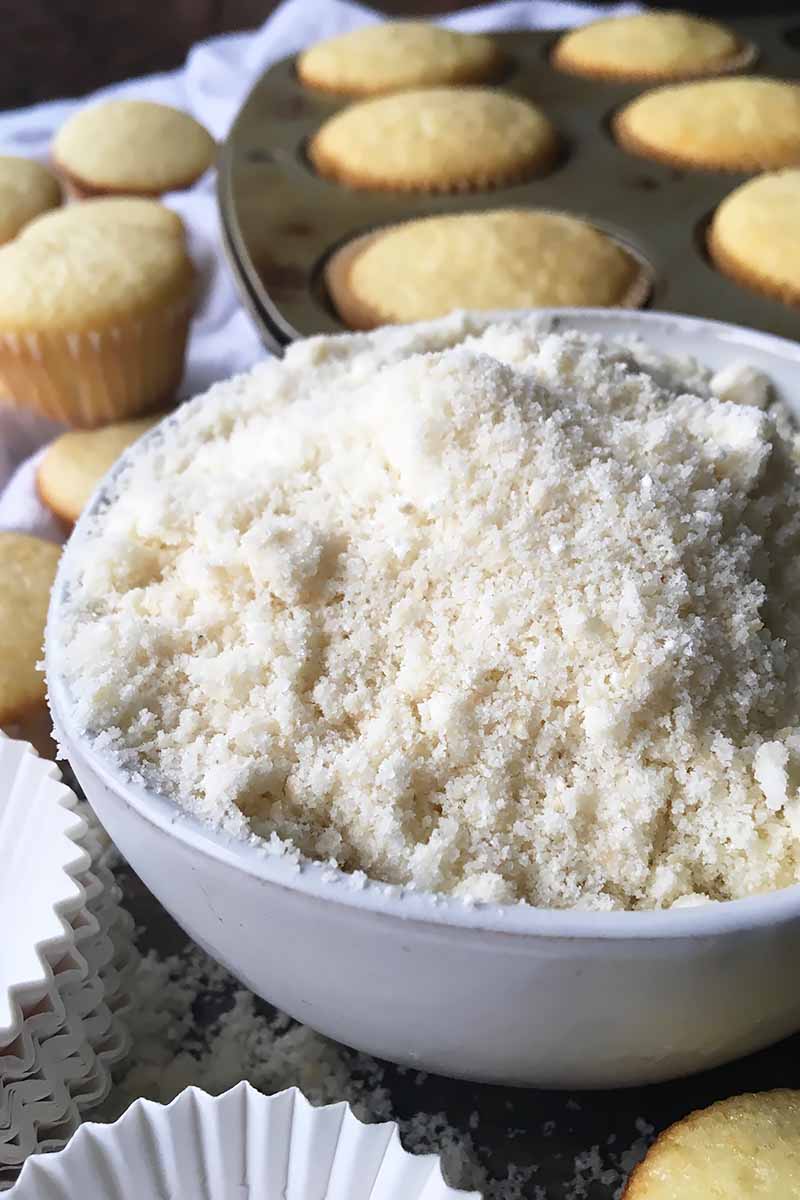
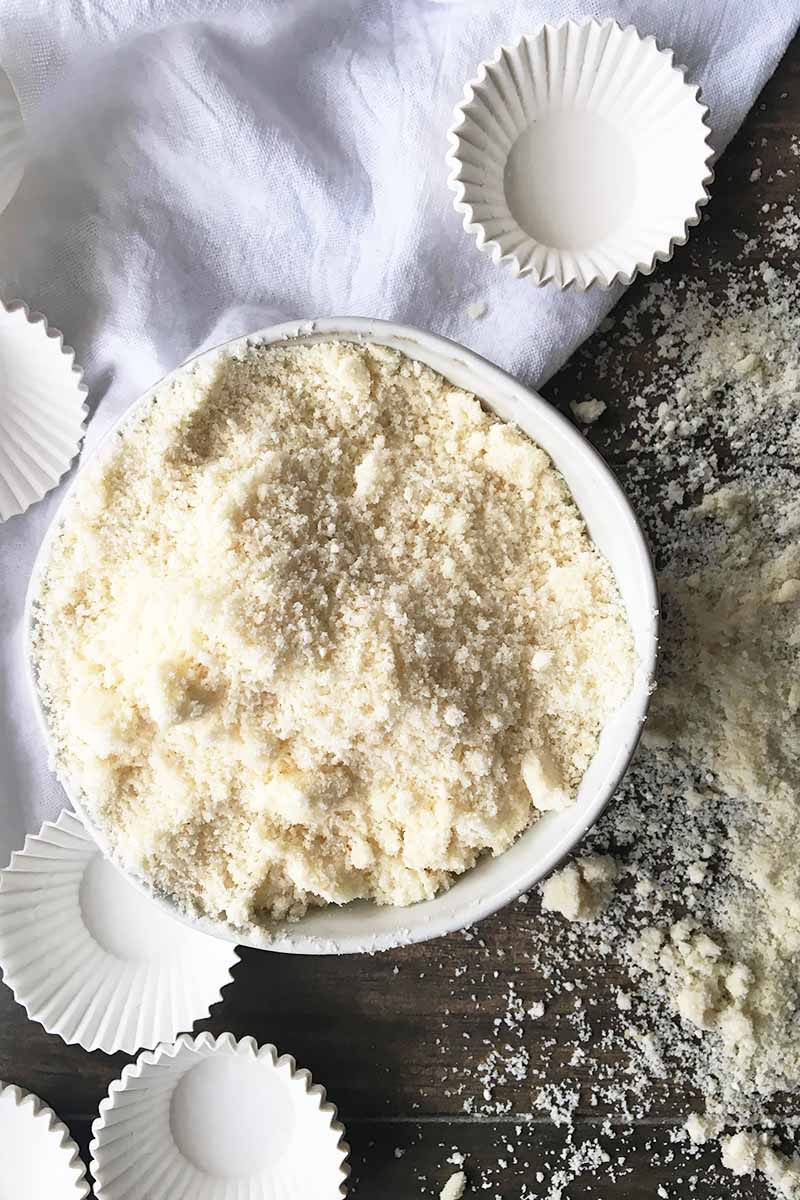
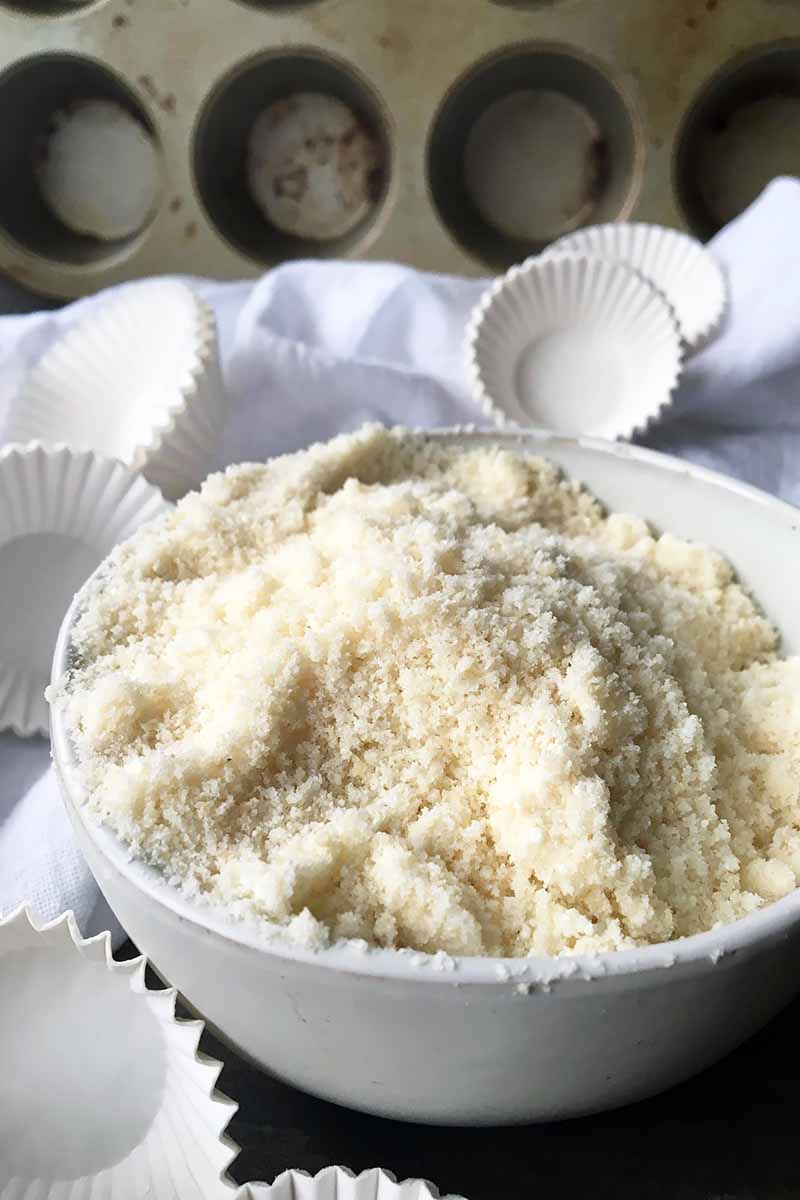
It’s a simple combo of flour, sugar, dry milk powder, butter, vanilla, and a little salt.
Incredibly rich and moist when you bake with it, you’ll suddenly realize how it became such a popular flavor in the first place!
Print
All-Natural Homemade Yellow Cake Mix
- Total Time: 5 minutes
- Yield: 8 cups (two 9-inch cake layers, one 9-by-13-inch cake, or 24 cupcakes) 1x
Description
If you do a lot of baking, save yourself some time and skip a few steps with our recipe for an all-natural homemade yellow cake mix.
Ingredients
- 2 cups granulated sugar
- 1 1/2 cups all-purpose flour
- 1 1/2 cups cake flour
- 1/2 cup nonfat dry milk powder
- 1 tablespoon baking powder
- 1 teaspoon salt
- 1 cup (2 sticks) unsalted butter, chilled and cut into cubes
- 1 tablespoon vanilla extract
Instructions
- Place sugar, all purpose flour, cake flour, milk powder, baking powder, and salt in the bowl of a large food processor or a bowl of a stand mixer fitted with the paddle attachment. Pulse/mix at low speed until well combined.
- Add butter and vanilla, and pulse/mix again at low speed until the mixture resembles fine crumbs.
- Use right away, or place in an airtight container or bag and store in the fridge for up to 1 week, or the freezer for up to 3 months. Allow to thaw in the refrigerator overnight before using.
- Prep Time: 5 minutes
- Category: Cakes
- Method: Baking
- Cuisine: Dessert
Cooking by the Numbers…
Step 1 – Prep Ingredients
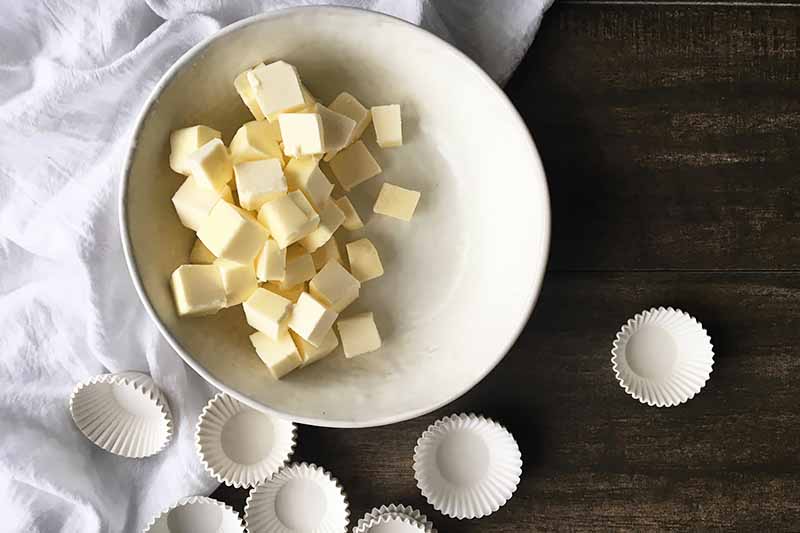
Measure out the dry and wet ingredients. Cut the two sticks of unsalted butter into small cubes with a sharp knife and sturdy cutting board.
Step 2 – Combine Dry Ingredients
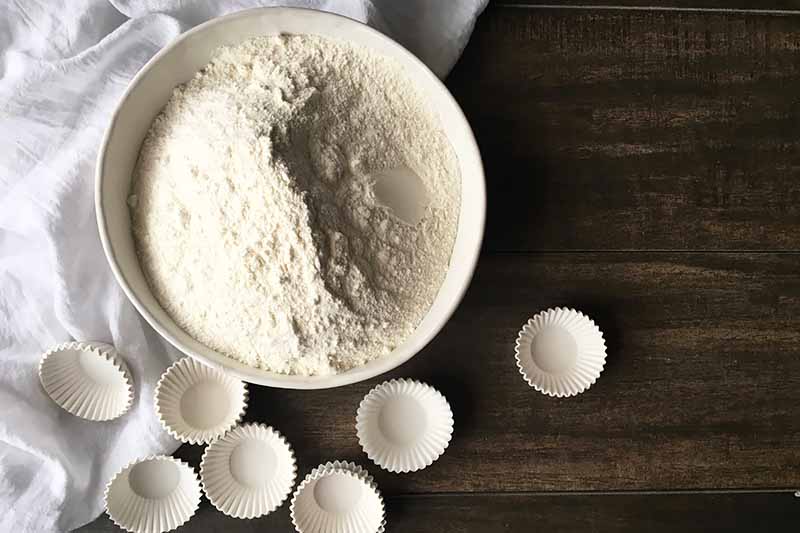
Place granulated sugar, all-purpose flour, cake flour, milk powder, baking powder, and salt in the bowl of a large food processor or the bowl of a stand mixer fitted with the paddle attachment.
Either machine will work perfectly. I prepared this recipe in a stand mixer with no issues.
Step 3 – Add Butter and Vanilla
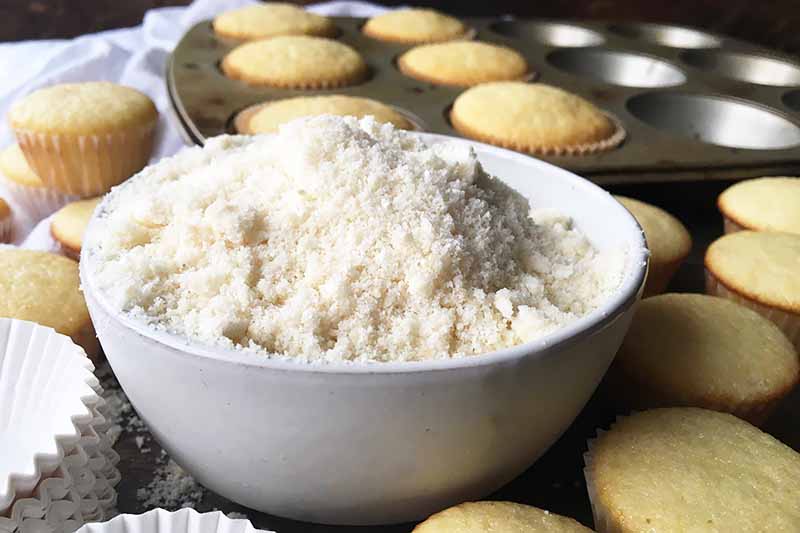
Add the butter and vanilla extract and combine again until the mixture resembles fine crumbs, like dry sand with a few small chunks. Pulse or blend at medium speed.
The small amount of liquid will not turn it to mush – it will remain fairly dry.
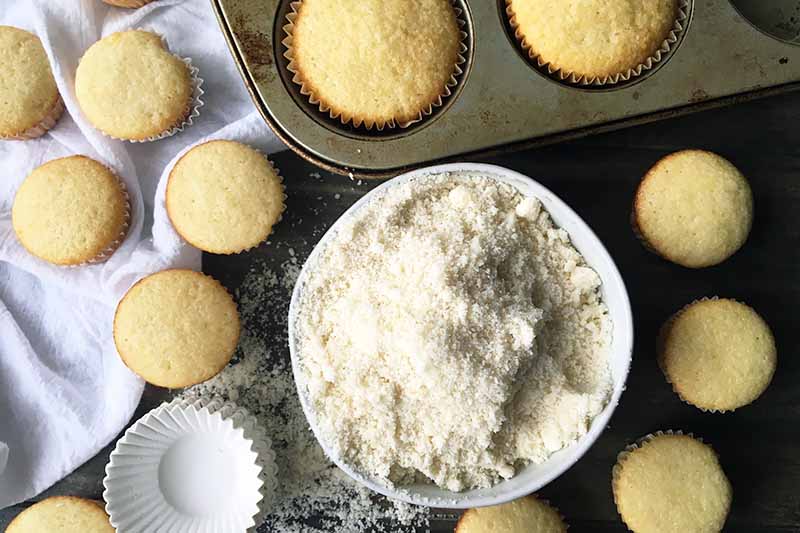
Step 4 – Use Immediately or Store
Use right away, or place in an airtight container or airtight bag and store in the fridge for up to 1 week, or in the freezer for up to 3 months.
Allow to thaw in the refrigerator overnight before using. You might need to use your hands or a spoon to break up any large chunks that have stuck together during storage.
Okay, So I Made the Recipe – Now What?
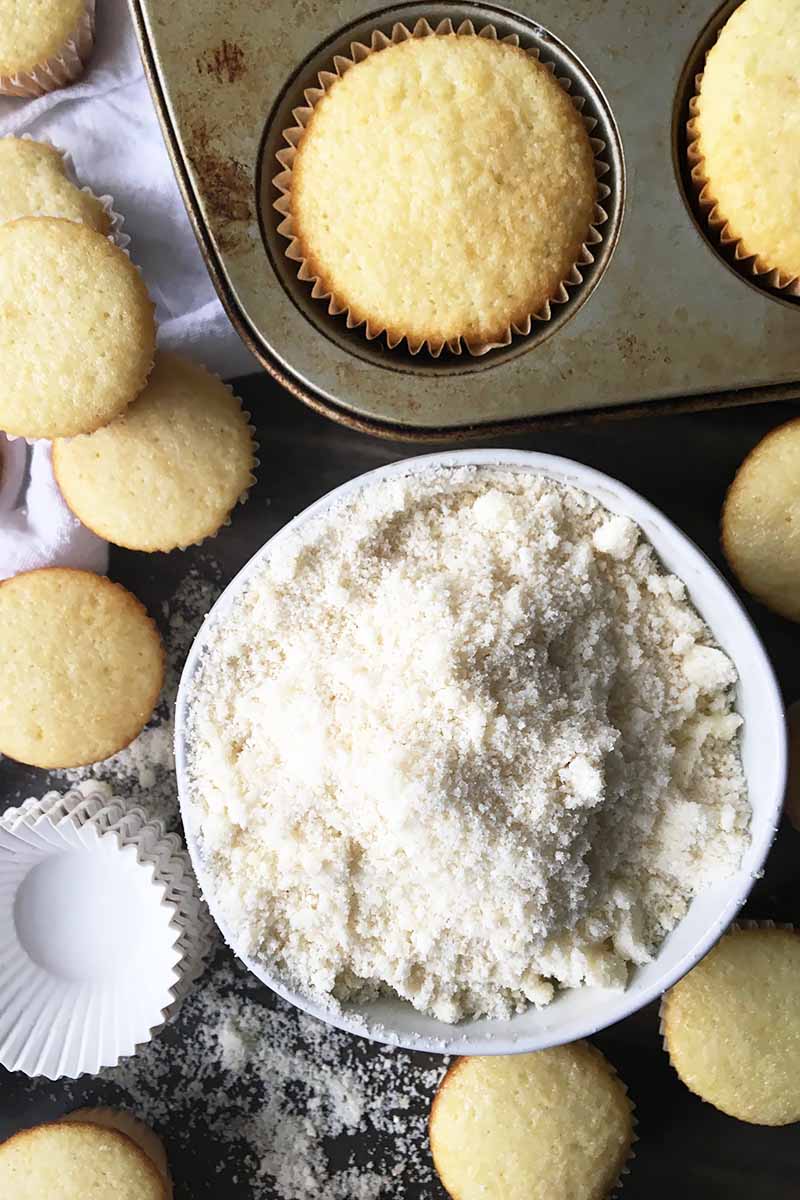
Once you whip up this delish mix, all you have to do is add some water and eggs to make an all-purpose batter for cakes and cupcakes.
We’ll definitely provide a few recipes for you to use (coming soon!), but here are the basics:
Whisk together 1 recipe Homemade Yellow Cake Mix with 1 1/4 cups water and 2 eggs until the ingredients are completely combined and a thin batter forms. It will look a little grainy.
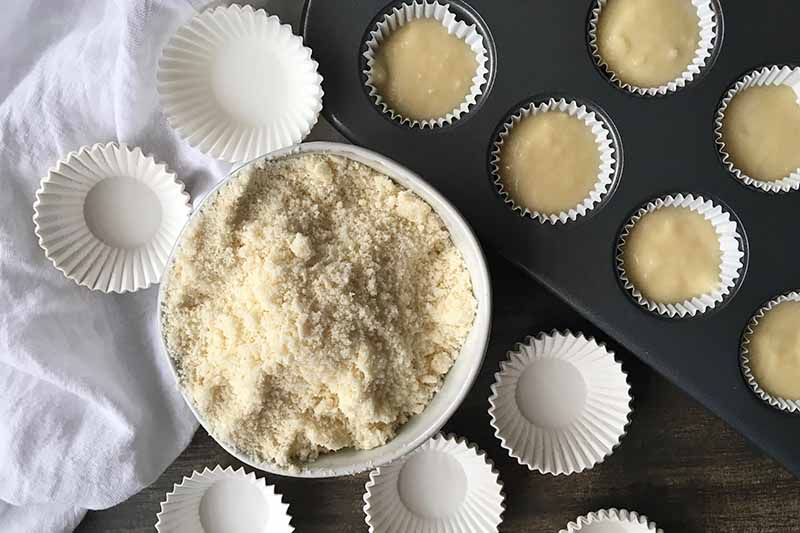
Apply as you would to any cake recipe – it will yield 24 cupcakes, two 9-inch rounds, or one 9-by-13-inch sheet cake. Bake at 350°F until puffy and perfect!
What do you think you’ll make first? I’d love to hear your own DIY ideas for baking basics! Let’s chat in the comment section below.
Looking for more sweet DIY recipes? We love going completely from scratch. Try these next:
Photos by Nikki Cervone, © Ask the Experts, LLC. ALL RIGHTS RESERVED. See our TOS for more details. Originally published on September 11, 2012. Last updated: February 14, 2021 at 10:08 am.
Nutritional information derived from a database of known generic and branded foods and ingredients and was not compiled by a registered dietitian or submitted for lab testing. It should be viewed as an approximation.
About Nikki Cervone
Nikki Cervone is an ACS Certified Cheese Professional and cheesemonger living in Pittsburgh. Nikki holds an AAS in baking/pastry from Westmoreland County Community College, a BA in Communications from Duquesne University, and an MLA in Gastronomy from Boston University. When she's not nibbling on her favorite cheeses or testing a batch of cupcakes, Nikki enjoys a healthy dose of yoga, wine, hiking, singing in the shower, and chocolate. Lots of chocolate.


This was amazing but mixing cold butter by hand was hard work… Can I have the butter room temp?
This is my second time making it and still waiting on my mixer sadly lol
Thank you
Sorry for the workout, Michael! It’s important that the butter be cold when you cut it in, but cutting it into small cubes before you add it to the mix should help. A food processor is best for this, since the blade will do the work for you. If you’re working by hand, try cutting the butter in with two knives or a pastry blender like you would when making pie crust.