
We occasionally link to goods offered by vendors to help the reader find relevant products. Some of these may be affiliate based, meaning we earn small commissions (at no additional cost to you) if items are purchased. Here is more about what we do.
I’ve been wanting to make these layered buttermilk biscuits for the past couple of years – let’s not waste any more time!
This recipe is inspired by Fox in the Snow’s mile-high buttermilk biscuits, a cherished recipe the Columbus, Ohio coffee shop and bakery released back in 2020 when the business temporarily closed due to the Covid-19 pandemic.
The owner wanted to share the recipe so that housebound patrons could still enjoy made-from-scratch flaky biscuits throughout the first wave of shutdowns.
As an avid follower of this bakery, I was so excited when the recipe was first made public, and was equally as thrilled to make them in my own home. But my baking plan took a loooong detour.
One that lasted over two years.
I continued working full-time as a buyer for a grocery store all throughout the pandemic, without a big break between work, buying a house, and planning for my wedding – it’s no surprise that many of my personal projects came to a halt!
Within that time, my sourdough starter died (rest in peace, Bubba Bubble Baby), my kombucha SCOBY was long forgotten in my basement, and so many home renovation projects were postponed.
But fast forward to the present day, and I’m slowly gaining back my energetic momentum, removing all the dust and cobwebs from once-dormant plans!
A new sourdough starter is in the works, I have revived my kombucha SCOBY, and we’re starting to garden, paint, and renovate!
So, what’s the next task to check off on my to-do list?
Baking these buttermilk biscuits! Finally, woo-hoo!
The recipe presents a fun and challenging shift away from other biscuit doughs. It’s not like a cakey buttermilk drop biscuit, and has a few more steps than your typical quick cut-out recipe.
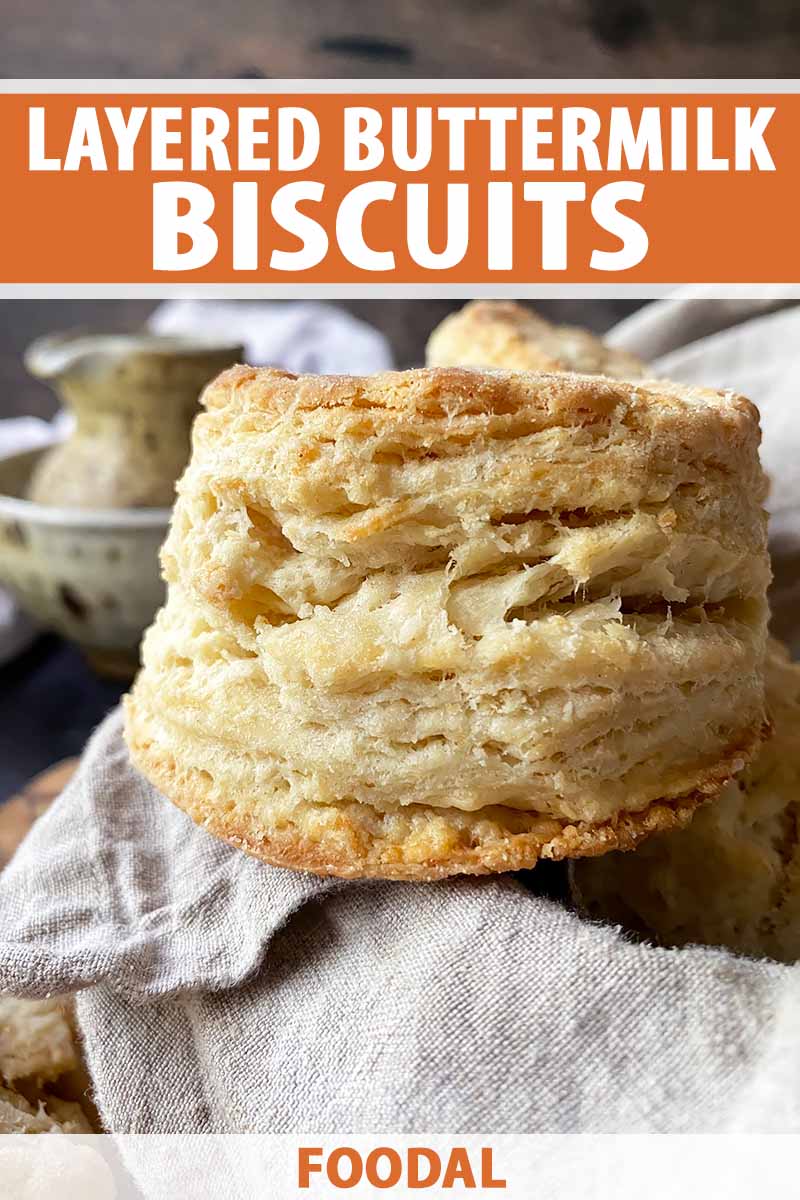
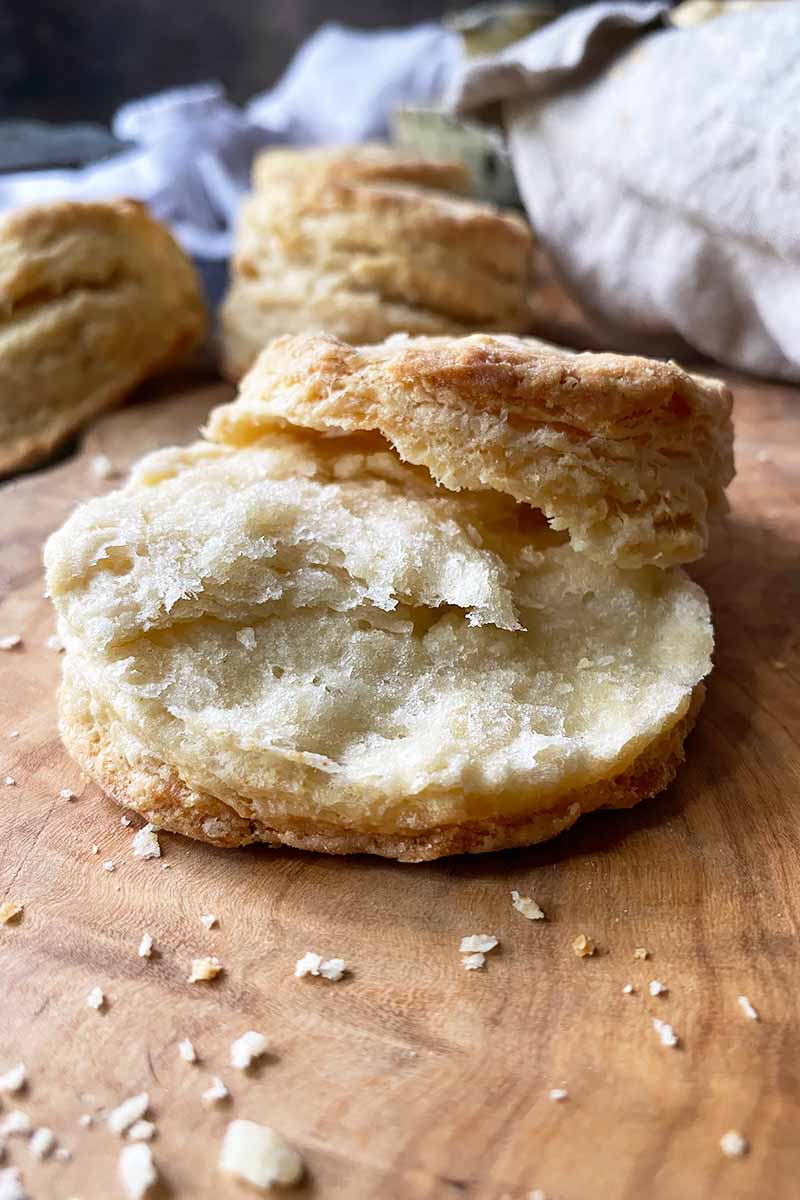
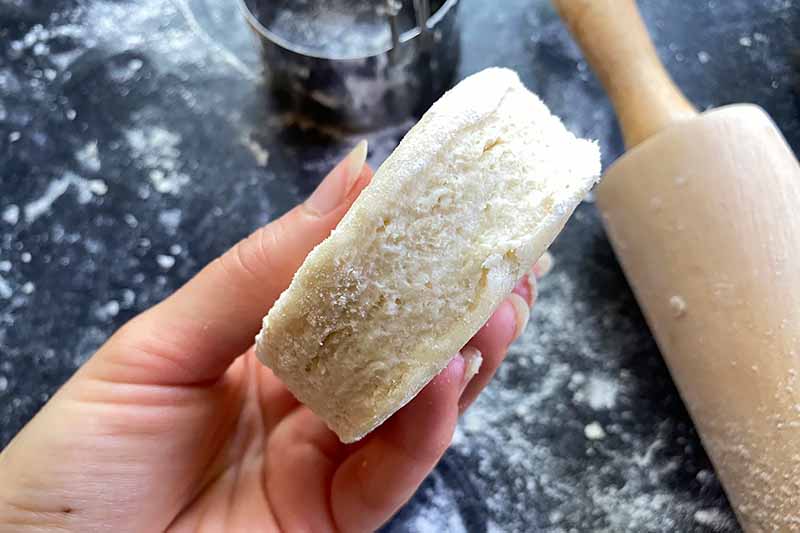
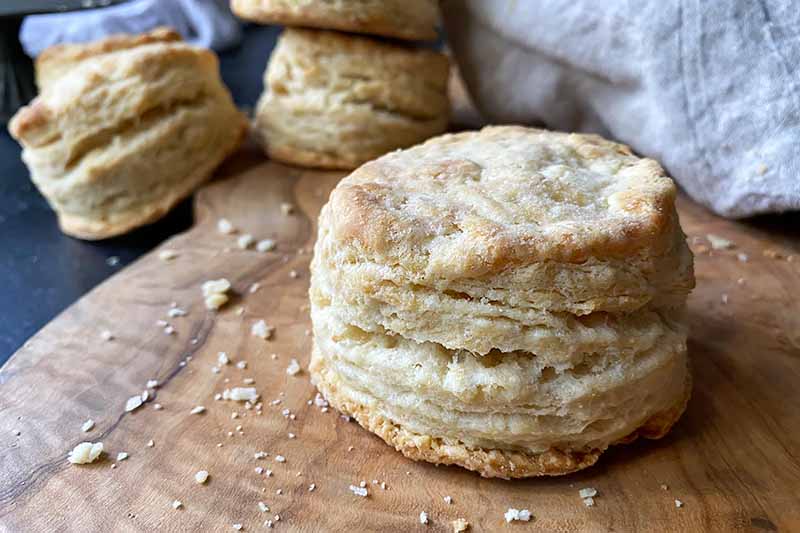
The towering, buttery, peelable layers that make up the structure of these biscuits are achieved through the process of lamination.
Lamination is used for certain baked goods such as croissants and Danish pastries, like our puddingbrezel. With this technique, you fold and roll the dough multiple times to create tender layers of buttery and flaky dough.
Oftentimes, you’re folding a separate thin sheet of butter onto the dough, but this biscuit recipe already has large chunks of butter incorporated in the dough. As you fold, these glorious pieces of butter are continually dispersed throughout each layer.
When baked, the butter chunks melt and evaporate, helping the dough expand and separate into distinct layers. The final result is a structural beauty rivaling even the finest works of architecture created by man.
The Temple of Artemis, the Great Pyramid of Giza, the Colosseum… what awesome wonders!
But can I slather them with jam? Or eat them with a side of oven-baked bacon and fried eggs? Or bake them on top of a juicy tomato cobbler?
Nope.
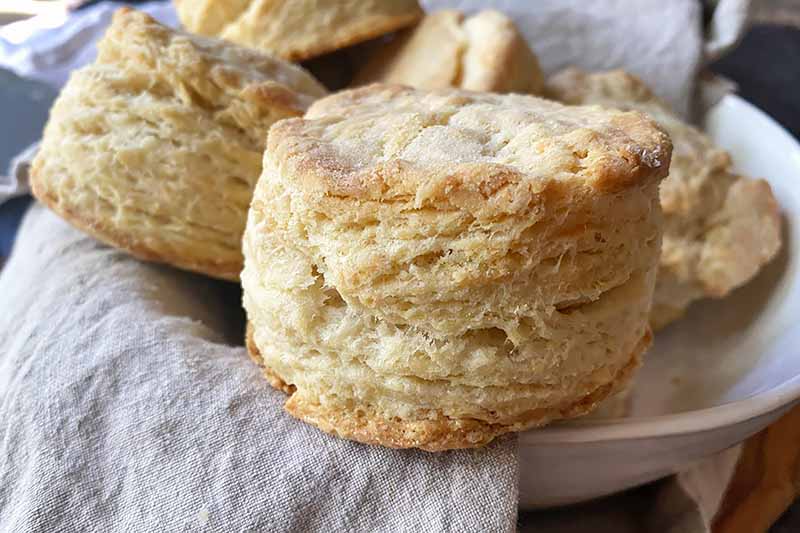
Make these biscuits, and you’ll be rewarded with both visual and edible splendor!
Print
Layered Buttermilk Biscuits
- Total Time: 1 hour, 10 minutes
- Yield: 6-8 biscuits 1x
Description
With buttery layers upon layers, these homemade buttermilk biscuits rely on a special folding method for the flakiest results. Read more now for the recipe.
Ingredients
- 2 3/4 cups all-purpose flour, divided, plus more for dusting
- 1 1/2 teaspoons kosher salt
- 2 teaspoons baking powder
- 1 teaspoon granulated sugar
- 1/4 teaspoon baking soda
- 1 1/2 sticks unsalted butter, chilled and cut into large cubes, plus 2 tablespoons for melting
- 1 1/4 cups buttermilk, plus more as needed
Instructions
- Preheat the oven to 400°F. Line a half-sized baking sheet with parchment paper or a silicone mat.
- Whisk together 1 cup of flour, the salt, baking powder, sugar, and baking soda in a large bowl. Using a pastry cutter, cut the cubed butter into the dry mixture until the cubes are evenly distributed but still in large chunks about the size of nickels.
- Add the remaining 1 3/4 cups flour and lightly toss together with your hands until the ingredients are evenly distributed.
- Add 1 1/4 cups buttermilk and knead the mixture by hand just until a shaggy dough forms, adding more buttermilk 1 tablespoon at a time if the dough is too dry.
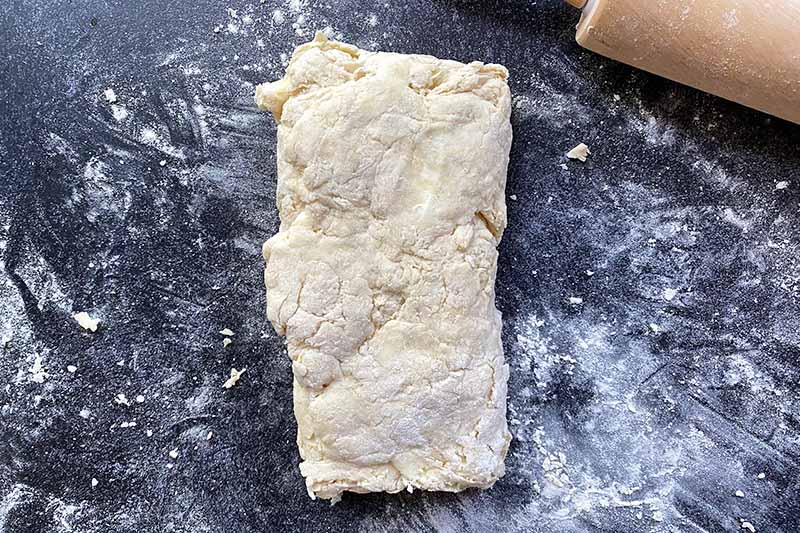
- Transfer the dough onto a lightly floured surface. With a rolling pin, form into a rectangle about 1/2 inch thick, with dimensions of roughly 12 inches by 6 inches. The shorter sides of the rectangle should be on the right and left sides.
- Complete three separate rounds of trifolds. Starting from the left side, fold the dough halfway to the center. Fold the right side over the top of the first fold. Press down to compact the dough and flatten it out to make a vertically long rectangle shape, using a rolling pin. Rotate the dough 90 degrees to the right and complete another trifold. Press the dough down and reshape into a rectangle. Rotate the dough 90 degrees again, and complete one last trifold.
- Using a rolling pin, flatten the dough into a rectangle, adjusting the dough to a thickness of 1 inch.
- Dip a circular 2- or 3-inch metal biscuit cutter into the flour to prevent sticking, and then cut straight up and down into the dough without twisting. Place on the prepared baking sheet. Repeat with the remaining dough, positioning the biscuits about 1 inch apart from each other on the baking sheet.
- Press the remaining dough together and reshape into a small rectangle. Cut and repeat with the biscuit cutter. Dispose of the remaining dough.
- Transfer the baking sheet to the refrigerator and chill for 10 minutes. Remove from the refrigerator, and lightly brush the tops of the biscuits with the melted butter.
- Transfer the baking sheet to the oven. Bake until golden brown, about 20-25 minutes, rotating the pan halfway through the baking process.
- Remove the biscuits from the oven, and allow to cool on the pan for 5 minutes before transferring to a cooling rack. Serve while still a little warm!
- Prep Time: 30 minutes
- Cook Time: 25 minutes
- Category: Biscuits
- Method: Baking
- Cuisine: Baked Goods
Cooking by the Numbers…
Step 1 – Prep
Preheat the oven to 400°F.
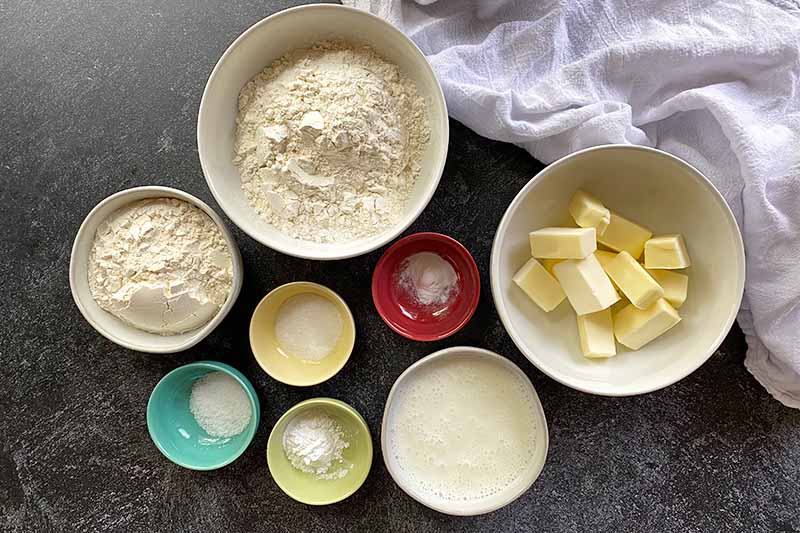
Cut 1 1/2 sticks of butter into large cubes using a sharp chef’s knife and sturdy cutting board. To keep the butter cold, place the cubes in a bowl or on a plate and transfer to the refrigerator to chill while you measure the remaining ingredients and gather your equipment.
Separately, measure 2 tablespoons of butter and place it in a microwave-safe bowl.
Measure out and divide the all-purpose flour into two separate bowls: a bowl for 1 cup, and another bowl for 1 3/4 cups. Make sure to leave out some flour for dusting your work surface and dipping your biscuit cutter.
Measure out the buttermilk, sugar, baking powder, salt, and baking soda.
Set out a pastry cutter, a 2-inch or 3-inch metal biscuit cutter (depending on how wide you want them to be), a pastry brush, and a rolling pin. Line a half-size baking sheet with parchment paper or a silicone baking mat.
I’m a big fan of the comfortable grip and design of the Gifbera Pastry Cutter. You can find it on Amazon now.
Instead of a pastry cutter, you can also use a food processor or 2 butter knives as alternative equipment for cutting the butter into the dry ingredients in the next step.
For cutting the shape of the biscuits, I prefer a metal cutter, as opposed to plastic, because the metal material will more easily and cleanly cut through a thicker dough. A flimsier plastic material will cause the dough to warp as you are cutting through it, causing them to bake unevenly.
Take a look at this 5-piece set of metal biscuit cutters with handles, available on Amazon.
Step 2 – Cut Butter into Dry Ingredients
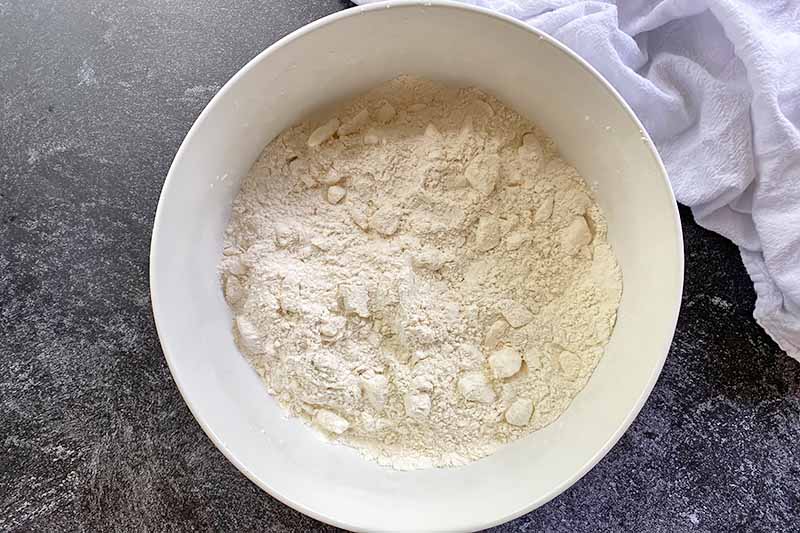
In a large bowl, whisk together the baking powder, salt, sugar, baking soda, and 1 cup of the flour.
Whisking helps to evenly distribute all of the ingredients, rather than simply combining them with a spoon. This is important before adding the butter, so you won’t get large clumps of a single ingredient that are stuck to the butter cubes as you’re cutting them into the dry mix.
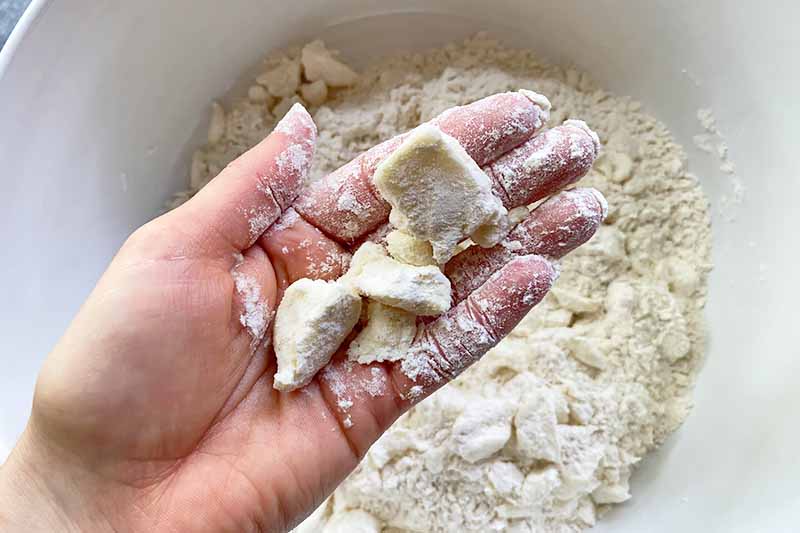
Add the cubed and chilled butter to the dry mixture. Cut the butter into the dry mix with a pastry cutter until the butter pieces are still big, about the size of nickels, and so they are evenly distributed.
Unlike other biscuit recipes, like our sourdough chive version or our cheddar garlic recipe, you do not want to cut the butter so small that it resembles peas or coarse crumbs. You want larger pieces for this particular recipe.
The larger pieces will help to keep the many layers created during the lamination process light and flaky, forming glorious air pockets within each layer as the butter melts during baking.
If using a food processor, pulse the butter into the dry mix. Be careful to avoid over-pulsing.
Step 3 – Add the Remaining Flour
Once you have cut in the butter, add the remaining 1 3/4 cups of flour.
Gently toss with your hands until incorporated, resisting the urge to rub or break up the large chunks of butter. Keep those pieces intact!
Step 4 – Mix in Buttermilk and Lightly Knead
Keep the mixture in the bowl. Add the buttermilk and knead with your hands just until a shaggy dough forms.
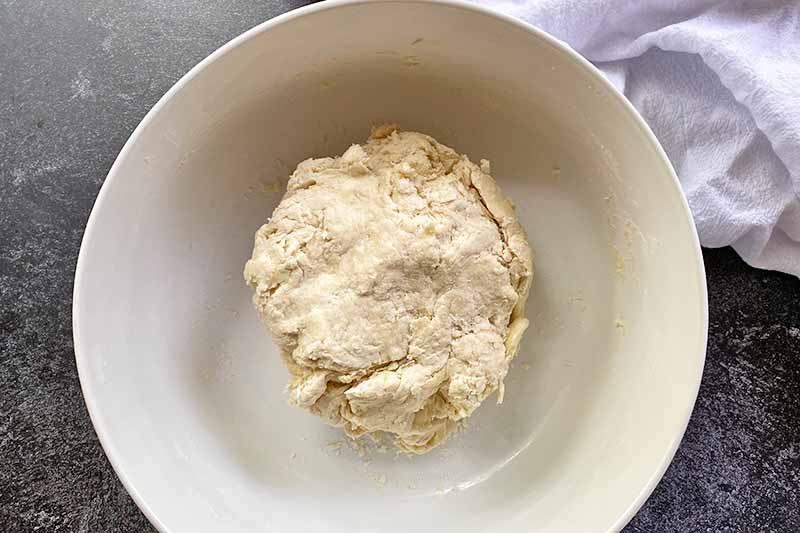
You should be able to pick up the dough without finding any unincorporated dry mix at the bottom of the bowl. If there still is some dry mix on the bottom, continue kneading until combined.
If there is still too much dry mix after about 1 to 2 minutes of kneading, add more buttermilk a tablespoon at a time and gently knead again, until the flour is incorporated all the way through.
Just be sure not to overmix, as we want to keep the dough tender and the butter pieces large. We’ll also be working the dough by folding it and rolling it repeatedly in the following steps, so aiming to achieve minimal gluten development in this beginning stage of mixing is important to remember.
Step 5 – Form into a Rectangle
Lightly dust a clean work surface with flour, and dump the dough onto it.
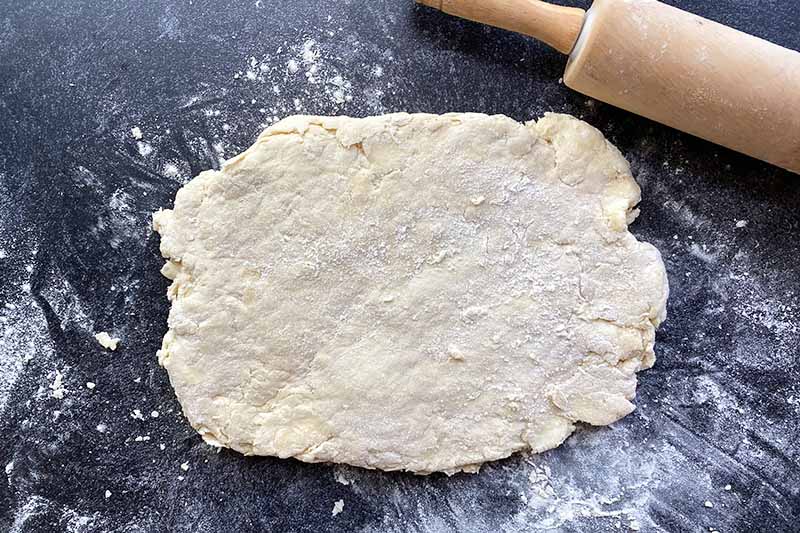
Gently press and form the dough into a rough rectangle shape that is about 1/2 inch thick. You can use your hands, and you can use a rolling pin to help create the shape. The dimensions of the rectangle should be roughly 12 inches by 6 inches.
The orientation of the rectangle is also going to be important for the folding process in the next few steps.
On your work surface, the long sides of the rectangle should be facing closest to you and furthest away from you, while the shorter sides should be on your left and right.
Step 6 – Fold in Three Separate Rounds
You will be using the trifold method for three rounds of folding, and you’ll want to work quickly for this step to keep the butter as cold as possible without it melting. Here’s an explanation of this method:
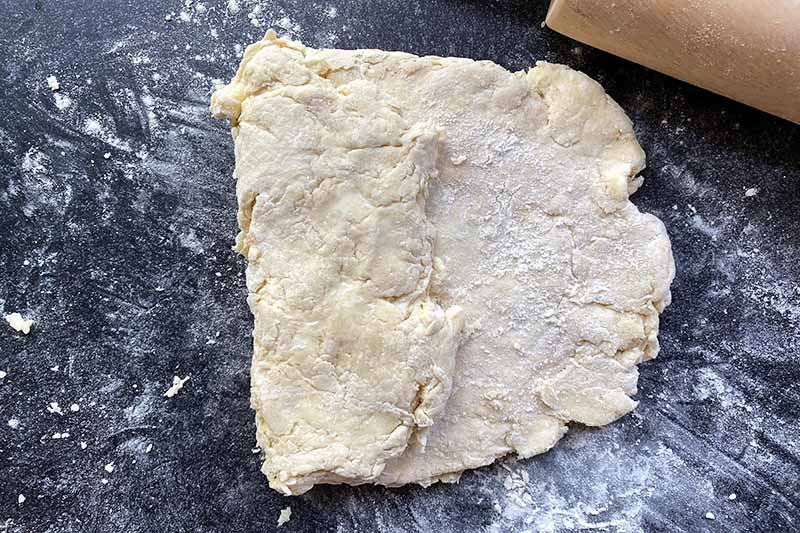
Imagine folding a letter to put inside an envelope: starting from the left side, fold the dough halfway to the center. Then, fold the right side past the middle and over the top of the first fold. You now have three distinct layers of dough.
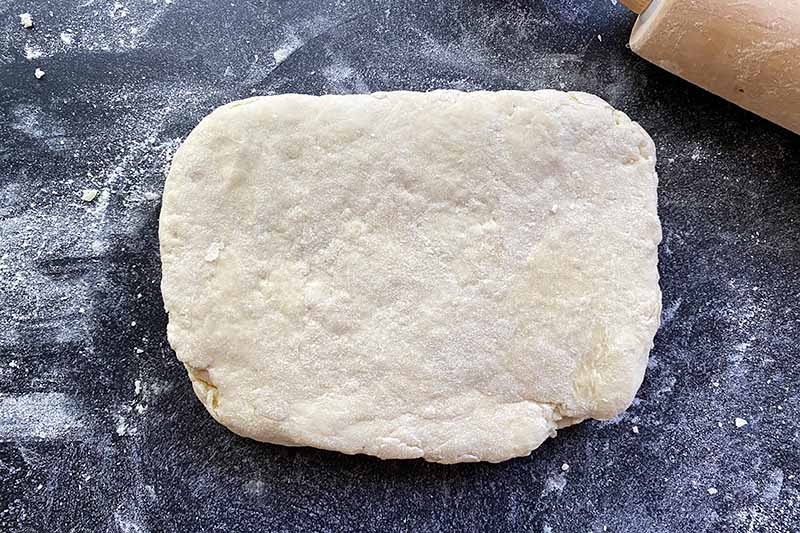
With your hands or your rolling pin, press down to compact the dough, and flatten it out again to make a rectangle shape, large enough that you can repeat another trifold.
Rotate the dough 90 degrees to the right. Repeat the trifold again, and flatten it out again to make a rectangle shape.
Rotate the dough 90 degrees to the right once more. Repeat the trifold one more time, and flatten it out again to make a rectangle shape.
With this step, and in the following folding step, you are laminating the dough as you would pastry dough, repeatedly folding to build distinct and separate layers upon layers of buttery dough.
This process is essential to create flaky, tender layers that make up the structure of these unique biscuits.
I know it sounds a little confusing at first, but don’t be frustrated if you think you messed up at some point. This is a very forgiving dough and process!
As long as you are not repeatedly folding in the same direction every time, you’ll still get a multi-layered final product.
Step 7 – Flatten and Cut
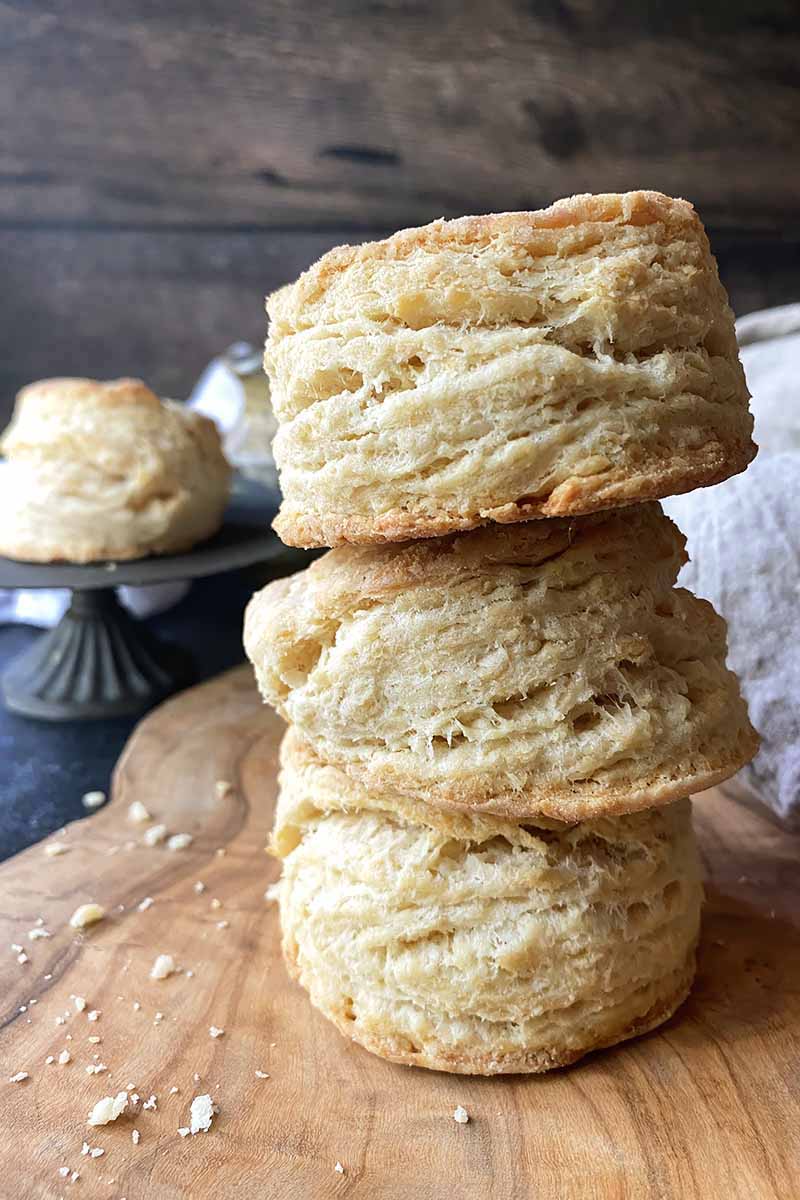
Use your rolling pin to press down the dough and flatten it to your desired thickness. This is up to you!
The thicker the dough, the more showstopping layers you’ll get. Fox in the Snow goes crazy with the height, sometimes making theirs over 2 or even 3 inches high!
However, the final yield will be smaller in number with taller biscuits. You’ll get less layers with thinner dough, but you’ll be able to make more rounds that way.
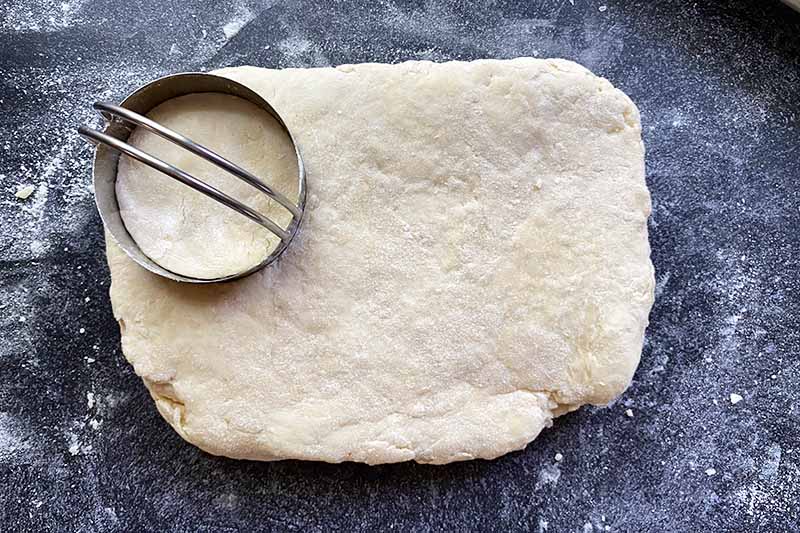
I prefer this dough to be about 1 inch in height. With this height, you’ll get a final yield of about 6 to 8 biscuits, and you’ll be able to see so many beautiful layers!
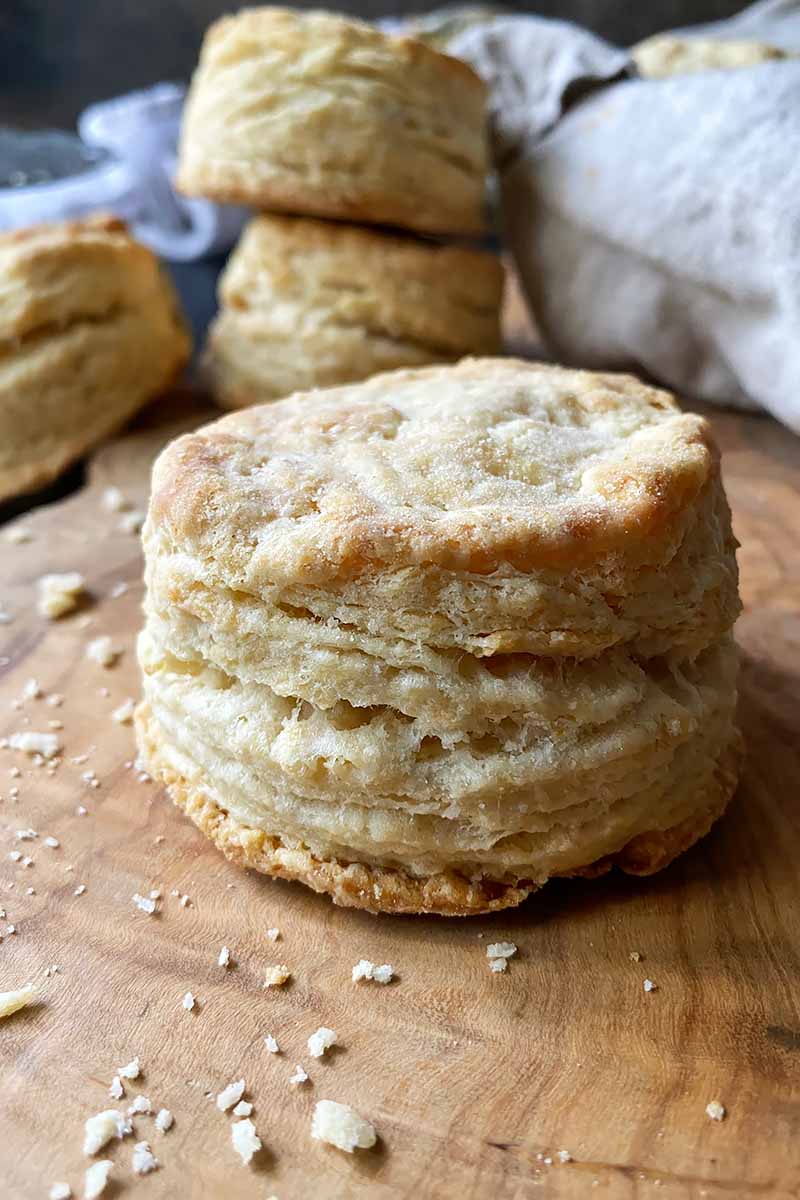
Dip your biscuit cutter into flour to prevent sticking. Insert the cutter straight up and down into the dough, being careful to avoid twisting the cutter.
Twisting may cause the exposed layers of each biscuit to seal, minimizing the rise and flakiness between the layers. Resist that urge – you want to be able to see all your hard work!
Repeat to cut out as many biscuits as you can across the dough.
Gently press (don’t knead!) the remaining dough scraps together and reshape into a small rectangle with your rolling pin. Repeat cutting and recombining the scraps until only a small amount of dough remains.
To prevent the dough from becoming tough, you don’t want to re-knead it – simply press the dough back together as gently as you can.
Transfer all of the cut rounds to your prepared baking sheet, placing them about 1 inch away from one another.
You’ll find some recipes will have you place the biscuits on the baking sheet so that they touch. This helps to support each of them as they rise while baking, without a risk of collapsing.
With this particular recipe, and in true Fox in the Snow Spirit, we’re spacing them apart from one another instead. You don’t want to hide the layers you’ve created, and a slight collapse gives these biscuits a whimsical and fun charm!
Step 8 – Chill and Bake
Transfer the baking sheet to the refrigerator and let the portioned dough chill for about 10 to 15 minutes.
Chilling will re-harden the butter, and will help the biscuits maintain their tall shape without shrinking as they bake. Because the butter will not melt as quickly now that it is cold, there will not be an excessive amount of butter loss.
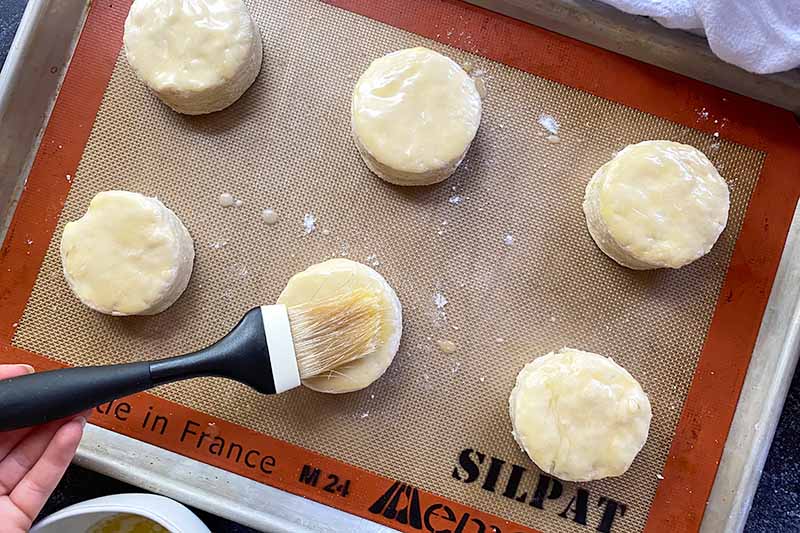
As the biscuits are chilling, you can melt the remaining 2 tablespoons of butter. This melted butter is totally fine, as it will be used for creating a lovely brown crust on the top of the biscuits.
Remove the baking sheet from the refrigerator. Brush the tops lightly with the melted butter.
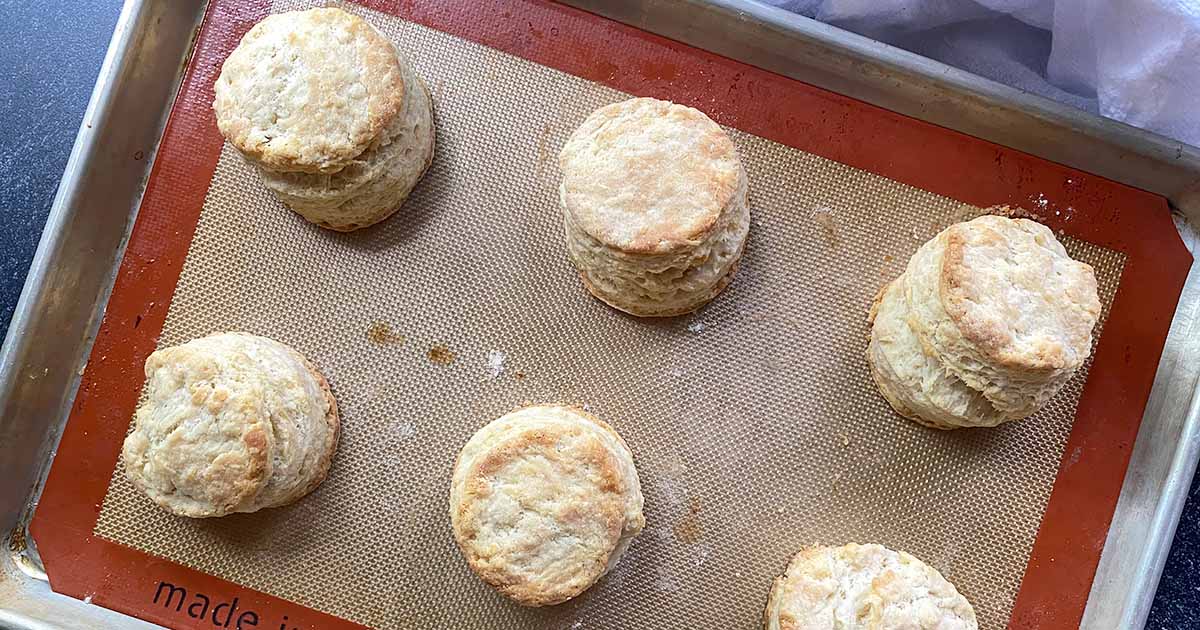
Transfer immediately to the preheated oven and bake until golden brown, for about 20 to 25 minutes.
The bake time may vary depending on the height of the biscuits. For thinner dough, check them at 15 minutes. For thicker dough, they may need closer to 30 minutes to bake.
Step 9 – Cool and Serve
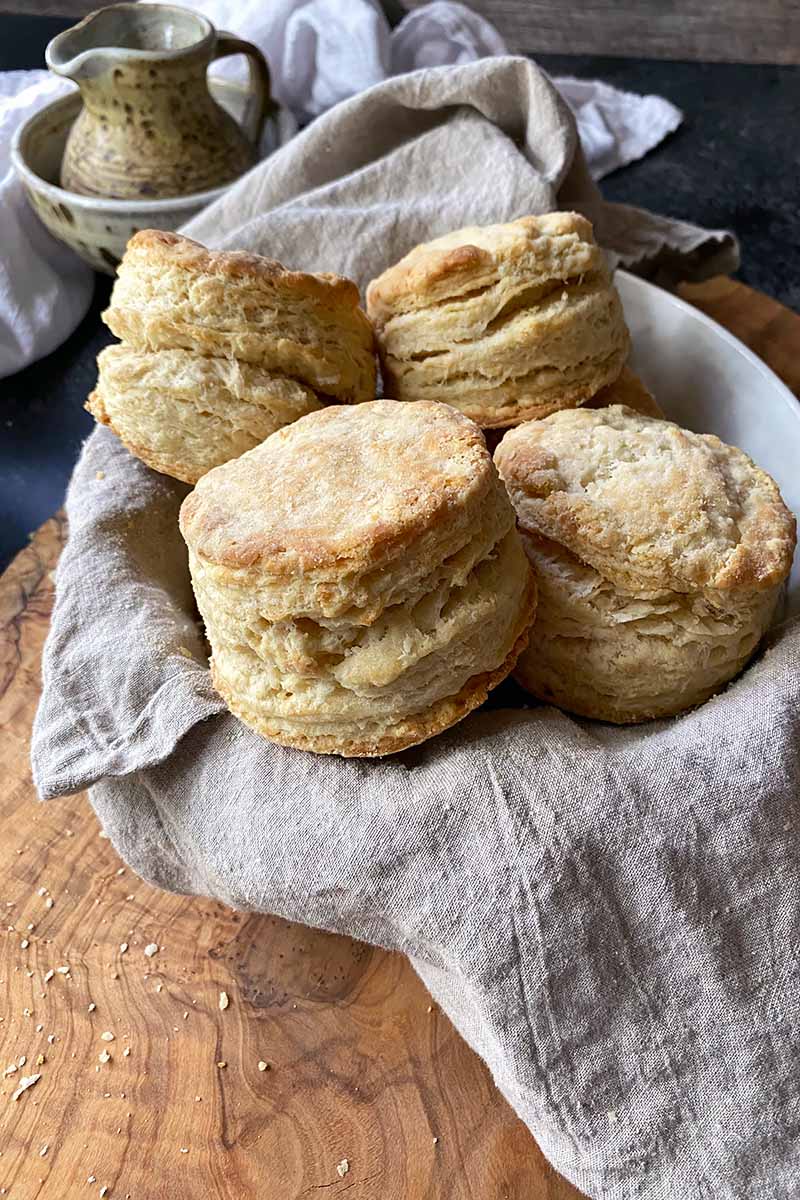
Remove the biscuits from the oven, and allow to cool on the pan for 5 minutes before transferring to a cooling rack.
I recommend serving these while they’re still warm and steamy!
The Biscuit – A Star at Breakfast, Lunch, Dinner, and Dessert
The sky’s the limit as far as uses for this biscuit dough are concerned! Let’s go through all the meals in a day, for kicks and giggles:
Breakfast is a no-brainer! A simple spread of softened butter and spiced blueberry jam on biscuit halves is an easy choice that will put the shine in your rise.
You can also make some pretty epic sandwiches with these. Use our homemade sausage for breakfast or slices of deli meat for lunch. Pile on over-easy eggs, slices of cheese, juicy tomatoes, lettuce, and homemade aioli!
There are also plenty of hearty stews fit for a hungry family that would benefit from the perfect carb accompaniment.
Serve our no-fuss slow cooker chicken pot pie, pressure cooker beef stew, or our parsnip and potato chicken stew with a side of biscuits still warm from the oven.
And for dessert? You know I’d never disappoint you for the final course! Strawberry shortcake is the way to go here – serve fresh summer strawberries macerated in our strawberry syrup, and top with freshly whipped cream and a little chopped mint.
How will you serve our buttermilk biscuits for breakfast, lunch, dinner, or dessert? Leave a comment below, and let’s share some ideas!
We need to show buttermilk the respect it deserves! This tangy dairy product is our pride and joy in the kitchen, prized for its bright acidity and creamy texture. It graces us with its presence in many of our recipes outside of baked goods territory. Give our favorites a try soon, starting with these:
- Whole Grain Buttermilk Pancakes
- Crispy Baked Buttermilk and Spelt Chicken Fingers
- Gluten-Free Buckwheat Buttermilk Waffles
Photos by Nikki Cervone, © Ask the Experts, LLC. ALL RIGHTS RESERVED. See our TOS for more details. Originally published on October 18, 2014. Last updated on July 2, 2022.
Nutritional information derived from a database of known generic and branded foods and ingredients and was not compiled by a registered dietitian or submitted for lab testing. It should be viewed as an approximation.
About Nikki Cervone
Nikki Cervone is an ACS Certified Cheese Professional and cheesemonger living in Pittsburgh. Nikki holds an AAS in baking/pastry from Westmoreland County Community College, a BA in Communications from Duquesne University, and an MLA in Gastronomy from Boston University. When she's not nibbling on her favorite cheeses or testing a batch of cupcakes, Nikki enjoys a healthy dose of yoga, wine, hiking, singing in the shower, and chocolate. Lots of chocolate.

I could eat biscuits every day and for every meal. They can go with everything and the are so simple to make. The meat and cheese rolls look amazing! I will have to look into trying to make those myself. I’ve made pigs in a blanket before and they are one of my favorite things.
I can eat biscuits with so many things, and I think that is why I love them so much. They go great with beef stew, chicken and noodles, and chicken soup as well.
Yes, biscuits are a perfect accompaniment for most foods be they sweet or savory. Easy to make as well, much less hassle than other sides like bread.
Personally I swear by butter instead of margarine in my biscuits, I feel that the resultant texture and taste of butter biscuits is much better!
I’m a butter lover as well. It really does taste much better on biscuits. I’m also picky about when I eat biscuits. I love them fresh out of the oven. Nothing is better! I love the taste of them right out of the oven.
I’d personally eat biscuits all the time. I’d take a biscuit over bread any day of the week.
Over here in the UK, biscuits means what I think you would call cookies – I was very confused by the title of the post until I worked out that you meant something completely different! Going by the pictures and the recipe, I think we would call these scones.
Now that I’ve got over that, I think there’s some great ideas for quick, filling meals and snacks in here – I’ll certainly be trying the pigs in blankets and the meat and cheese rolls. I’ve used them as toppings for stew many times before, and that always goes down well with the hungry hordes.
Yes, they remind me of scones too! LIke a savoury version. I suppose it’s just another twist on stew and dumplings. I had always wondered what biscuits actually were in the US, especially when I heard people talk about biscuits and gravy – I too immediately think of cookies!
Yes British think of biscuits as cookies. I believe our biscuits are similar to your scones but without raisins or sultanas.
I love biscuits! Growing up my dad loved them so we had them with most dinners. Buttermilk are my favorites. There’s nothing like a weekend breakfast of biscuits with sausage gravy. Your recipe sounds faster than mine so I’m going to try it. I’d love a quicker way to whip them up as a side for a dinner. Thanks!
I like the idea of the mini bite size pizzas or for breakfast as in the UK I’m used to seeing them with jam on them. I much prefer the savory ideas, though as they are more versatile.
I would add a bit of wholemeal flour to add some extra fiber to them so then I have an excuse to eat more of them.
Mini pizzas on biscuit dough are delicious. I’ve made them a few times before in the past and they are always a hit in my house. That’s a good idea to add wholemeal flour to them. I can always use a good excuse to eat more biscuits as well.
Such a fun playful side with so much variety and yet it’s own unique flare.
Canadian Thanks Giving just passed and I was very proud of the recipe I pulled out of nowhere to whip up a batch of cranberry biscuits, the key was to add enough sugar to counter the slightly bitter cranberry, but to, you delight they did not last long.
A dash of this or that can turn them from a dinner side to a coffee dunked.
My dad absolutely loves biscuits, and he’s pretty darn good at making them too. We’ve had almost every sort of biscuit recipe you can image, so I was shocked when I found one on this list I’ve never heard of! We’ve never had the biscuits with stew. I think it’d be delicious, like you said, made into a little biscuit pot pie!
We make and eat biscuits all of the time. I just love how versatile they are, just as you showed in this post. They can go with any meal! I haven’t ever tried stuffing them before, but I am definitely going to.
I tried this recipe tonight and they turned out great! It was quick and easy. My guests all enjoyed them and there were no leftovers. Thanks for the recipe and idea.
I take a buscuit mix, store made or home made and mold them around the outside of a muffin tin, making a bowl. I put them in the oven until they are golden brown. I then fill them with my favorite soup, make little tops for them and put them in the oven for another 10 mins. Heat the soup in microwave or stove first.
I am indeed a sad soul today, with the electricity cuts and hikes in my area…certain appliances are out, hence no baking…talk of feeling like am in shackles…yet looking at this page, i can’t help but mouth-water,…am optimistic that positive changes are going to happen soon….and when they do, i know what will be for dinner :).
That second picture is amazing! That is a perfect way to show how to enjoy biscuits with that stew. I like having biscuits with some of my meals as well, but I don’t have it very often though. I love all the ideas that you have here, especially the mini pizzas. That is very neat!
Oh my, these look scrumptious! They remind me very much of what the Cornish people from Cornwall,UK call: scones.
Those are served with a local speciality called “clotted cream” which is a thick-buttery tasting cream and strawberry jam……mmmm…memories. Tasty memories. Yet this new suggestion is worth definitely trying! I will get baking, thank you 🙂
Oooo, I totally love this article!!! I’ve only eaten biscuits as biscuits, like a side of sliced bread. And boy are they good!!! Not mine… mine suck. But the ones I buy are so good. Anyway, I love the different ideas you’ve given, especially the pizza one. Never heard of it before. So, I’m definitely given the pizza one a try next time. It must have a very interestingly beautiful taste. 😀
I am struggling with this post 🙂
In Australia, biscuits are sweet and eaten for afternoon tea or such – what Americans call cookies.
Your recipe, however, has sugar in it so I can’t imagine adding it to a stew or pizza base! It is like a damper or scone recipe – damper is basically an unleavened bread so would go in many of the examples above but the base recipe doesn’t include sugar!
I made cheese biscuits once, but they didn’t turn out too good. The biscuits weren’t very flavorful and crumbled too much. Since then, I’ve been buying biscuits from the Pillsbury DoughBoy, but I figured that to save some money, I should make the biscuits myself. This recipe looks a lot simpler and easier than the recipe I used to make those cheese biscuits. I like the ham and cheese idea, and I definitely will dry the deep-fry idea. I’d recommend topping the fried biscuits using powered sugar instead of honey, though. It’s just my opinion from past experiences I’ve had with deep-fried desserts, such as zeppoles.
Mmm, I love biscuits! I usually use prepared biscuit mix, but have been looking around for a handmade dough recipe, which is how I ended up here. One of my favorites is simple biscuits and gravy, and breakfast any time of day works in my house. I like the versatility of this recipe, and that it can be used in one piece, as well as being cut into single serving biscuits. I might have to try the meat and cheese roll ups, they look delicious.
I love biscuits! I think I was meant to be a southerner..I will order biscuits and gravy every time I see it on the menu. I have tried making them a few times but they never look as good as the pictures, I think I need more practice and a pastry cutter. I will definitely be trying some of the ideas that you gave, I really like the faux pot pie idea.
Now with the dessert idea I have tried something similar with crescent rolls, I lay them out on a sheet pan and butter them, then sprinkle with cinnamon and sugar, fold them over and sprinkle the top with more cinnamon and sugar. It is a nice quick treat.
Those pigs in a blanket look massive! I’m so used to making them itty bitty. I’m a big fan of biscuits but they MUST be the right consistency. That’s the biggest factor second to flavour. Biscuits & gravy only work for me when the biscuit has that soppy deliciousness that accompanies the hard work that went into the gravy.
Pigs in a blanket huh?…i had my eyebrows raised plus i had to do a real walk over from the dashboard area to the actual article…Joan, i just had to see these ‘pigs’ 😉 …turns out they are massive biscuits… you had my curiosity in check there… i must say 😀
Biscuits are a must have at my house. My husband is like a big baby when it comes to them. He will beg me to make a pan of homemade biscuits, and I usually will. I must admit I love them to probably to much. They make any meal complete.
What a simple looking recipe with so many options! When I make these biscuits this weekend I’ll add sour cream in place of the milk and maybe grate some sharp cheddar cheese 🙂 I’ll probably make an extra batch and keep it stored in the fridge. Or maybe create the little pizza biscuits and freeze them for a quick snack. I love foolproof recipes like this and especially that it seems so versatile. Thanks!
I love, love, love the buttermilk versions. I might eat one or more with jam and sausage as a breakfast sandwich. Or i have it as a side with a nice meal like a roast.
Every recipe I’ve found in the past for biscuits involves lard or crisco, and I can’t find those where I live, but this recipe has ingredients I already have, so I’m totally going to make this soon! I already have so many ideas for how to switch up the recipe by adding things like oregano or other herbs to the dough. Are there any good additions to the dough to make the biscuit more of a dessert? Like adding chocolate chips, for example? The deep fried version sounds delicious as dessert, though.
I loved the US biscuits! We don’t have them here where I am from but I lived in the US for a while.. They are delicious and yet so simple to make! 🙂
Thank you for the great biscuit recipe that is so simple and quick. Everyone loves biscuits and I tend to forget about all of the quick dinners you can put together just with biscuits. I have to say that biscuits and gravy are my all time favorite for a simple and tasty breakfast for dinner!
I’m from a country big on rice. It’s hard for me to imagine eating stew dishes with biscuits to go with them instead of rice! This kind of combination is kind of odd to me. I may not have these for dinner, but I think I can try these for breakfast: pigs in blanket/ meat and cheese rolls. But then again, I’m a big breakfast food fan, so on the second thought – roll them out on the dinner table, I’m sure I’ll still enjoy them.
This is such a useful post! My favorite part of this one was Pigs in blankets, you can use them as a snack or as an accompaniment to a regular food, and they actually reminded me to Mexican salchitacos, yum!
One of the things that I love about simple types of breads is that you can use them for almost every single occasion, and you’ll never get bored of it, because who doesn’t love biscuits or just bread in general? 😉
Thanks for sharing!
I made the pigs in blankets with hot dogs. Super easy and delicious. Thanks for the recipe!
Glad you enjoyed it, Liz!