If you like bread, cheese, butter, and eggs (you know, all the best things this world offers), then there’s nothing you won’t like about khachapuri.
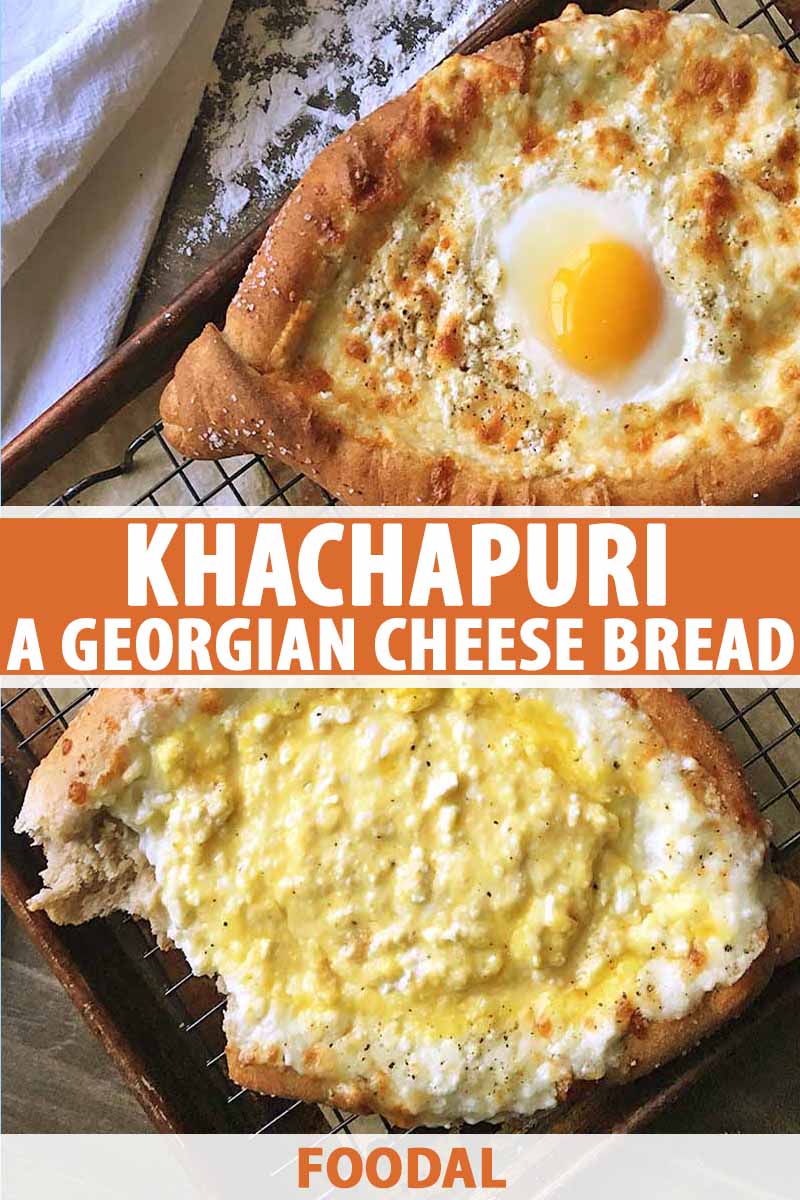
Prounounced “kah-chah-pour-ee,” this pizza-like cheesy bread is a popular dish from the country of Georgia, shared and eaten by hand.
And just like pizza, there are endless variations of it, from the preparation to the shape of the dough to the fillings.
I want to give you a very simple and popular version – as a tasty building block for your own culinary interpretation.
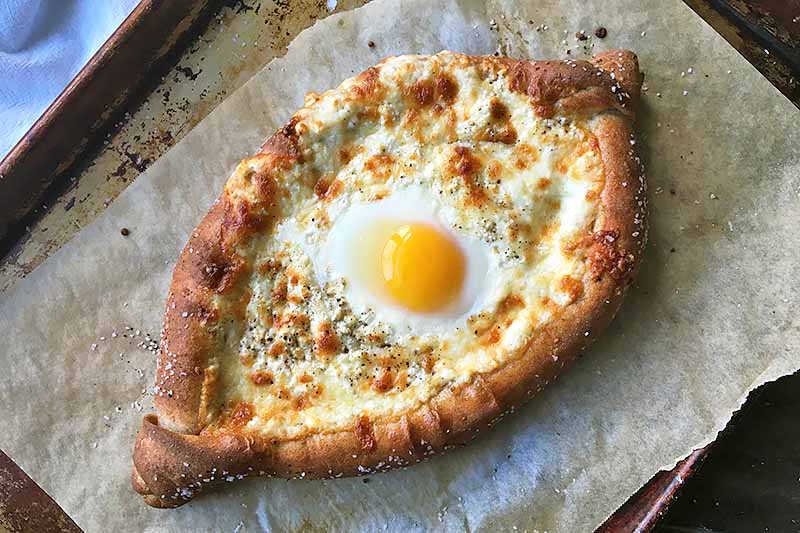
You’ll be very happy with this one: a whole egg enjoys slowly cooking in a hot Jacuzzi of a molten, bubbly mixture of melted cheese.
Immediately before serving, you mix the barely cooked egg with the cheese, and dig in by ripping off chunks of the crust and plunging it into the dip.
Basically, it’s the cheesiest scrambled eggs you’ve ever had, all nestled inside a golden-brown, fluffy boat of yeasted bread.

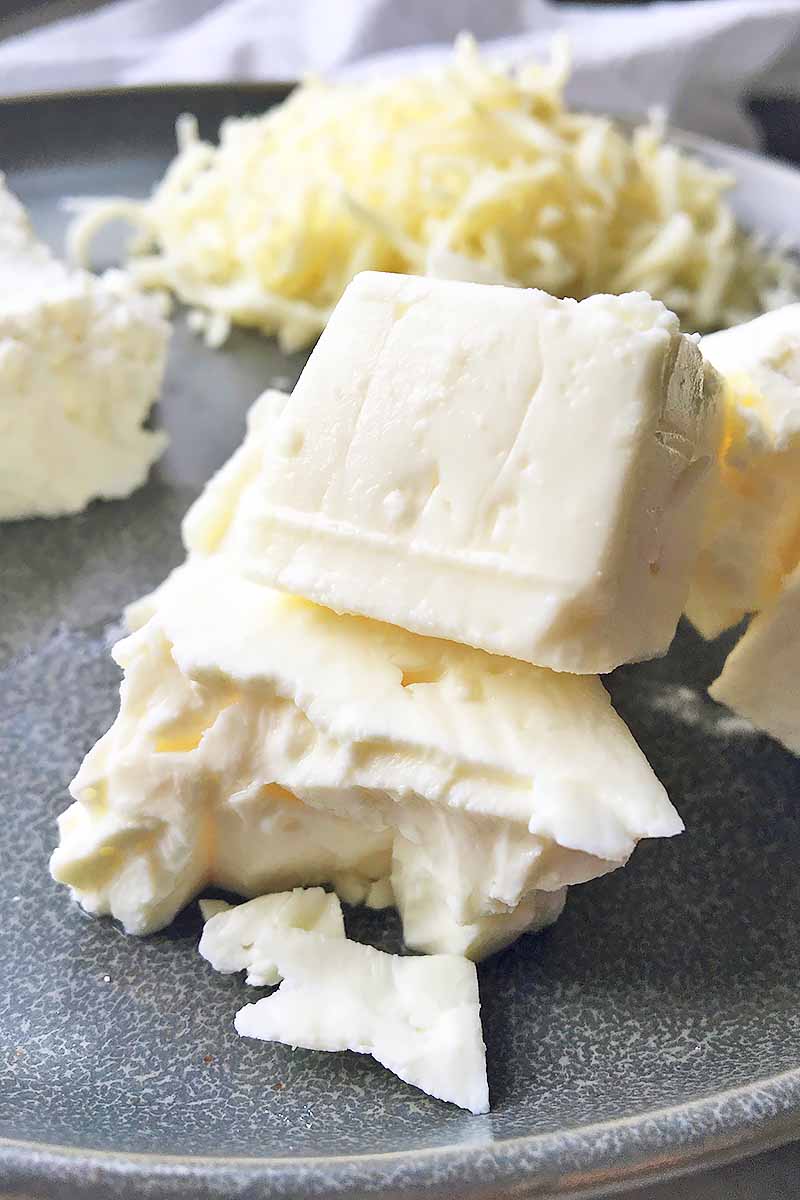
While American grocery stores will not carry Georgian cheeses typically used to make this dish, a blend of mild mozzarella, fresh farmer’s, and tangy feta cheese will yield a similar taste, texture, and drool-worthy meltability.
Try this ooey-gooey creation below!
Print
Khachapuri: A Georgian Cheese Bread
- Total Time: 2 hours, 45 minutes
- Yield: 3 khachapuri 1x
Description
Khachapuri, a cheesy bread topped with an egg, is a popular dish from Georgia that’s shared and eaten by hand.
Ingredients
- One batch pizza dough*
- 1 pound part-skim mozzarella, shredded (about 4 cups)
- 8 ounces feta, crumbled (about 1 heaping cup)
- 8 ounces farmer’s cheese (about 1 cup, firmly pressed)
- 3 large eggs
- 3 tablespoons unsalted butter, room temperature
- Salt and pepper, to taste
Instructions
For the Dough:
- Preheat the oven to 425°F. Set out three baking sheet pans. Place a parchment sheet or silicone mat on each pan. Set aside.
- With your hands or a large spoon, mix and mash the cheeses together in a medium bowl. Add a pinch of salt and pepper and mix until combined.
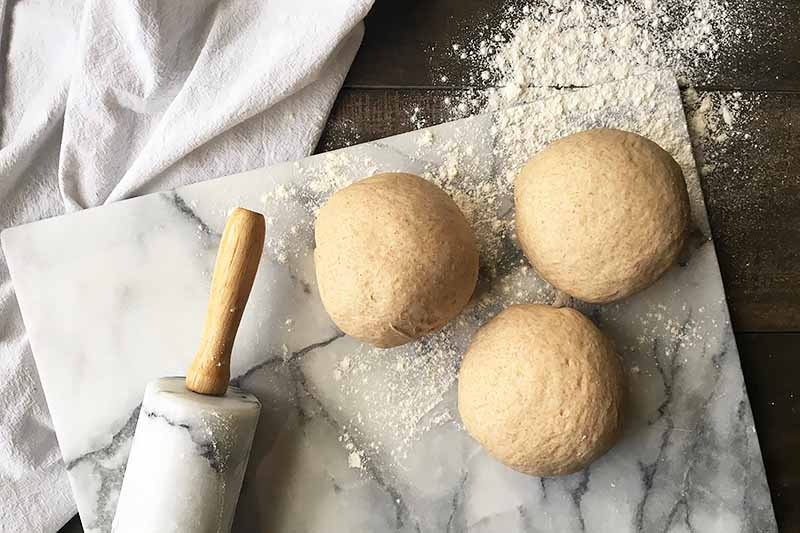
- Very lightly flour your work surface. Turn the dough onto the floured surface and cut it into equal thirds. Mold the divided pieces gently back into rough rounds. Cover the rounds with a slightly damp towel. Let rest for 10 minutes.
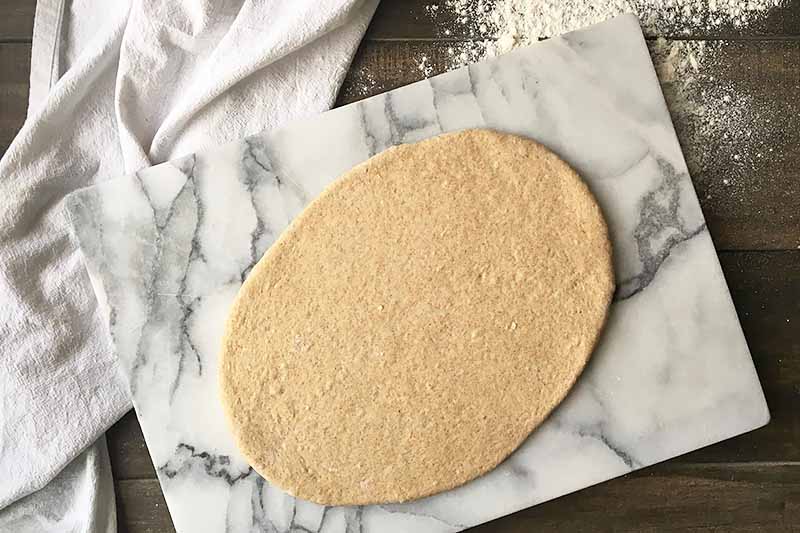
- Working with one round at a time, roll out the round with a rolling pin to make a rough oval shape, about 12 inches long and 7 inches wide. Transfer to one prepared sheet pan.
- Roll both of the long sides tightly towards the center of the dough until there is about 1 inch separation between the rolled edges. Pinch the top and bottom ends together and twist to seal tightly. Gently manipulate and stretch the rolled sides to make a shape like a bulbous canoe, while ensuring the seal ends are still tight. Let rest for 10 minutes.
For Baking and Serving:
- Spoon one third of the cheese mixture in the center of the shaped dough, spreading to the crust. Brush the sides with just a little olive oil, and sprinkle the top with a pinch of salt and pepper.
- Repeat with the other two pieces of dough, and with the remaining cheese.
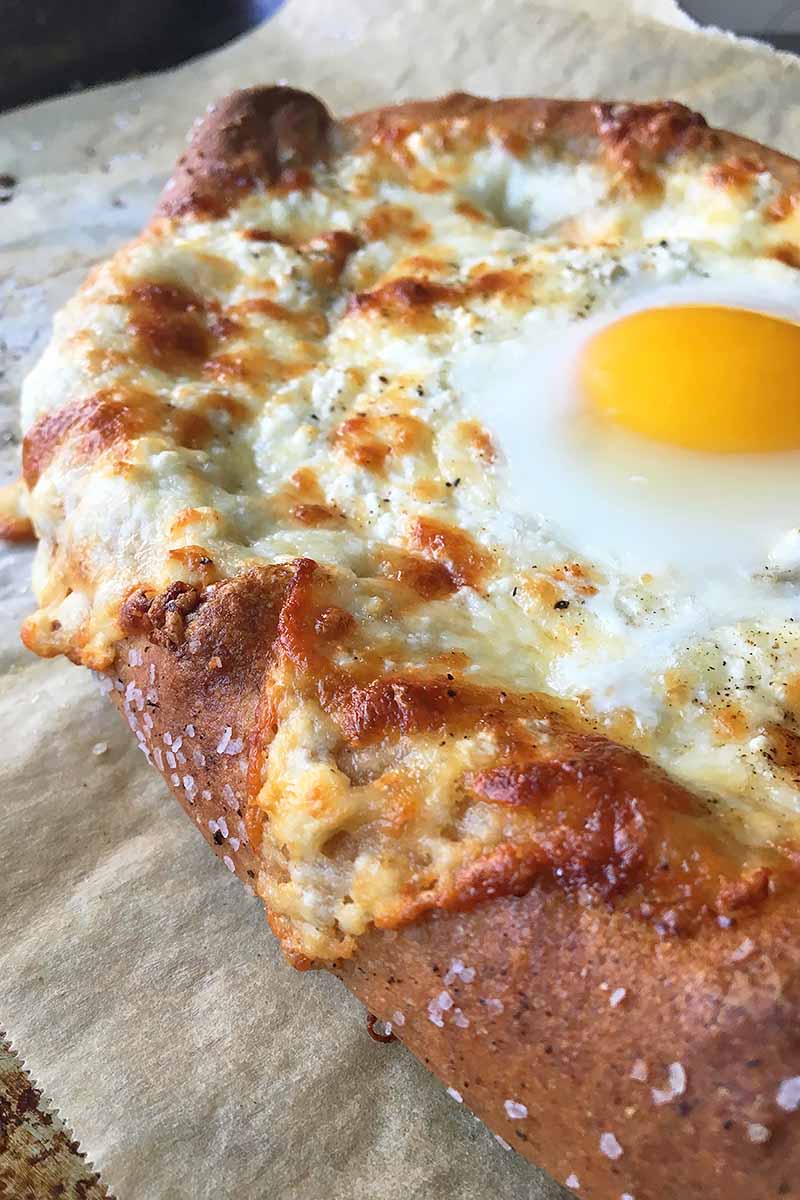
- Transfer the pans to the preheated oven. Bake until the dough crust is lightly golden-brown, but still slightly underbaked, about 10 minutes, rotating the pans halfway through baking. Remove from the oven.
- With a spoon, create a deep well in the center of the cheese large enough for one egg by moving the cheese towards the sides. Pour one cracked egg in the middle of each khachapuri and return to the oven. Bake until the white is just set around the edges, about 5-6 minutes.
- Remove from the oven, place 1 tablespoon of butter on each khachapuri, and sprinkle with salt and pepper.
- Serve immediately – stir the egg and butter into the hot cheese. Tear off the outside crust to dip into the cheese and egg mixture. Enjoy!
Notes
*I recommend using Foodal’s easy homemade Honey Whole Wheat Pizza Dough, so hearty with whole wheat flour!
- Prep Time: 2 hours, 30 minutes
- Cook Time: 15 minutes
- Category: Bread
- Method: Baking
- Cuisine: Georgian
Cooking by the Numbers…
Step 1 – Prep and Make the Dough
Preheat the oven to 425°F. Set out three baking sheet pans. Place a parchment sheet or silicone mat on each pan. Set aside.
Prep the bread recipe you are planning on using for this dish. I recommend using an elastic bread dough like pizza dough – it will work perfectly.
I used Foodal’s recipe for Honey Whole Wheat Pizza Dough, but you can use any plain pizza dough.
Once it’s made, divide the dough into thirds, and knead into rounds. Let them rest for 10 minutes underneath a slightly damp towel as you prep the other ingredients.
Step 2 – Make the Filling
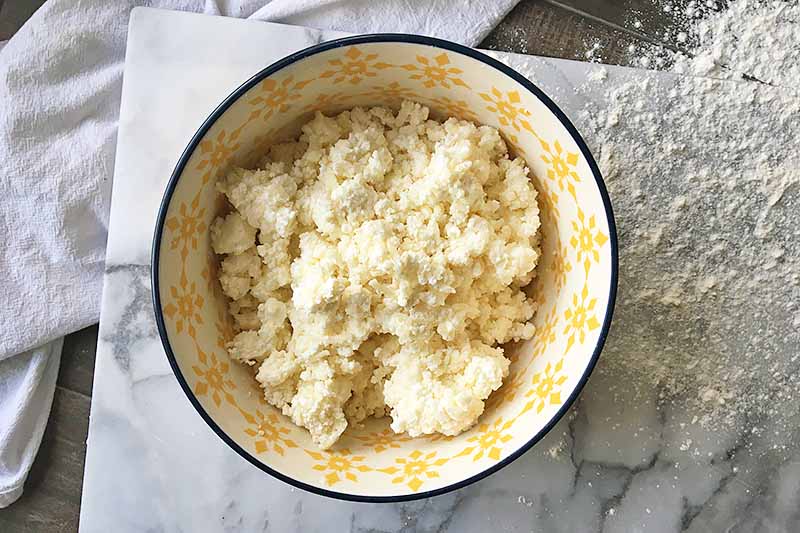
With your hands or a large spoon, mix and mash the cheeses together in a medium bowl until completely combined. It helps to pre-crumble the feta and farmer’s cheese before adding to the mozzarella.
Add a pinch of salt and pepper and mix until combined.
Farmer’s cheese is a fresh, mild, and milky cow’s milk cheese with a slightly gritty texture. If you can’t find it at the grocery use, you can use cottage or ricotta cheese, drained of any liquids.
Step 3 – Shape the Dough
Work with one round at a time, keeping the other two rounds underneath the damp towel so the tops do not dry out.
On a lightly floured work surface, roll out one round with a rolling pin to make a rough oval shape, about 12 inches long and 7 inches wide. Transfer to one prepared sheet pan.
If the dough is still too elastic to roll out fully, let the flattened dough rest for 5-10 minutes, and roll again.
With your hands, roll both of the long sides tightly towards the center of the dough until there is about 1 inch separation between the rolled edges.
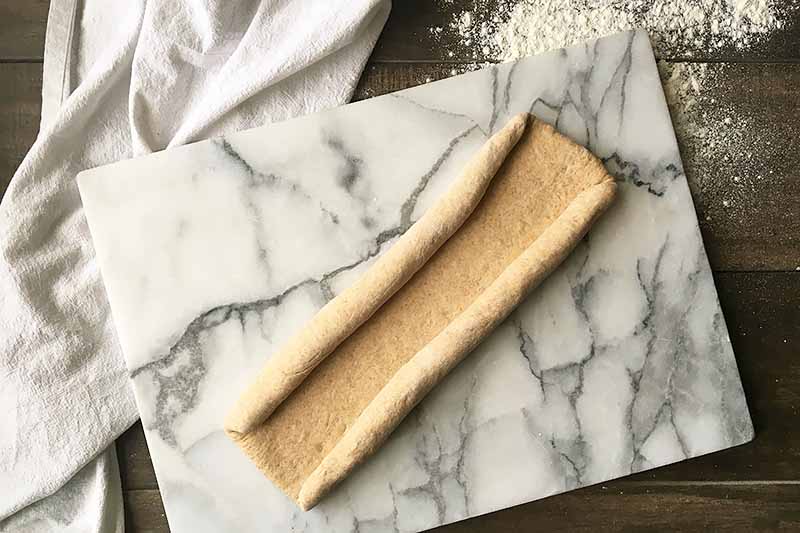
Keep the rolled sides nice and tight, pinching out any air bubbles.
Pinch the top and bottom ends together and twist to seal tightly. Gently manipulate and stretch the rolled sides to make a shape like a bulbous canoe.
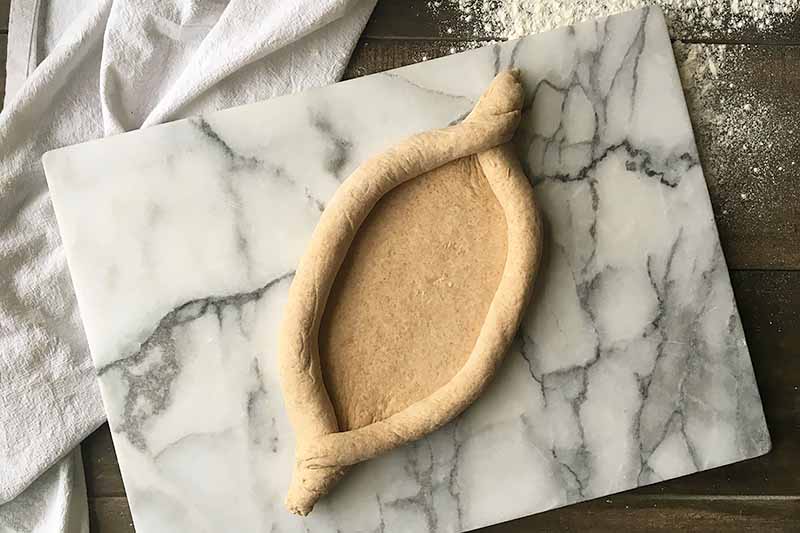
As you’re stretching, be sure to keep an eye on the pinched ends, ensuring that they stay intact as you’re stretching.
Step 4 – Fill
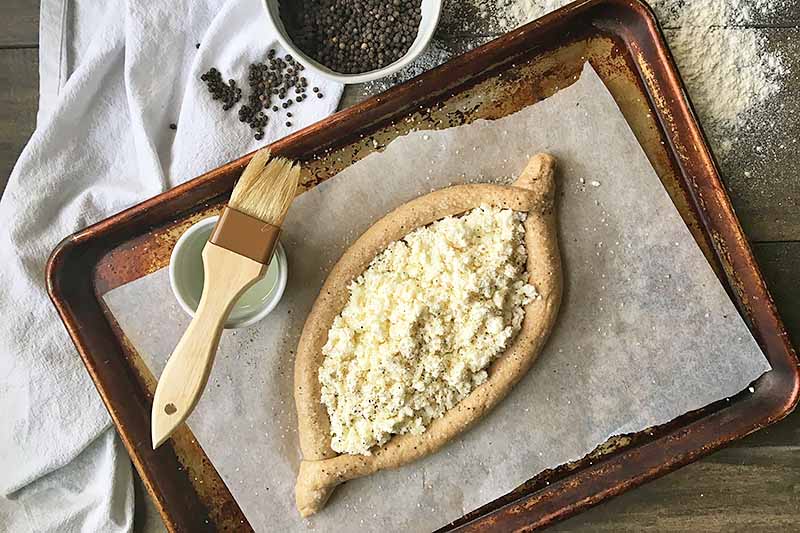
With a spoon or your hands, place roughly one third of the cheese mixture in the center of the shaped dough, spreading to the crust.
It’s totally fine if the cheese is mounded slightly above the crust – the bread will rise and bake as the cheese melts and loses it’s height. Plus a little cheese on the crust is delicious, so crunchy and toasty!
Brush the crust with just a little olive oil, and sprinkle the top with a pinch of salt and pepper.
Repeat Step 3 and Step 4 with the other two rounds of dough.
Step 5 – Bake
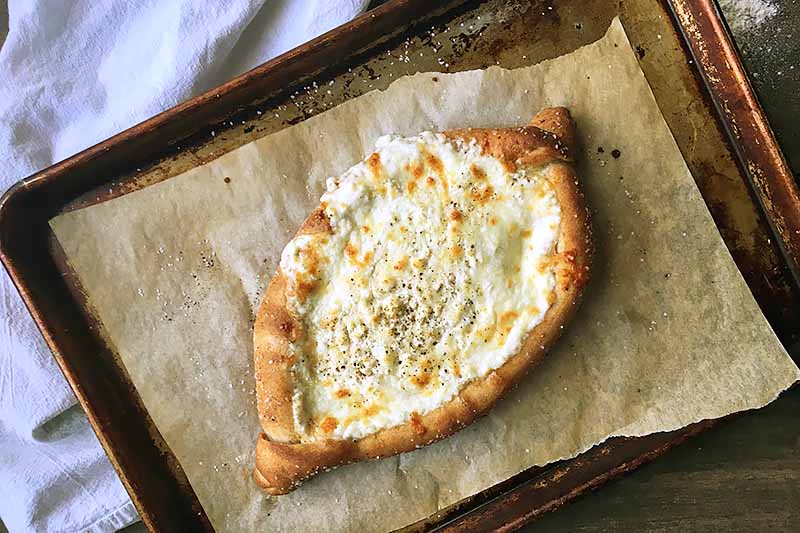
Transfer the pans to the preheated oven. Bake until the dough crust is lightly golden-brown, but still slightly underbaked, about 10-12 minutes, rotating the pans halfway through baking.
Remove from the oven.
You don’t want to bake any more than 12 minutes for this step – the bread will continue baking when you add the egg. No burnt bottoms, please!
Step 6 – Add the Egg
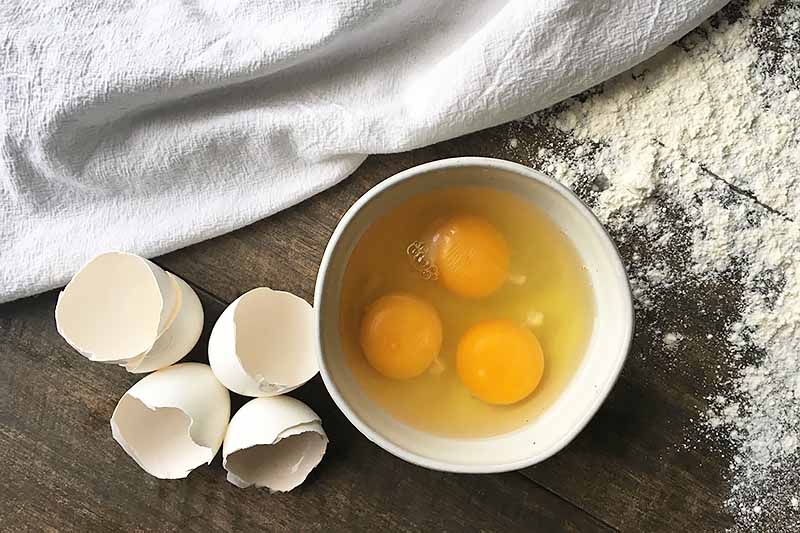
Crack the eggs in a bowl, making sure to not break the yolks.
With a spoon, create a deep well in the center of the melted cheese. It needs to be deep and wide enough so that the egg white does not spill over.
It happened to me, the first time I made it. Scrambled egg whites allll over the bottom of the pan.
Working quickly, pour 1 egg into each well and return to the oven. Bake until the white is just set around the edges, about 5-6 minutes.
Step 7 – Serve
Remove from the oven, place 1 tablespoon of butter on each khachapuri, and sprinkle with salt and pepper.
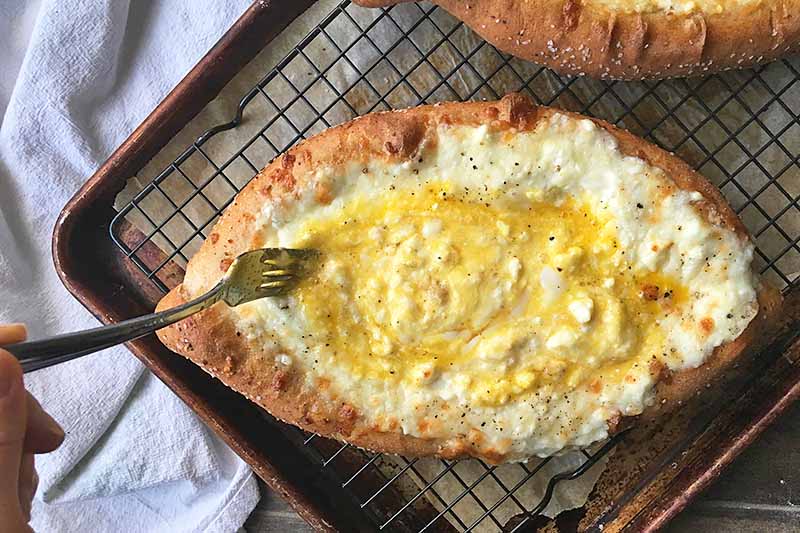
Serve immediately. Transfer each khcachapuri to large serving platters. With a spoon or fork, stir the egg into the hot cheese until completely mixed. Sprinkle with a little more salt and pepper before tearing off the outside crust to dip into the cheese and egg mixture.
Enjoy!
Skip the Pizza Tonight
Explore outside of the pizza box for your next dinner – and make this Georgian staple instead!

Friends and family will love tearing off chunks of freshly baked bread and dipping it right into the pool of melted cheese.
It’s a fun, interactive dish that you can adapt to your own liking. Use your favorite pizza dough recipe, and any combo of your favorite melting cheeses for a taste all your own: cheddar, pepper jack, provolone, ricotta…
Mmmmmm, I could go on for days…
Have you ever made this dish before? What kind of cheeses do you like to use? And how about that decadent, barely cooked egg? Comment below, and rate my recipe.
If pizza IS on your mind, though, we have all the recipes you could ever want:
- Pesto Pizza with Goat Cheese, Kale, and Mushrooms
- Grilled Zucchini Pizza
- Gluten-Free Pizza with Zucchini and Caramelized Onions
Photos by Nikki Cervone, © Ask the Experts, LLC. ALL RIGHTS RESERVED. See our TOS for more details.
Nutritional information derived from a database of known generic and branded foods and ingredients and was not compiled by a registered dietitian or submitted for lab testing. It should be viewed as an approximation.
About Nikki Cervone
Nikki Cervone is an ACS Certified Cheese Professional and cheesemonger living in Pittsburgh. Nikki holds an AAS in baking/pastry from Westmoreland County Community College, a BA in Communications from Duquesne University, and an MLA in Gastronomy from Boston University. When she's not nibbling on her favorite cheeses or testing a batch of cupcakes, Nikki enjoys a healthy dose of yoga, wine, hiking, singing in the shower, and chocolate. Lots of chocolate.