I’ve always been a flour girl.

Wait, that didn’t come out right. I’m not known for carrying bags of wheat powder down wedding aisles or anything like that.
We’re talking tortillas here. And I’ve always preferred flour over corn.
Maybe it’s my love for quesadillas or crispy beef chimichangas. I adore the golden, crackly crust a flour tortilla’s exterior takes on when it’s griddled or fried to perfection. You can’t get that with corn.
However, I’ve recently endured a personal tortilla transformation, and I’d like to share it with you.
After working on a recipe for crunchy beef tacos with zesty homemade seasoning, I was left with half a bag of corn tortillas. While it would have been a breeze to repurpose these rounds as handheld beef vehicles, I was over tacos for the time being.
Instead, I was craving something even more creative.
As I pondered ways to breathe new life into these remaining tortillas, it hit me like a load of lightning-hot peppers:
Chilaquiles!
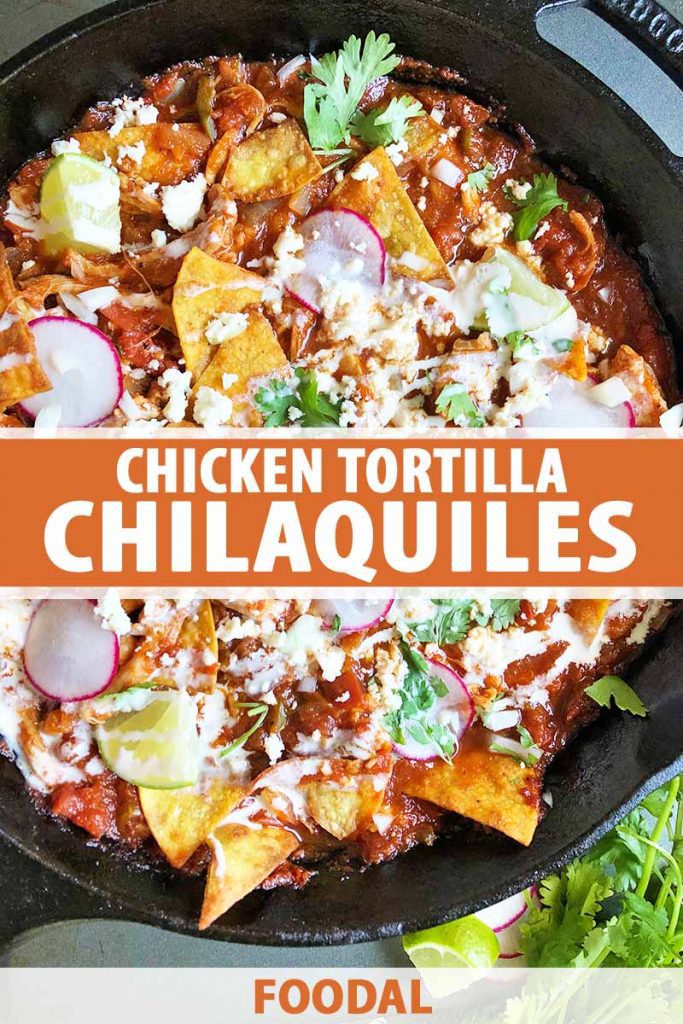
Simply put, this traditional Mexican dish consists of tortilla chips (stale ones can be brilliantly recycled here) simmered in a saucy mixture of tomatoes and spices.
Not only is the word “chilaquiles” fun to say, it’s a fabulous way to use up those corn tortillas you weren’t sure what to do with.
Aside from the above-described salty triangles and the tangy sauce, this Mexican masterpiece is as customizable as it gets. For a mega boost of protein, you can add anything from ground beef to carnitas to (my personal favorite) braised chicken thighs.
I use toasted dried guajillo chilies to enhance and brighten the tomato sauce with their tart, fruity flavor. They bring a mild, sweet heat and smokiness that can’t be matched. The base of the sauce is an aromatic blend of onions, garlic, and grassy jalapenos.
Though homemade chilaquiles could come together in a snap using leftover cooked chicken (or a shredded, store-bought rotisserie), I love building mine from the bottom up. This ensures the freshest, most powerful punch of flavor.
Not to mention, who doesn’t love a one-pot dish?
Sure, the chips get baked on a cookie sheet and you need a blender to puree the toasted chilies. But other than that, this baby is one-pot perfection!
I always reach for my cast iron pan when I’m making this type of dish, because you can do every step of the cooking process in it – from searing the chicken to braising to the actual serving.
Just make sure your guests know not to grab the handle… that thing’s gonna be sizzling hot!
When it comes to chilaquiles living their best life, texture is key.
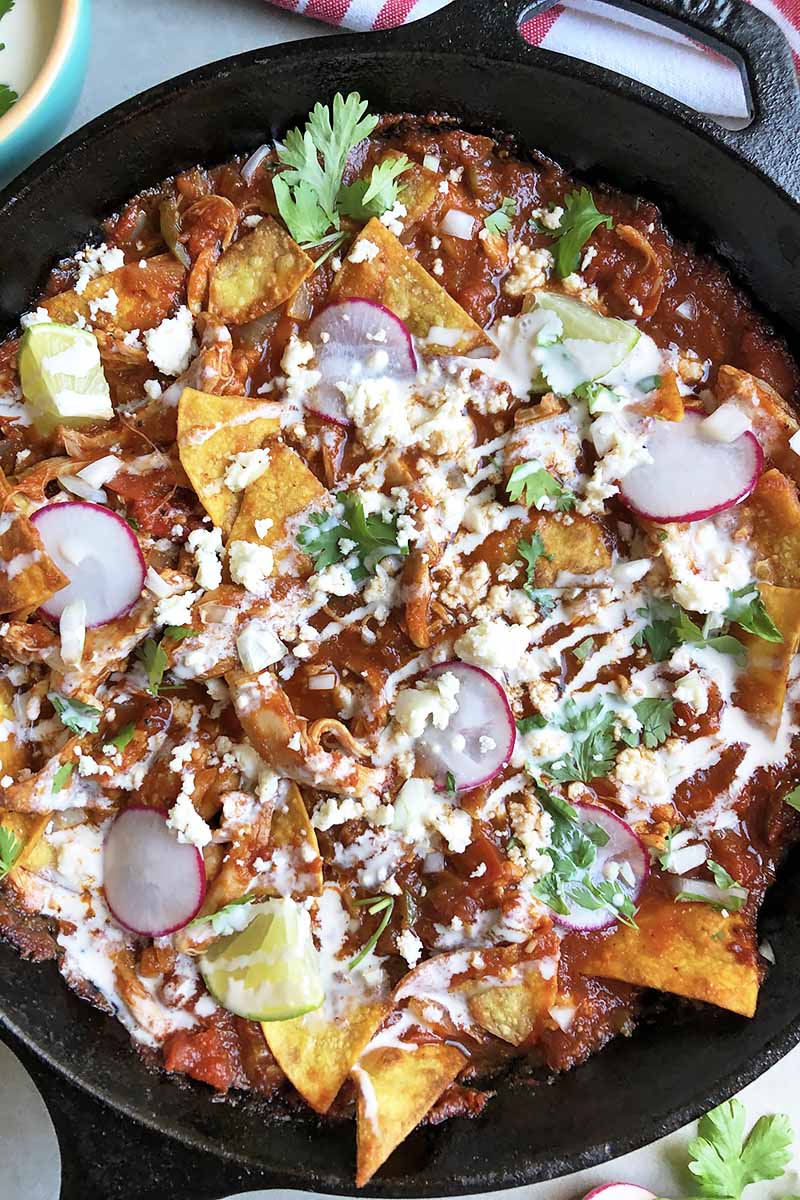
Sweet, raw onion and peppery shaved radishes added as a garnish contribute some brightness and crunch to every bite. I also leave several chips un-smothered in sauce, so there’s still some texture there.
For the oh-so-important salt factor, crumbly cotija cheese stands out as the star.
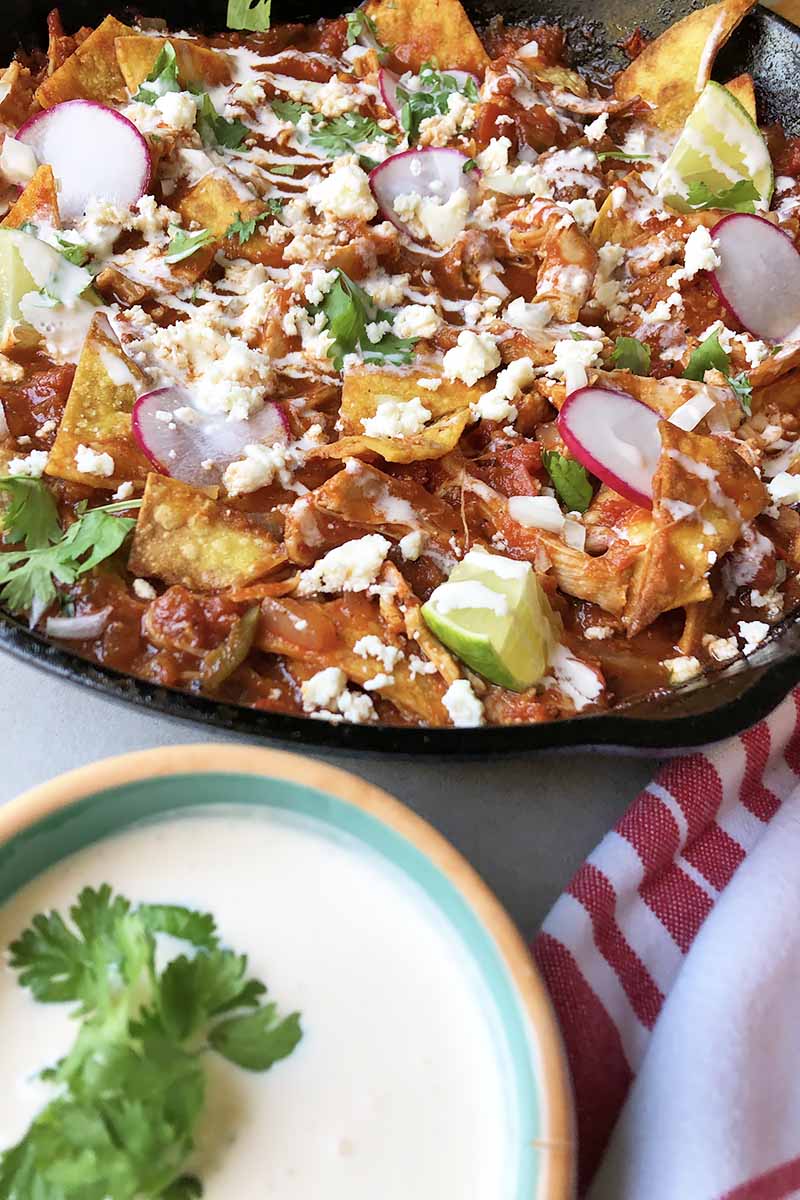
If you can’t find cotija or queso fresco at your local grocery store, a good-quality, briny feta will do the trick. Silky smooth Mexican crema is also preferred for drizzling on top, but sour cream is a solid sub.
As far as additional garnishes go, let your mind run wild with munchable toppings. Pickled jalapenos add a vinegary kick, and freshly diced tomatoes never hurt anyone.
If your serving time is closer to sunrise than sunset, throw a fried egg on top and watch the crowd go wild. And if you’re serving these as a late-night snack, a made-from-scratch margarita or two probably wouldn’t hurt.
Corn tortillas, where have you been all my life?
Love, Former Flour Girl.
Print
Chicken Chilaquiles
- Total Time: 1 hour, 30 minutes
- Yield: 4 servings 1x
Description
Turn to leftover tortillas and fruity guajillo peppers for these bold chicken chilaquiles. You’re going to love this Mexican comfort food classic.
Ingredients
- 8 corn tortillas, each cut into 8 triangles
- 2 teaspoons coarse salt, divided
- 5 tablespoons vegetable oil (or another neutral oil like canola or grapeseed), divided
- 4 dried guajillo chilies, stemmed and seeded
- 1 cup homemade or low-sodium chicken stock
- 1 28-ounce can crushed tomatoes
- 6 boneless, skinless chicken thighs (about 2 pounds)
- 1 teaspoon ground cumin
- 1 teaspoon garlic powder
- 1 teaspoon onion powder
- 1 teaspoon freshly ground black pepper
- 1 cup plus 1 tablespoon diced sweet onion, divided
- 1 jalapeno, ribs and seeds removed and diced
- 3 large cloves garlic, minced
- Juice of 1 lime, plus additional lime wedges for garnish
- 1 cup crumbled cotija cheese (or queso fresco)
- 1 ripe avocado, cut into chunks
- 2 radishes, trimmed and very thinly sliced
- 1/2 cup Mexican crema
- 2 tablespoons roughly chopped fresh cilantro
Instructions
- Preheat your oven to 415°F.
- In a large bowl, toss the tortilla triangles with 2 tablespoons of the oil until evenly coated. Arrange the triangles in an even layer on a rimmed baking sheet and bake, stirring chips once halfway through, until golden brown and crispy, about 10-12 minutes.
- Remove from oven and remove from pan. While the chips are still hot, season them with 1 teaspoon salt.
- Turn oven temperature down to 300°F.
- In a large, wide, heavy-bottomed skillet or cast iron pan, toast the guajillo chilies over medium heat until very fragrant and slightly darkened, about 5 minutes. Transfer to a food processor and add the stock. Puree until smooth, then strain through a fine mesh sieve into a large bowl. Stir in the crushed tomatoes and set the mixture aside.
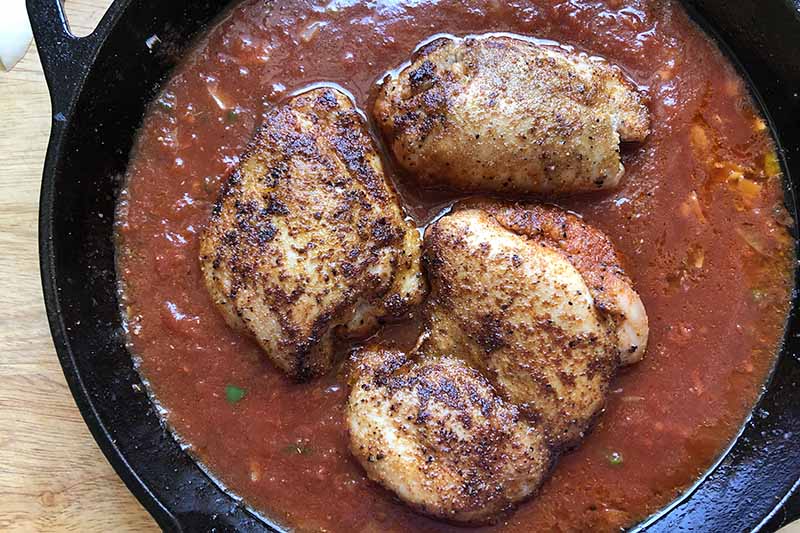
- In a small bowl, combine the cumin, garlic powder, onion powder, remaining salt, and ground black pepper. Season the chicken on both sides, gently patting down to ensure that the dry rub sticks. In the same cast iron pan used to toast the chilies, add 2 tablespoons oil and swirl to coat the pan. Place over medium-high heat. Sear the chicken until golden brown, about 2 minutes per side. Set aside on a plate.
- Lower the heat to medium, add the remaining tablespoon of oil, and swirl to coat the pan. Add the onions, jalapenos, and garlic. Saute until fragrant and lightly golden, about 1 minute. Deglaze the pan with the tomato mixture, scraping up any brown bits from the bottom. Return the chicken to the pan and braise until its cooked through and reaches an internal temperature of 165°F, about 30-35 minutes.
- Remove the chicken from the pan and use two forks to shred the meat. Meanwhile, return the pan with the sauce back to the stove over high heat. Reduce the sauce by about 2/3 in volume, then add the lime juice. Season to taste with salt, and then fold in the chips and shredded chicken.
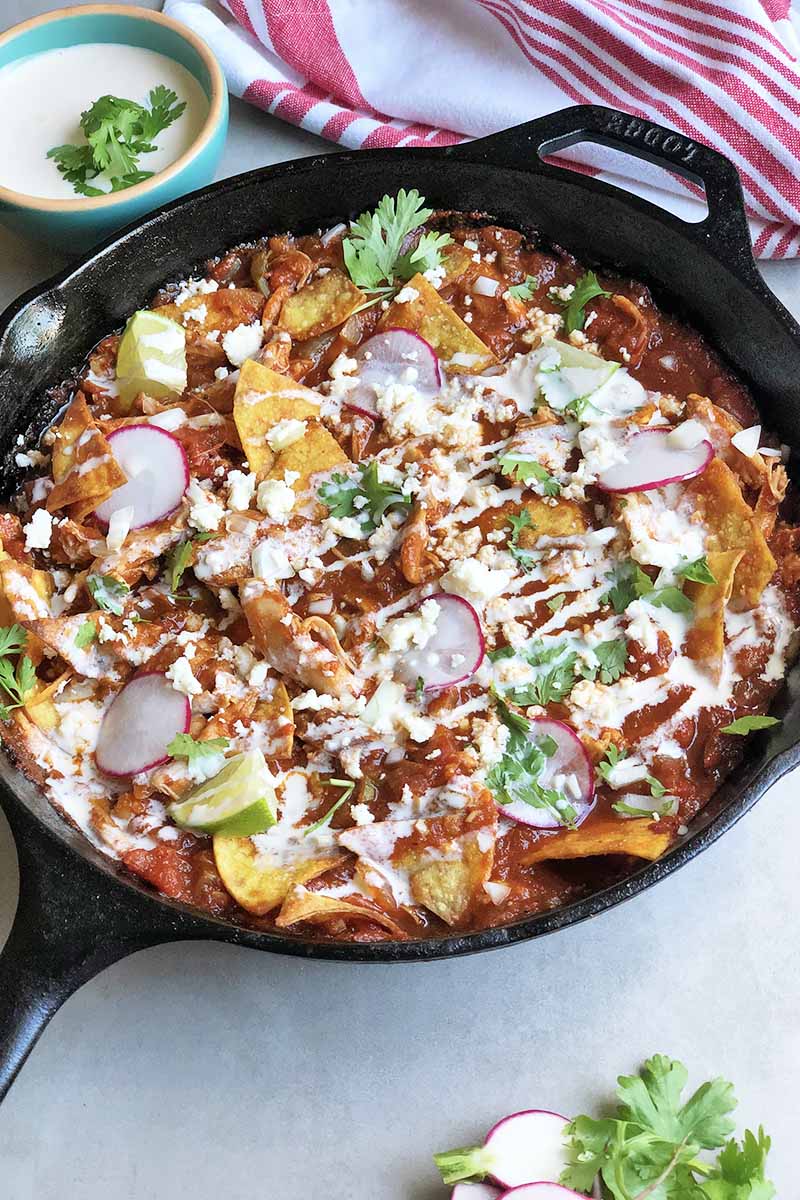
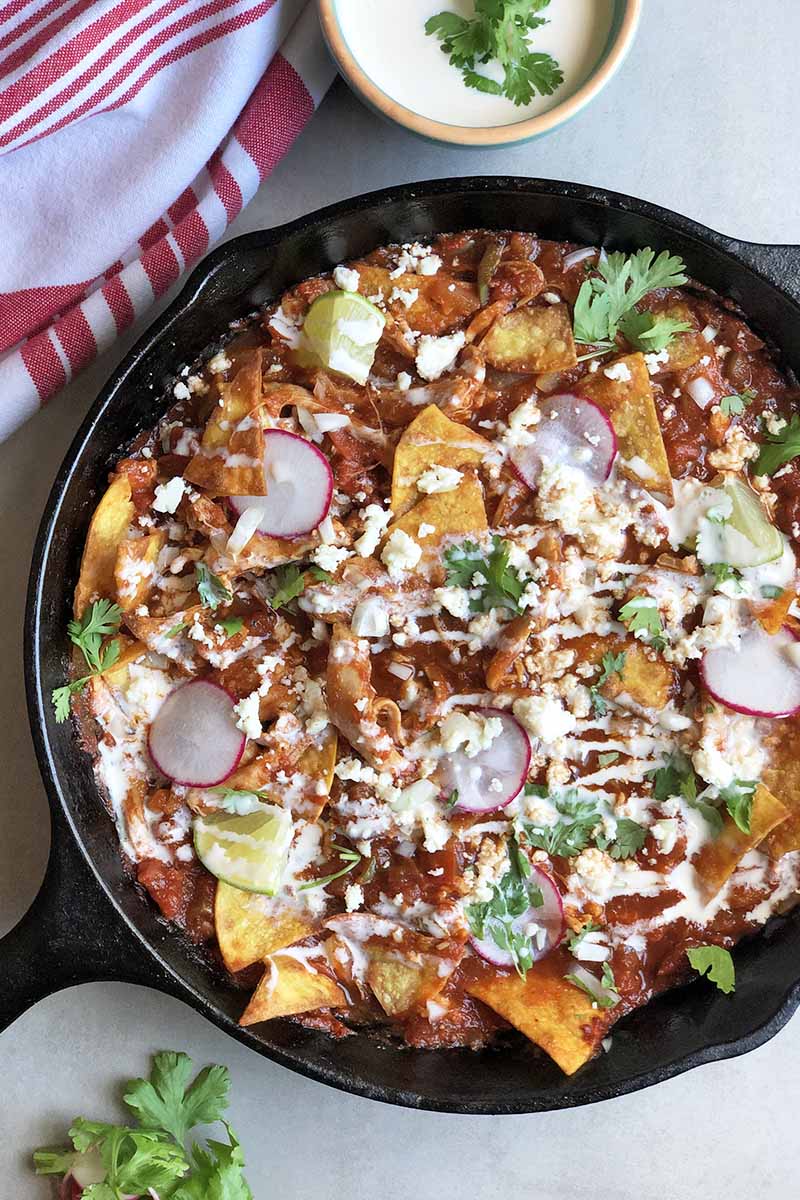
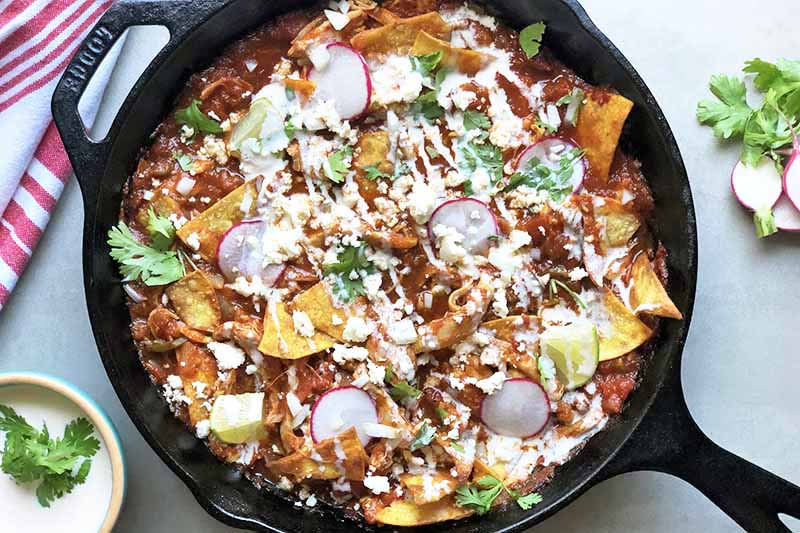
- Either divide the chilaquiles among plates, or serve directly from the skillet and garnish with the cotija, avocado, radishes, crema, and cilantro. Serve with additional lime wedges on the side.
- Prep Time: 25 minutes
- Cook Time: 1 hour, 5 minutes
- Category: Chilaquiles
- Method: Stovetop/Baking
- Cuisine: Mexican
Cooking By the Numbers…
Step 1 – Slice and Bake the Tortillas
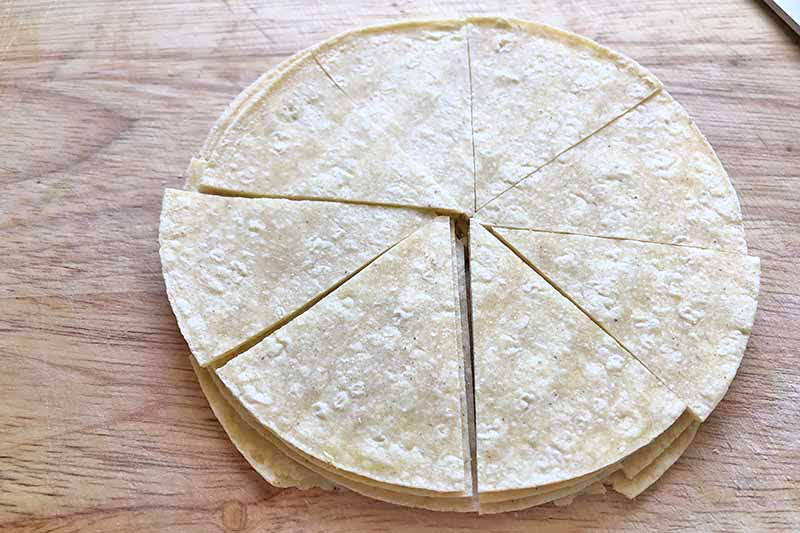
In a large bowl, toss the tortilla triangles with 2 tablespoons of the vegetable oil until they are evenly coated. Arrange the triangles in an even layer on a rimmed baking sheet.
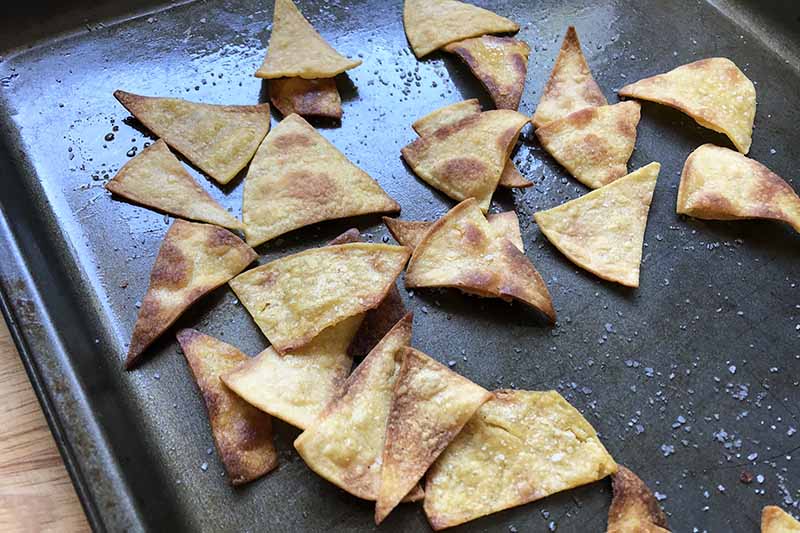
Bake, stirring the chips once halfway through, until they are golden brown and crispy, about 10-12 minutes. Remove from the oven and transfer to a pan or serving platter
While the chips are still hot, season them with 1 teaspoon of the salt.
Step 2 – Stem, Seed, and Toast the Guajillo Chilies
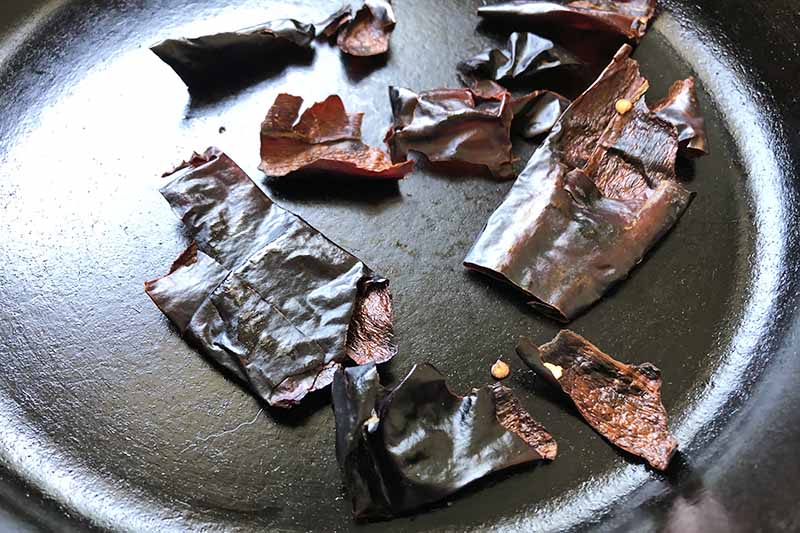
Remove the stems, seeds, and ribs from the dried guajillo chilies. Some might need to be broken apart or sliced into pieces in order to get all the seeds out.
In a large, wide, heavy-bottomed skillet like a cast iron, toast the guajillo chilies over medium heat until they very fragrant and slightly darkened, for about 5 minutes.
Step 3 – Puree the Chilies and Mix in the Crushed Tomatoes
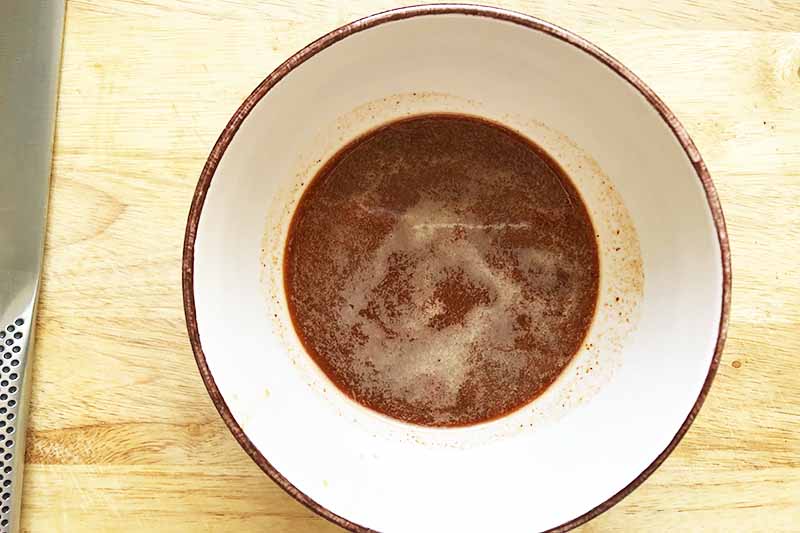
Transfer the toasted chilies to a food processor and add the stock. Puree until smooth, and then strain through a fine mesh sieve into a large bowl.
Stir in the crushed tomatoes and set the mixture aside.
Step 4 – Season and Sear the Chicken, and Chop the Veggies
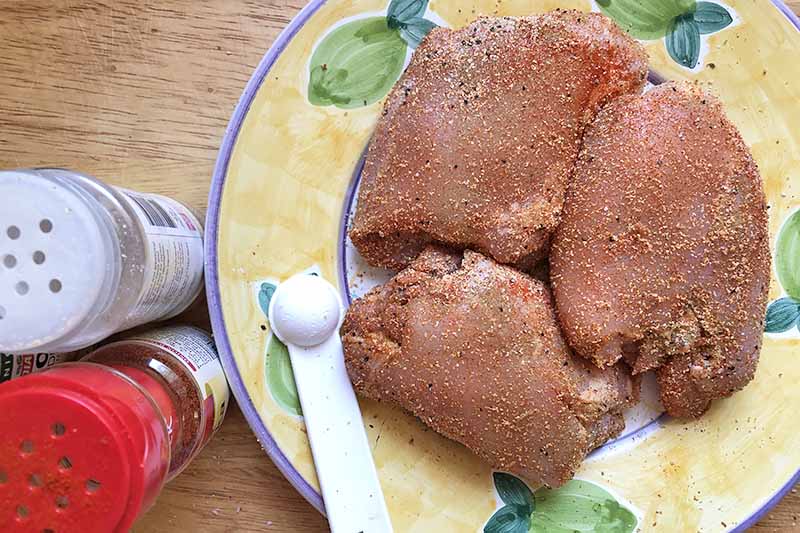
Your oven should still be on at this point. Turn it down to 300°F and wait for it to cool to this temperature before you proceed with the recipe.
Season the chicken on both sides, gently patting down to ensure that the dry rub sticks, with a combination of ground cumin, garlic powder, onion powder, the remaining salt, and the black pepper (freshly cracked, please!).

In the same cast iron pan that you used to toast the chilies, add 2 tablespoons of the oil and place it over medium-high heat. Swirl to coat the pan.
Sear the chicken until it’s golden brown, about 2 minutes per side, and then set it aside on a plate.
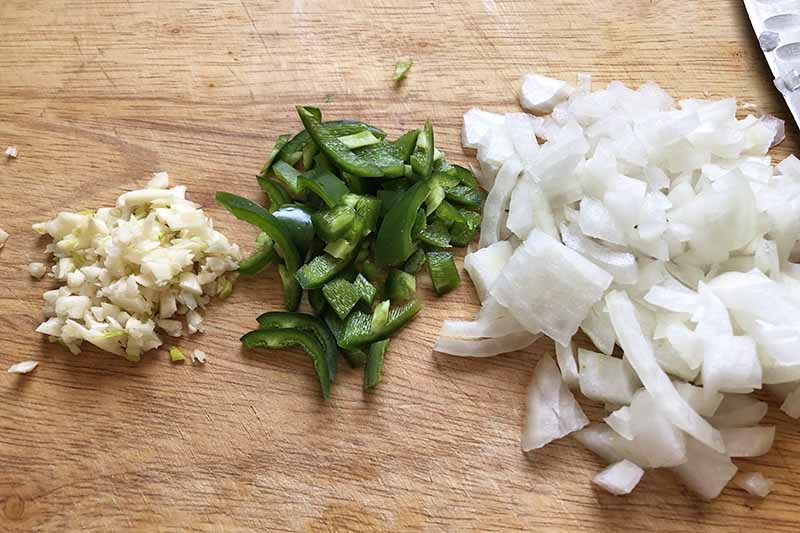
Stem and seed the jalapeno, remove the ribs, and dice it. Dice the onions and mince the garlic.
Step 5 – Saute the Veggies and Deglaze the Pan
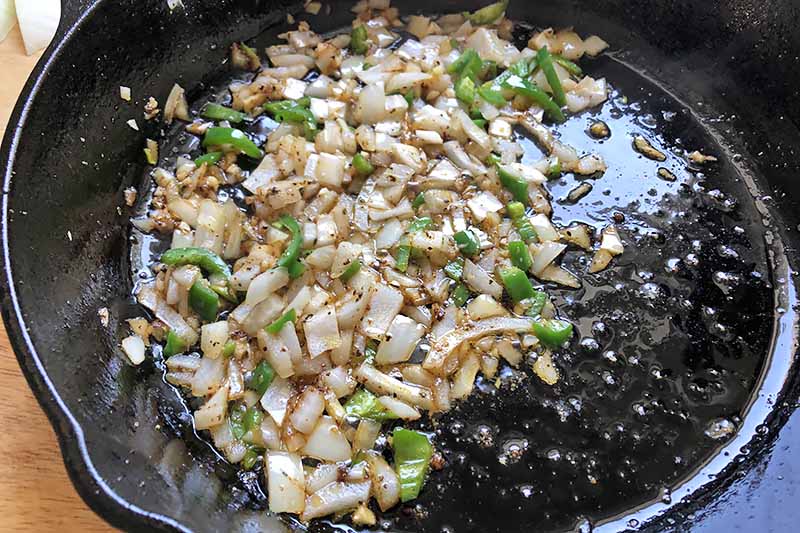
Lower the heat to medium, add the remaining tablespoon of oil, and swirl to coat the pan.
Add the onions, jalapenos, and garlic. Saute until fragrant and lightly golden, about 1 minute.
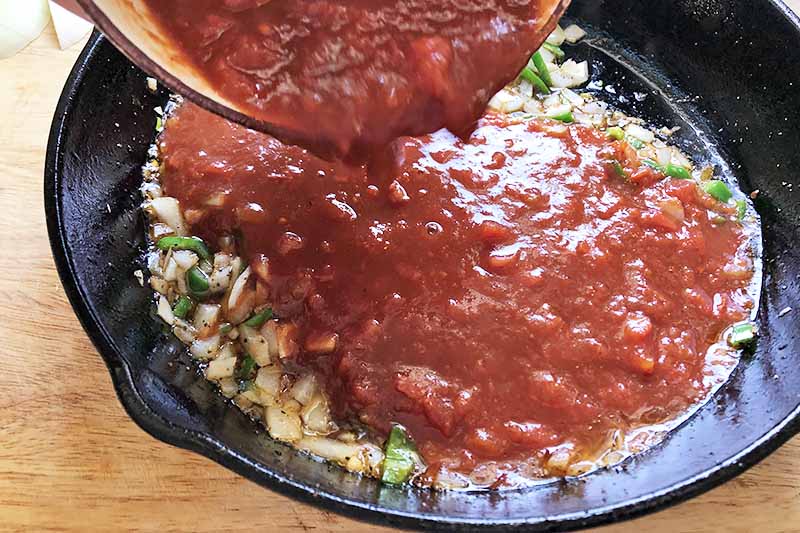
Deglaze the pan with the tomato-chili-stock mixture, scraping up any brown bits – or fond – from the bottom.
Step 6 – Return the Chicken to the Pan and Braise
Return the chicken to the pan and braise until it’s cooked through and reaches an internal temperature of 165°F, as indicated on a meat thermometer inserted into the thickest part of the meat. This will take about 30 to 35 minutes.
Step 7 – Shred the Meat and Reduce the Sauce
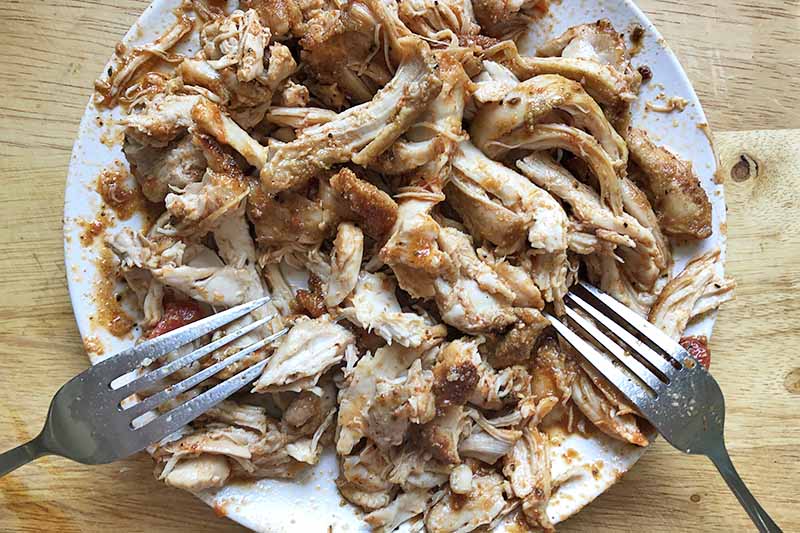
Remove the chicken thighs from the pan and transfer them to a cutting board. Use two forks to shred the meat.
Meanwhile, return the pan with the sauce back to the stove and place it over high heat. Reduce the sauce to about 2/3 of its original volume, and then stir in the lime juice.
Step 8 – Toss the Chicken and Chips with the Sauce and Garnish
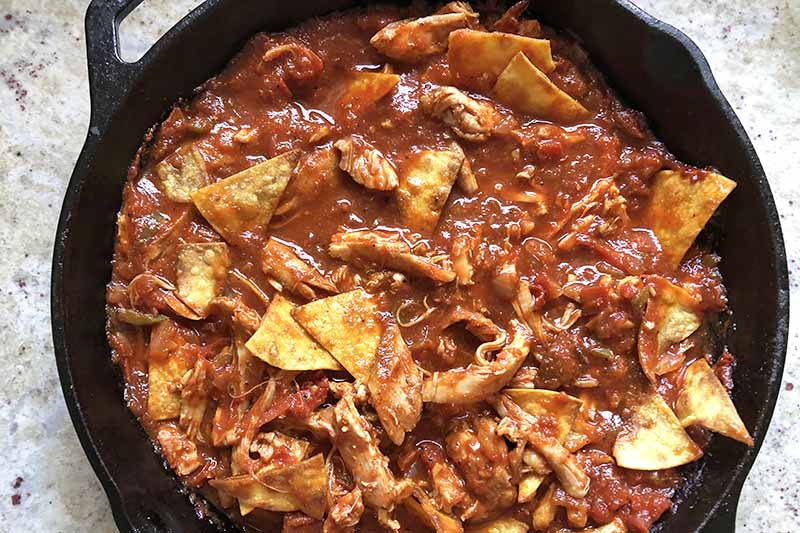
Season the sauce to taste with additional salt if needed , and then fold in the chips and shredded chicken. Leave some of the chips uncovered so they will stay crunchy.
Either divide the chilaquiles among serving plates, or serve this dish directly from the skillet. Garnish with the cotija cheese, avocado, radishes, crema, and cilantro. Serve with additional lime wedges on the side.
Chilaquiles, You Complete Me
Just when I thought I wouldn’t be able to figure out how to incorporate a surfeit of corn tortillas into my life, along came these chilaquiles, and they really changed my perspective.
I always have several varieties of dried chilies on hand, but you can also go green with your sauce. Tart, citrusy tomatillos like you’d use to make salsa verde make a refreshing change-up to sub in for traditional red tomatoes and guajillo chilies.
To throw together whatever variety of chilaquiles your stomach desires in thirty minutes flat, packaged tortilla chips and pre-cooked chicken will be your best friends.
If this dish didn’t lower your corn tortilla inventory to zero, break out the salsa and peruse our Mexican and Tex-Mex recipes for even more dinner inspiration. Here are a few of our favorites to try next:
How will you put your personal spin on a pile of chilaquiles? Amp up the spice with chorizo and extra chilies? Toss in some black beans for good measure? Share your tasty twists in the comments below! And don’t forget to give this recipe a five-star rating if you loved it.
Photos by Fanny Slater, © Ask the Experts, LLC. ALL RIGHTS RESERVED. See our TOS for more details. Originally published on April 11, 2011. April 1, 2020.
Nutritional information derived from a database of known generic and branded foods and ingredients and was not compiled by a registered dietitian or submitted for lab testing. It should be viewed as an approximation.
About Fanny Slater
Fanny Slater is a home-taught food enthusiast based in Wilmington, North Carolina who won the “Rachael Ray Show” Great American Cookbook Competition in 2014, and published her cookbook “Orange, Lavender & Figs” in 2016. Fanny is a food and beverage writer, recipe developer, and social media influencer. She was a co-host on the Food Network series “Kitchen Sink,” was featured on Cooking Channel’s longtime popular series “The Best Thing I Ever Ate,” and continues to appear regularly on the “Rachael Ray Show.”