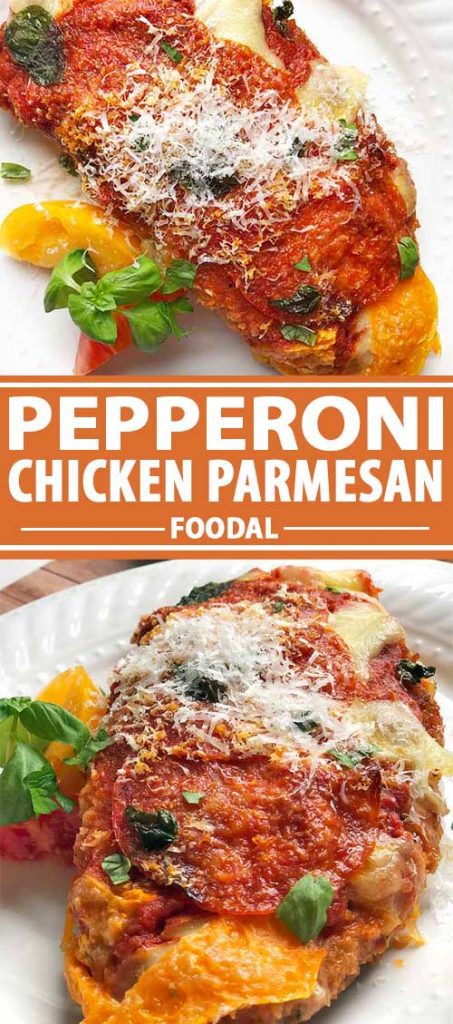
If pepperoni is the holy grail of pizza toppings, and chicken parmesan is the king of Italian classics, what happens when you marry the two?
Dearly beloved in your belly? I’d like to think so.
I’ve never met a pizza garnish I didn’t like, but somehow, I always find my way back to pepperoni. If it’s a grilled veggie, Hawaiian, or even white pie on the menu, without the addition of these sassy, salty rounds, it feels like something is missing.
Did I just admit to putting pepperoni instead of ham or Canadian bacon on my Hawaiian pizza? Oh yes, I did.
Let’s talk for a moment about why the spicy deli meat is so utterly addictive.
First, back to the basics. Pepperoni is an American variety of salami whose fine grind of cured pork and beef gives it a soft, silky texture when eaten cold.
As much as I adore pepperoni, however, I’m not as apt to sneak slices straight from the deli drawer as I am with other cured meats. My husband will gleefully eat them by the handful out of the fridge, but I prefer the magic that happens when the meat meets the heat.
That moment when the outer edges begin to curl up and crackle, and the middle wells up with grease – that’s when pepperoni enters its Goldilocks stage.
Slightly smoky, sumptuously crisp, and salty. How could anyone not be addicted to pepperoni?
I top my pizzas with it. I stuff it in bread. I even layer it into lasagna.
But enough about the meat. I bet you’re wondering when the parmesan treatment enters the room….
Knock, knock.
Okay, here we go.
As much as I’d love to stuff pizza into my face hole every day, I try to keep my diet balanced. I’m a believer in moderation.
Also, the previous two sentences don’t apply to weekends.
Removing the uber-carby crust from my imagined pizza and swapping in a less-carby base of breaded chicken like what is used in a classic chicken parmesan dish is at the core of the brilliance of this recipe.
It’s basically a pizza on top of a piece of chicken, which essentially means less carbs, which fundamentally means… more wine?
Again, it’s all about balance.
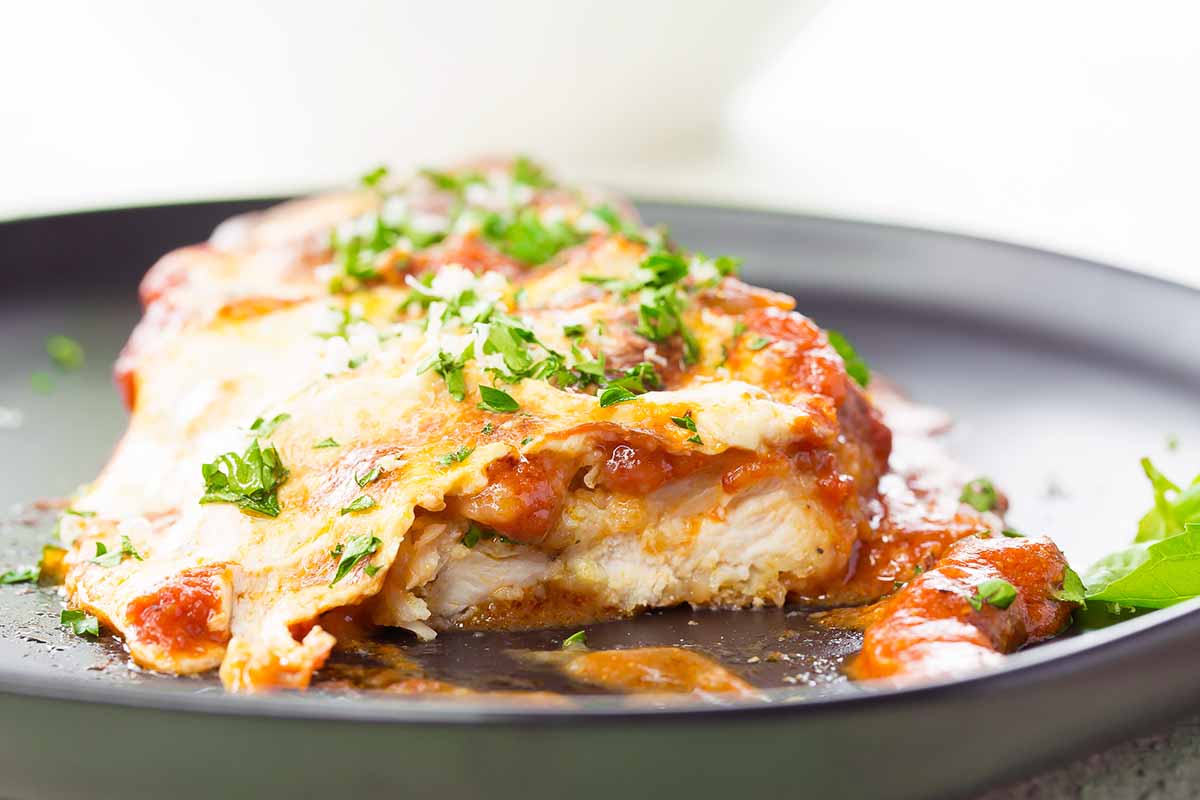
Instead of just flicking several slices of the crimson-colored meat on top of standard, deep-fried cutlets, my spin on the dish incorporates several fresh elements for flavor and texture.
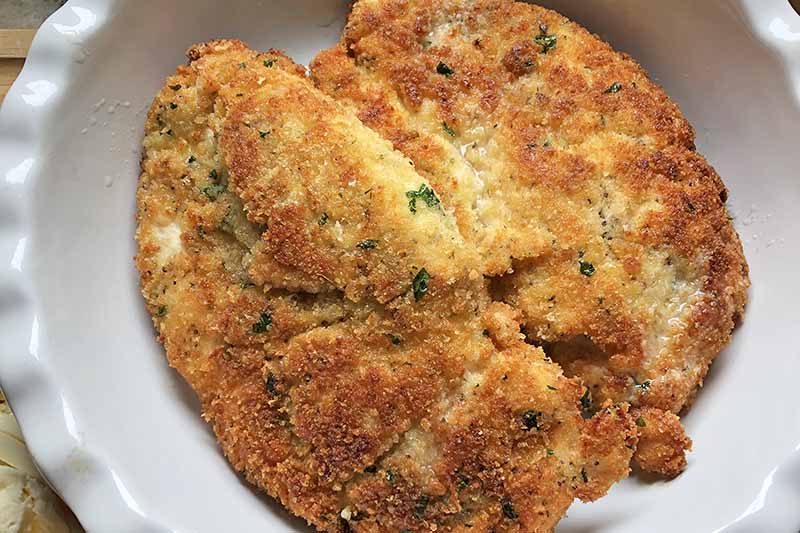
For starters, I’m an advocate of shallow-frying. I’m a big fan of this method for many chicken dishes, especially other Italian classics like cacciatore and piccata. You can still achieve a golden crust that clings onto chicken cutlets without dunking the entire breast in a vat of oil. Ouch. Anyone else just cringe?
I also prefer cooking protein until it’s almost done on the stovetop, and then letting it hit the finish line in the oven. It somehow always makes for a better seared, juicier piece of meat.
This goes for steak, chicken, chops, you name it.
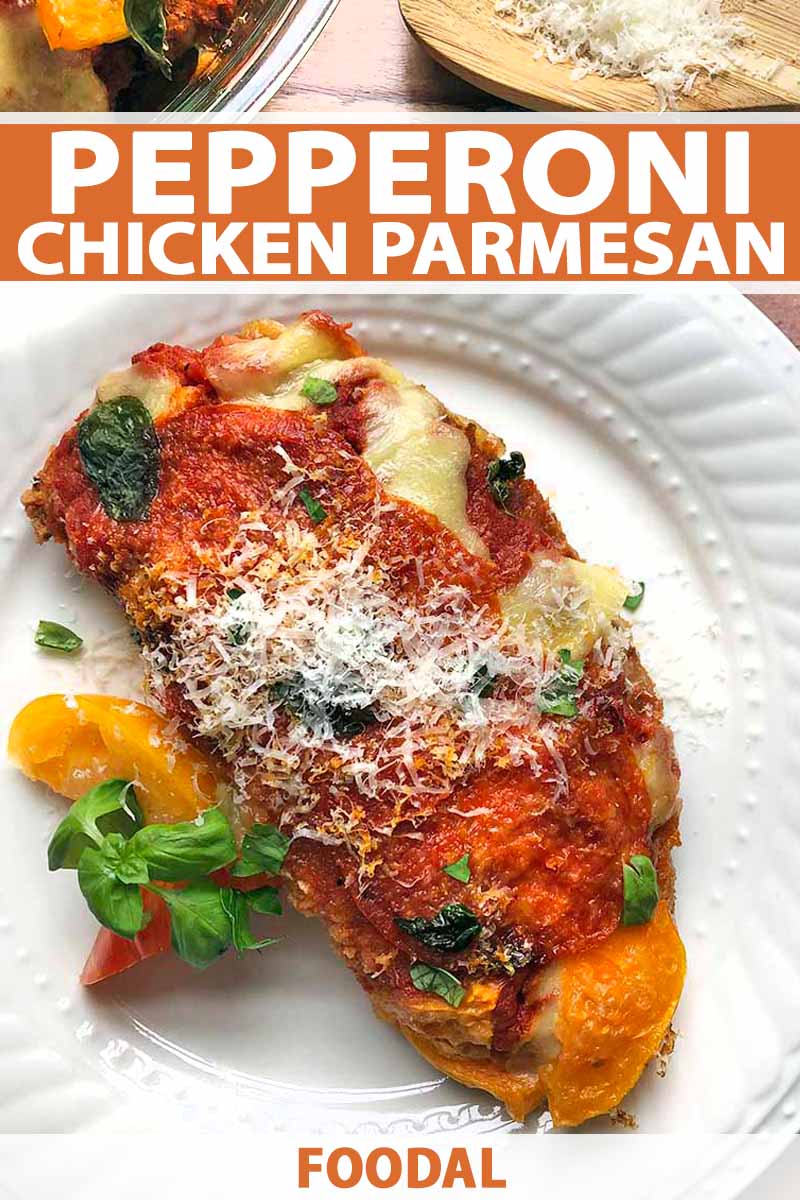
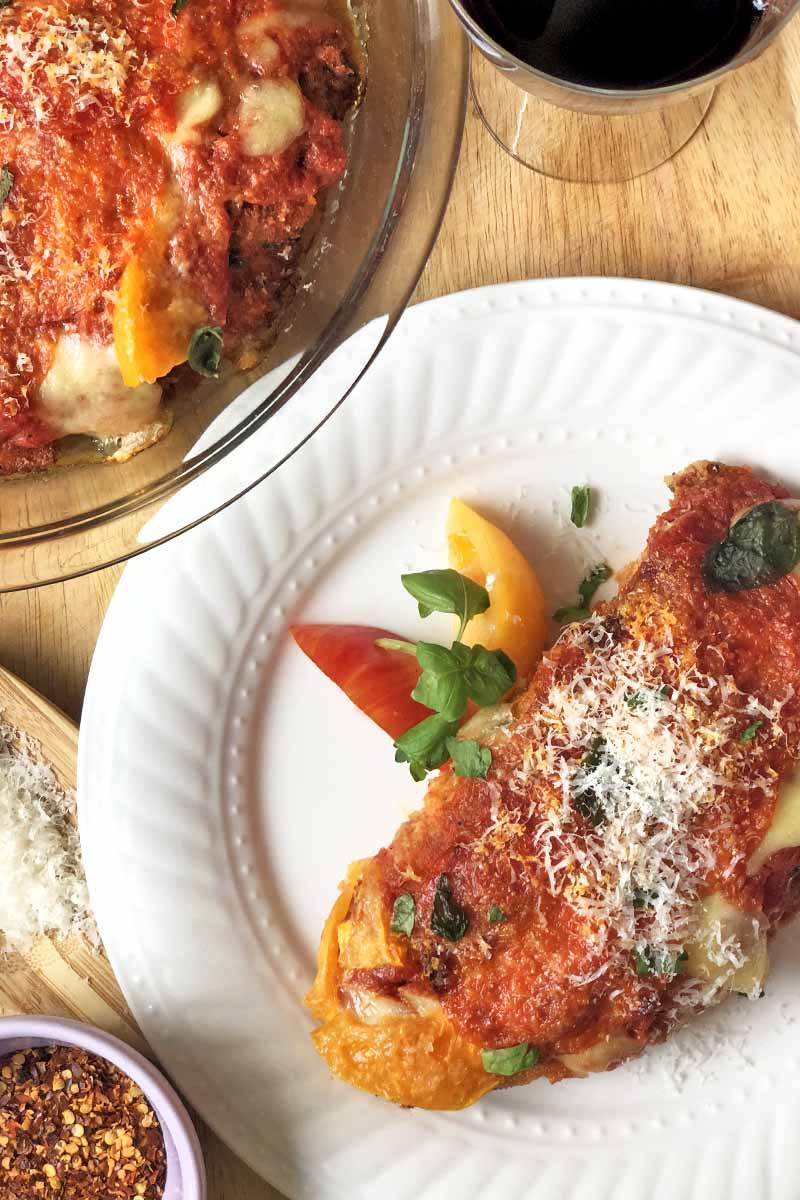
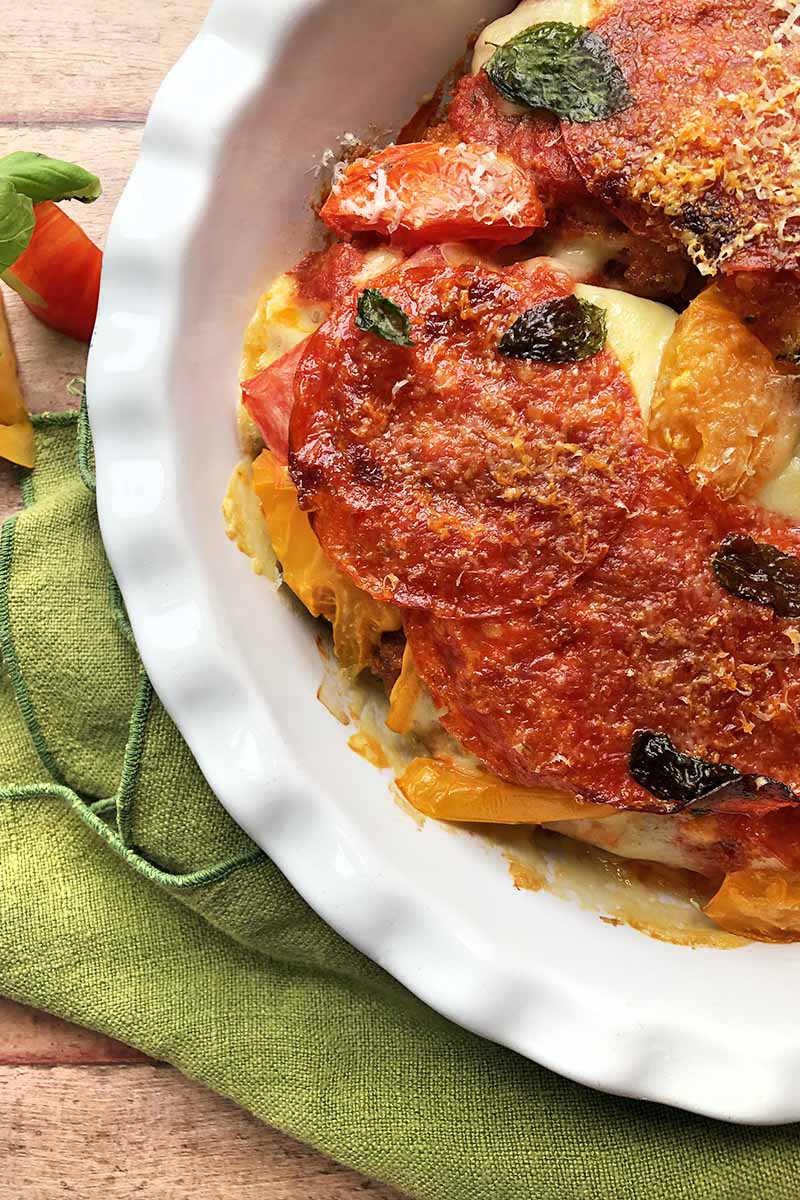
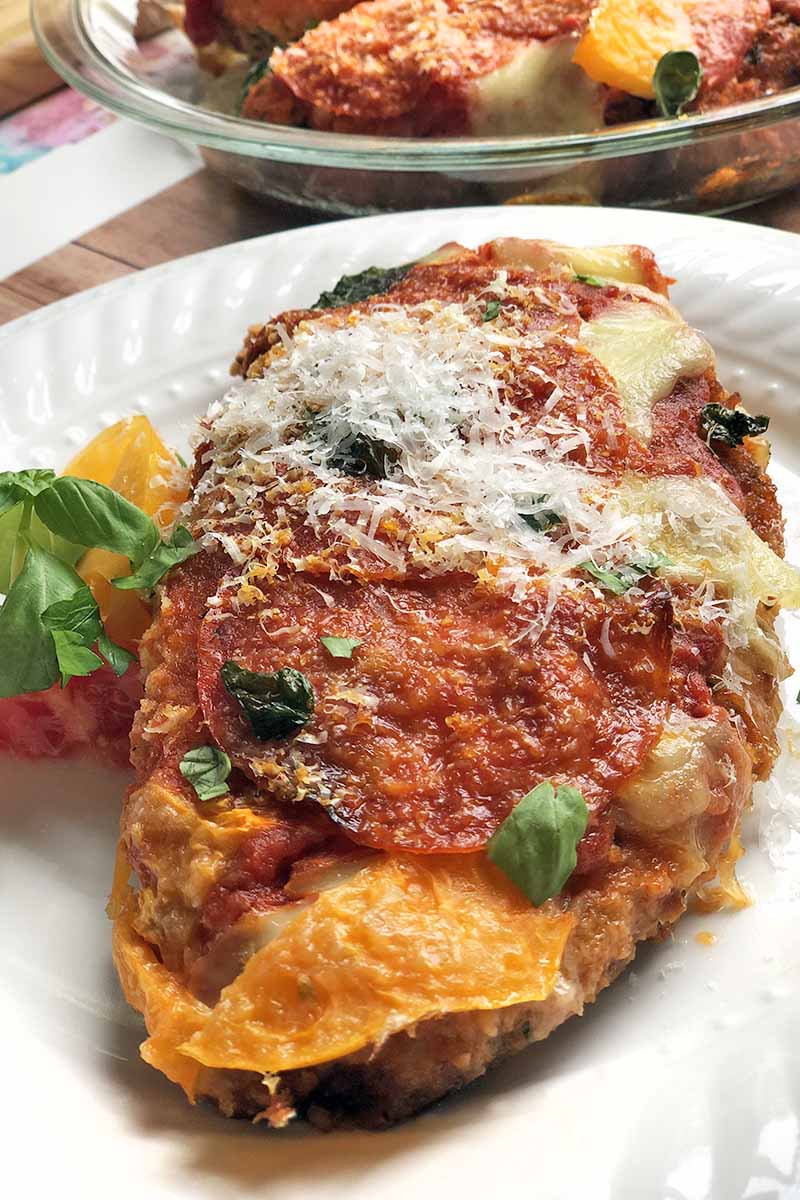
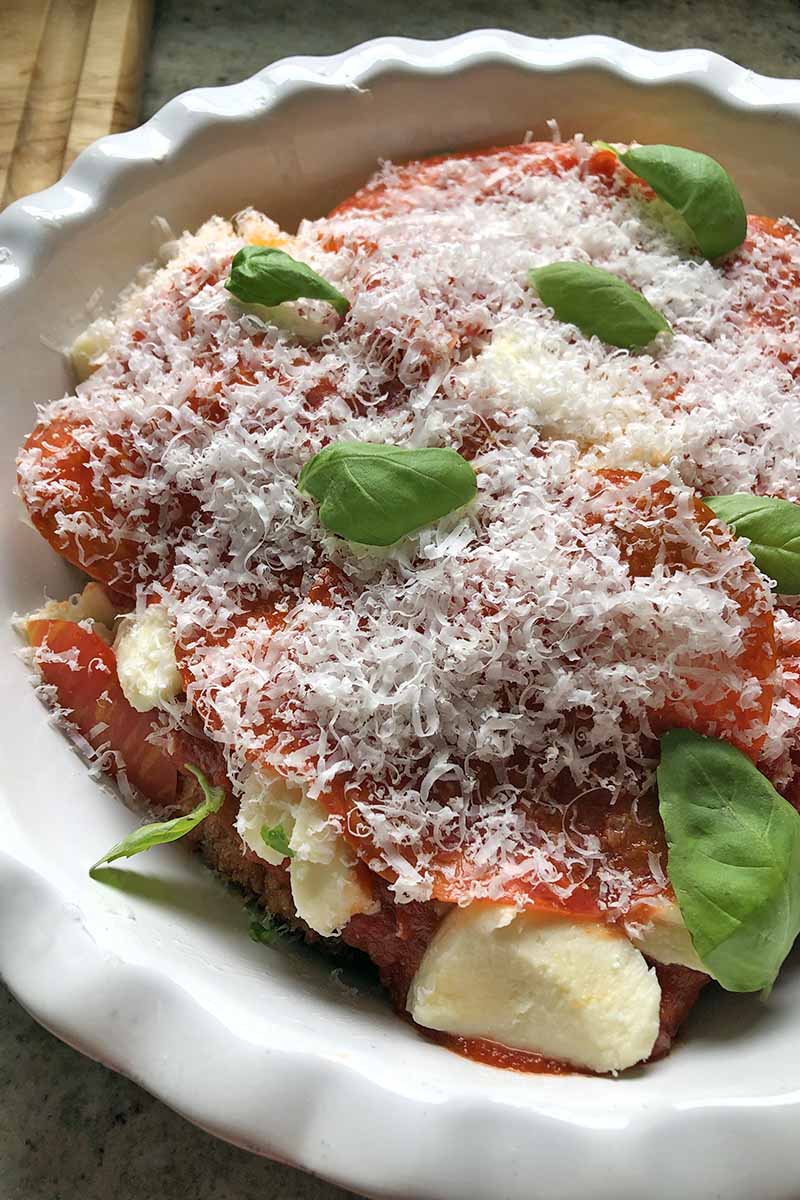
I add a handful of salty Parmigiano-Reggiano right into the breading so that the nutty, sharp flavor sings its way through the entire dish. For that comforting gooey factor, I reach for fresh mozzarella every time I’m preparing any kind of “parmesan” dish.
Not only does the fresh mozzarella have a bit more tanginess than the kind that comes in block form wrapped in plastic, once it bakes, I think it’s stringier and less rubbery than the pre-shredded stuff. It’s also fun to snack on while you’re prepping dinner.
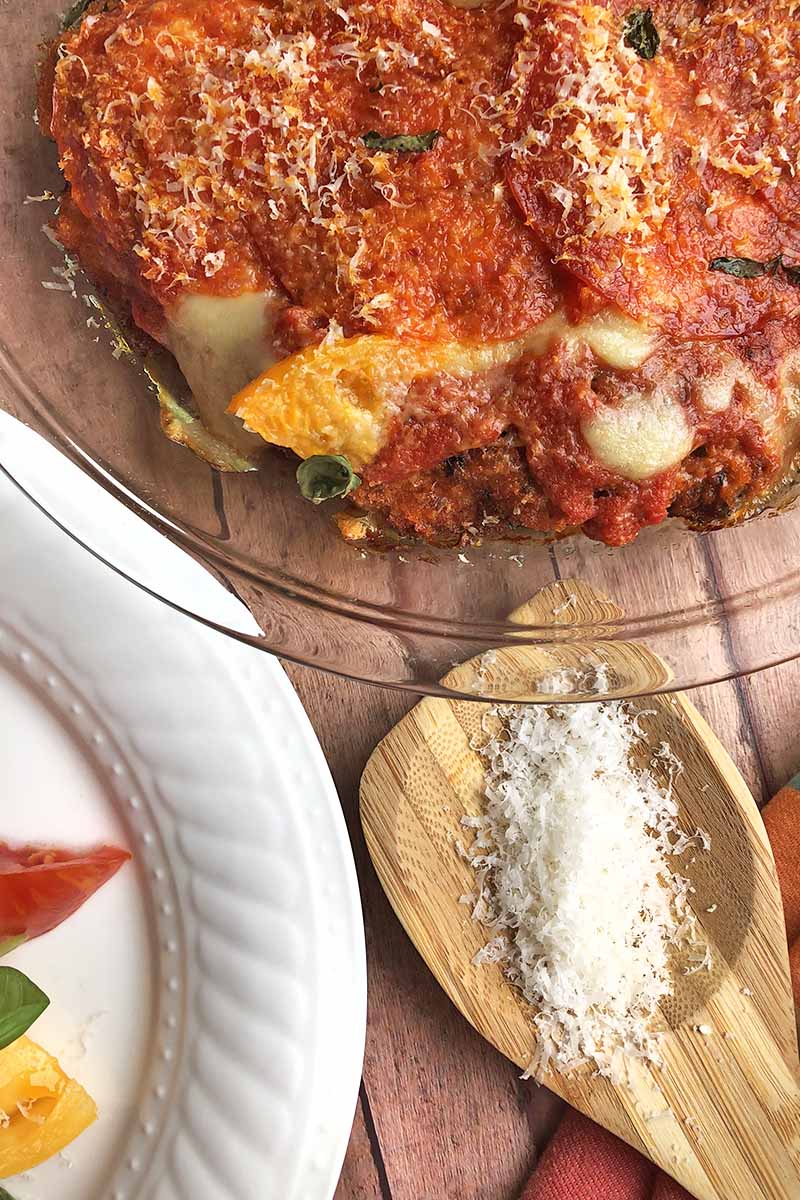
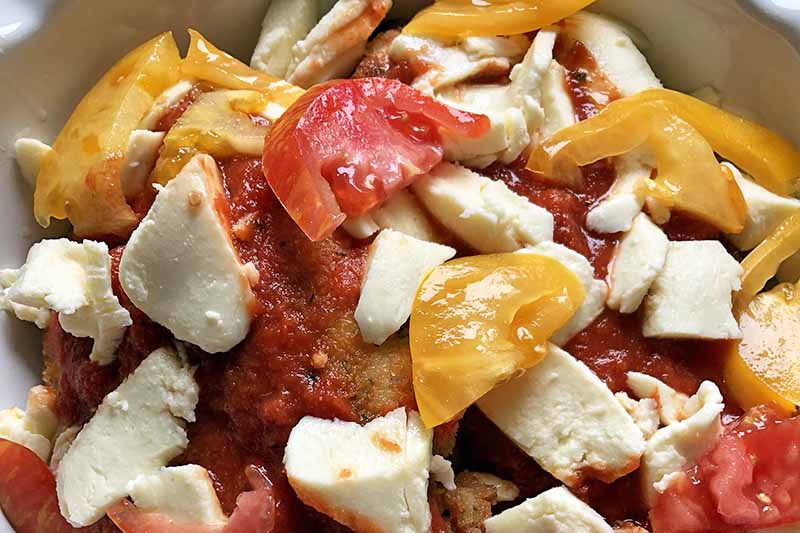
Once the mozz has been mounded on top, I slice the freshest tomatoes I can find (heirlooms if it’s summertime) and add them to the mix. A good-quality marinara is a joy to eat, and a homemade one is even better. But the additional accompaniment of sweet, juicy, fresh tomatoes makes for some seriously delicious bites that are bursting with flavor.
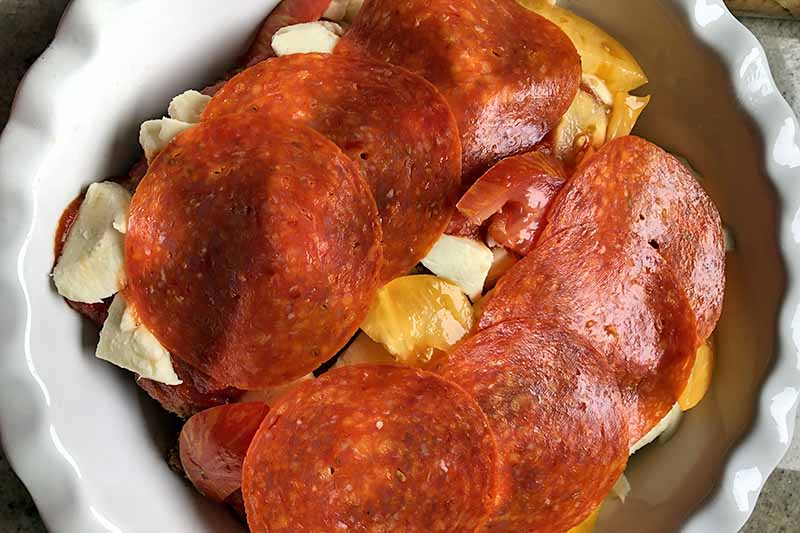
I like my pepperoni to be as close to the surface as possible, so it gets a solid kiss of fire. Add some extra cheese and fresh, fragrant basil leaves and you’ve got yourself a chicken parmesan that doubles as a pizza stand-in that also kind of thinks it’s a casserole.
Italian food that’s going through an identity crisis? I’m so in.
Print
Pepperoni Chicken Parmesan
- Total Time: 1 hour
- Yield: 6-8 servings 1x
Description
It’s time to put some pep in your chicken parm. Try our zesty spin on the Italian-American classic, made with garlicky pepperoni and fresh sliced tomatoes.
Ingredients
- 2 large eggs
- 1/4 cup half-and-half
- 1/2 cup all-purpose flour
- 1 1/2 teaspoons coarse salt, divided
- 1 1/2 teaspoons freshly ground black pepper
- 1 1/2 cups Italian seasoned breadcrumbs
- 1/2 cup freshly grated Parmigiano-Reggiano cheese, divided
- 3 tablespoons chopped fresh parsley, divided
- 4 boneless skinless chicken breasts, pounded to about ¾ inch thick (about 2 pounds)
- About 1 cup neutral oil (for frying), such as vegetable or canola
- 2 cups marinara sauce, store-bought or homemade
- 8 ounces fresh mozzarella, sliced
- 10–12 thin slices deli pepperoni (about 3 ounces)
- 2 small Roma or heirloom tomatoes, sliced
- 2 tablespoons gently torn fresh basil leaves, divided
Instructions
- Preheat the oven to 375°F.
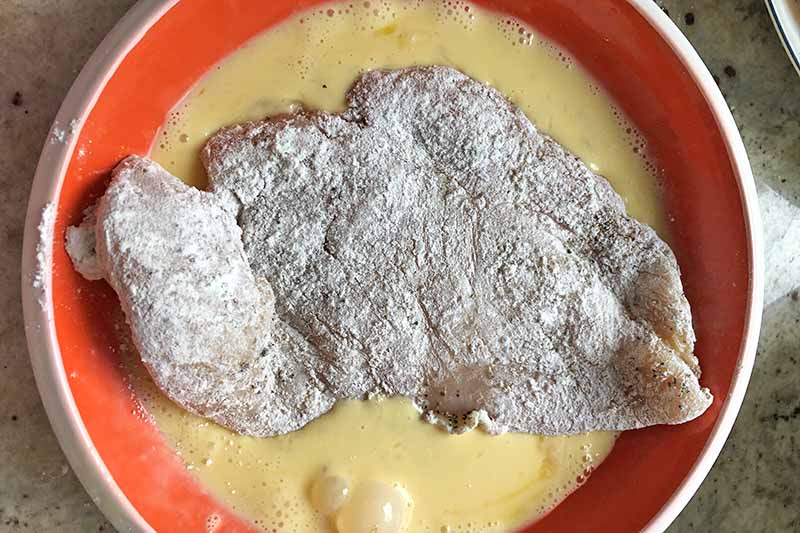
- Set up an assembly line of three shallow, wide bowls with a large clean plate ready at the end. In the first bowl, whisk the eggs with the half-and-half. In the second, mix the flour with 1/2 teaspoon each salt and pepper. In the third bowl, mix together the breadcrumbs with 1/4 cup Parmigiano-Reggiano and 2 tablespoons chopped fresh parsley.
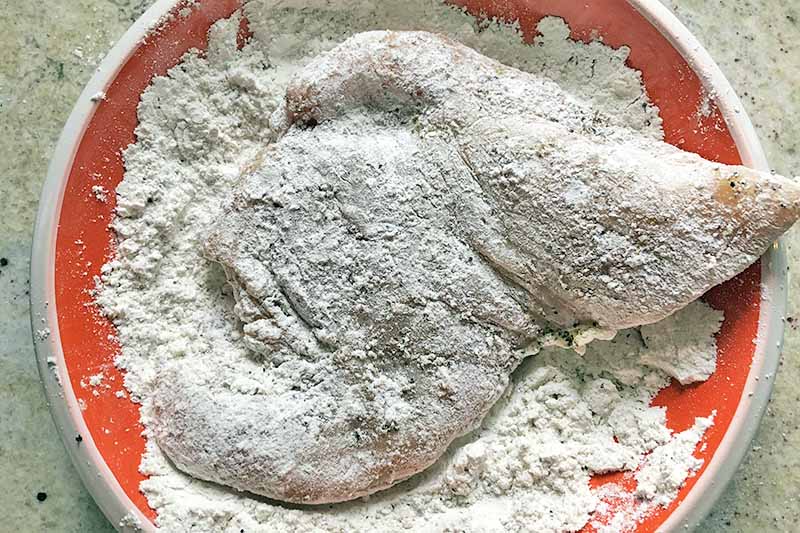
- Season the flattened chicken breasts on both sides with the remaining salt and pepper, and dredge in the seasoned flour. Shake off any excess. Dip the chicken into the egg, and then into the breadcrumb-cheese mixture, pressing down to help the crumbs adhere. Place the breaded chicken breasts on the clean plate at the end of the assembly line.
- In a large, heavy-bottomed skillet or cast iron pan, heat the oil over medium heat until shimmering. Working in batches, shallow-fry the chicken until golden brown, about 3-5 minutes per side. Transfer to a paper-towel-lined plate to drain any excess oil, and then move to a wire rack while you fry the remaining pieces.
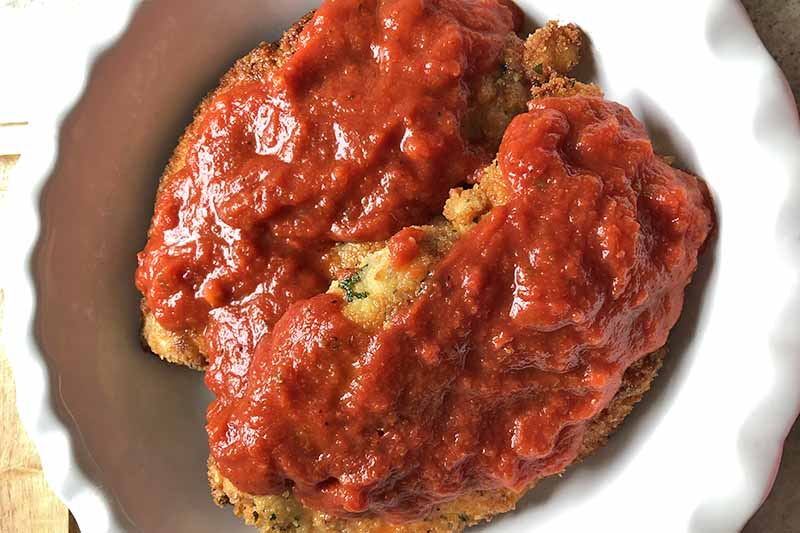
- In a large 9-by-13-inch casserole dish, or two 8- or 9-inch glass or ceramic pie dishes, add the chicken in a single layer. Top with even portions of the marinara, mozzarella, tomatoes, pepperoni, Parmigiano-Reggiano, and about 1 tablespoon of the basil.
- Bake until the chicken is cooked through, the cheese is melted and bubbly, and the edges of the pepperoni are slightly crisp, about 15-20 minutes. Transfer the chicken to plates, garnish with the remaining fresh parsley and basil, and serve.
- Prep Time: 30 minutes
- Cook Time: 30 minutes
- Category: Chicken
- Method: Baking
- Cuisine: Italian
Cooking By the Numbers…
Step 1 – Preheat Oven, Pound Chicken Breasts, and Prepare Herbs and Cheese
Preheat the oven to 375°F.
Wrap chicken breasts individually in plastic wrap and place on a cutting board or clean work surface. Using either the flat side of a meat mallet or the long side of a pestle (from a mortar and pestle set), starting in the center and working out to the edges, lightly pound the chicken until it reaches an even thickness of about ¾ inch.
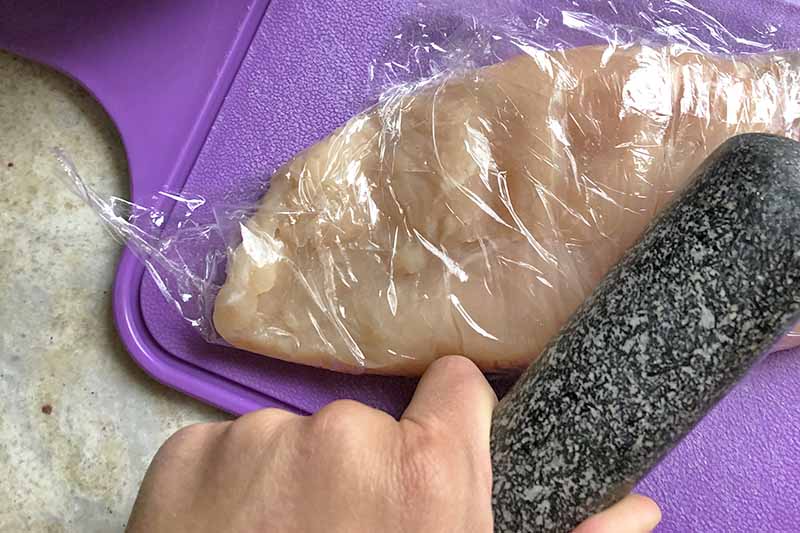
You can also flatten two pieces at the same time by placing them side by side between two sheets of plastic or parchment paper.
Butterflying each chicken breast first (slicing it in half without cutting completely through, leaving a hinge along one of the long sides so it opens like a book) can help to facilitate turning your breasts into cutlets as well. Butterfly before pounding, and you’ll have less work to do!
Rough chop the parsley and gently tear the basil leaves, making sure not to bruise them. Grate the Parmigano-Reggiano and slice the mozzarella into chunks or slices.
Step 2 – Set Up Assembly Line
Set up an assembly line of three shallow, wide bowls with a large clean plate (or baking sheet lined with parchment paper for easier cleanup) ready at the end.
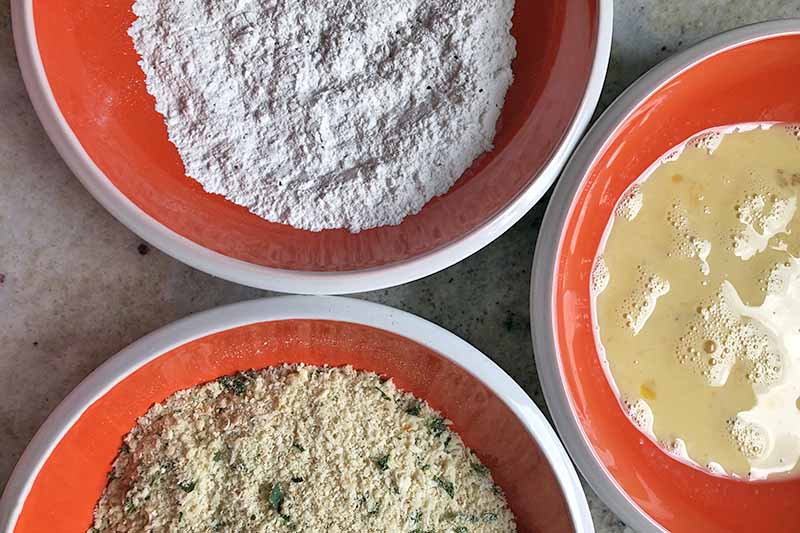
In the first bowl, whisk the eggs with the half-and-half. In the second, mix the flour with 1/2 teaspoon each of salt and freshly ground black pepper. In the third bowl, mix together the breadcrumbs with 1/4 cup of the Parmigiano-Reggiano and 2 tablespoons of the fresh parsley.
Step 3 – Bread the Chicken
Season the chicken cutlets on both sides with the remaining salt and pepper, and then dredge each in the seasoned flour. Gently shake off any excess.
Dip each piece of chicken into the egg mixture, and then into the breadcrumb mixture. Press gently, to help the crumbs adhere to the surface to create a uniform crust.
Going through the assembly line and breading one piece at a time using tongs, or keeping one hand wet and one hand dry, is the easiest way to avoid sticky fingers.
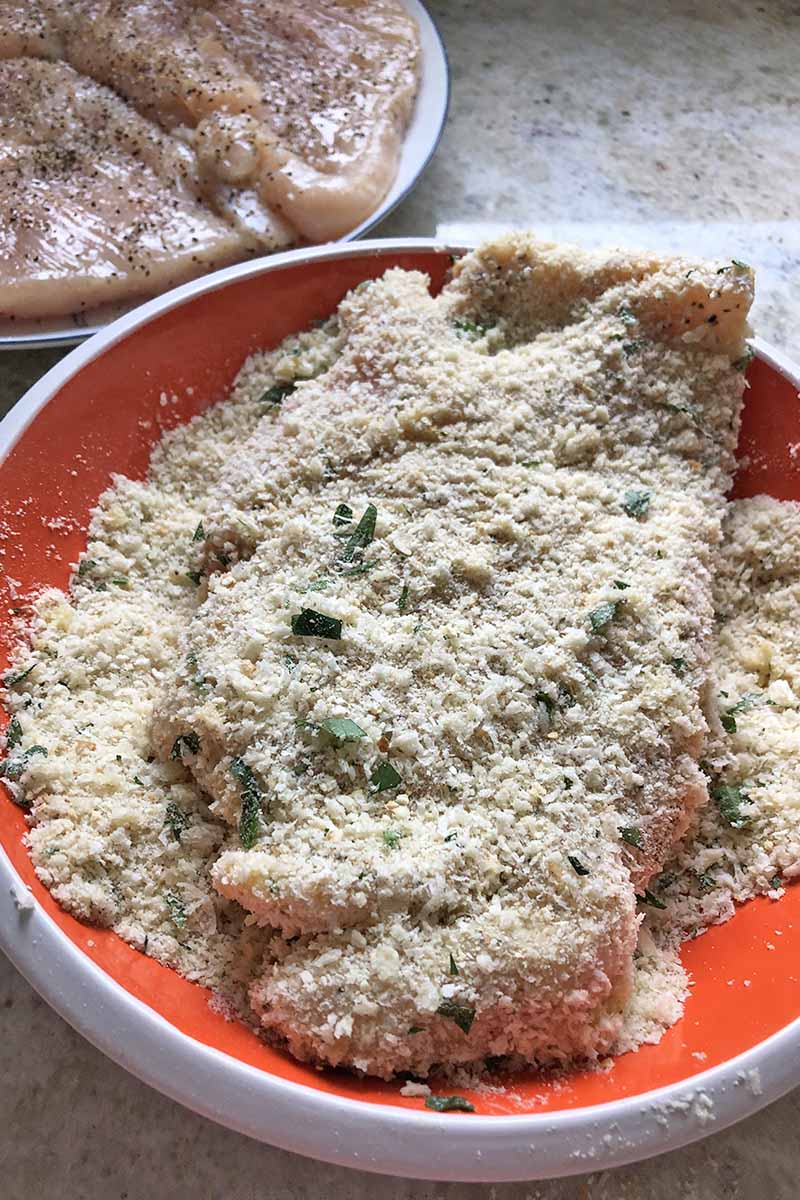
Place the breaded chicken breasts on the clean plate at the end of the assembly line.
Step 4 – Shallow Fry the Cutlets
In a large, heavy-bottomed skillet such as your favorite cast iron pan, heat the oil over medium heat until shimmering.
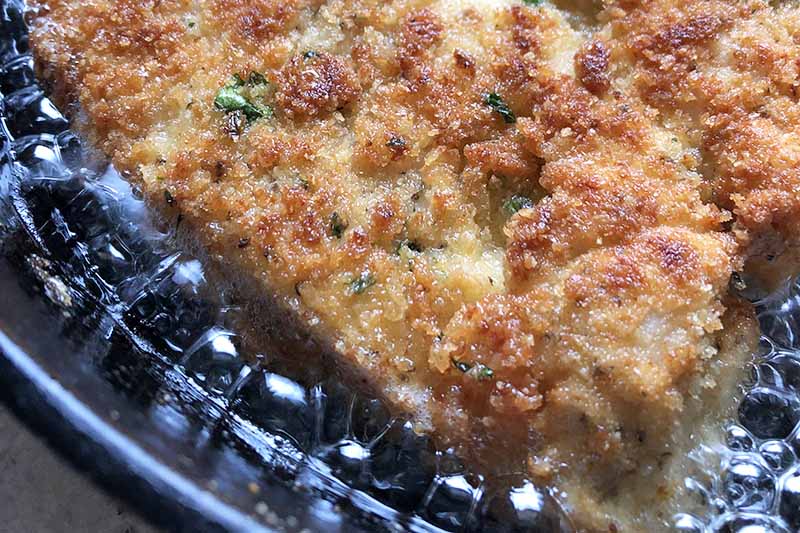
Working in batches, shallow-fry the chicken until it’s golden brown, about 3-5 minutes per side.
Transfer to paper towels to drain any excess oil, and then move the poultry to a wire rack while you fry the remaining pieces. This will keep the bottoms from getting soggy.
Step 5 – Assemble and Bake
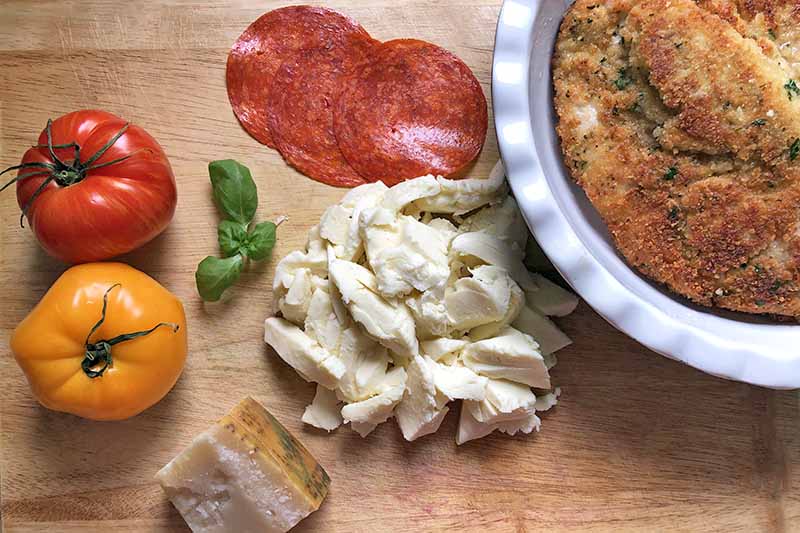
In a large 9-by-13-inch casserole dish, or two 8- or 9-inch glass or ceramic pie dishes, add the breaded cutlets in a single layer.
Top the poultry with marinara.
Add the mozzarella, tomatoes, and pepperoni, in this order.
Sprinkle grated cheese and about 1 tablespoon of the basil on top.
Bake until the chicken is cooked through, the cheese is melted and bubbly, and the edges of the pepperoni are slightly crisp, for about 15-20 minutes.
If you want the mozzarella to become even more golden and bubbly, preheat the broiler to low and – keeping an eye on the top because it will brown quickly – broil for about 1 to 2 minutes.
Step 6 – Plate and Garnish
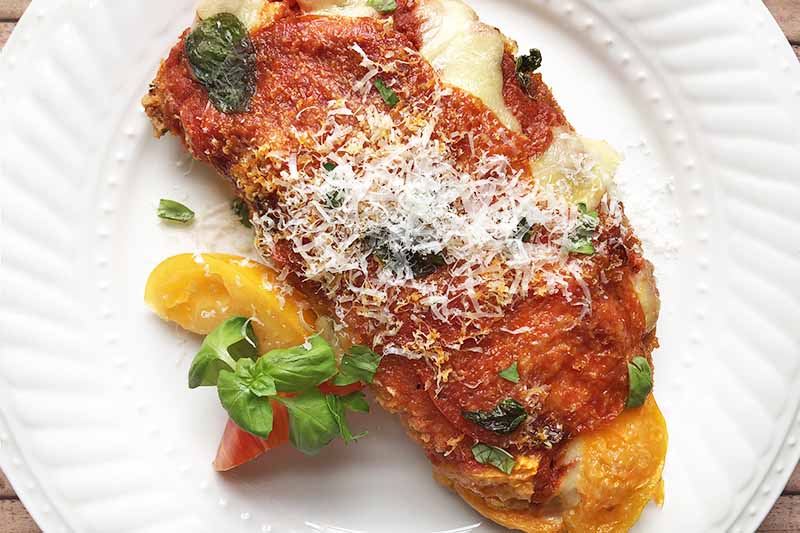
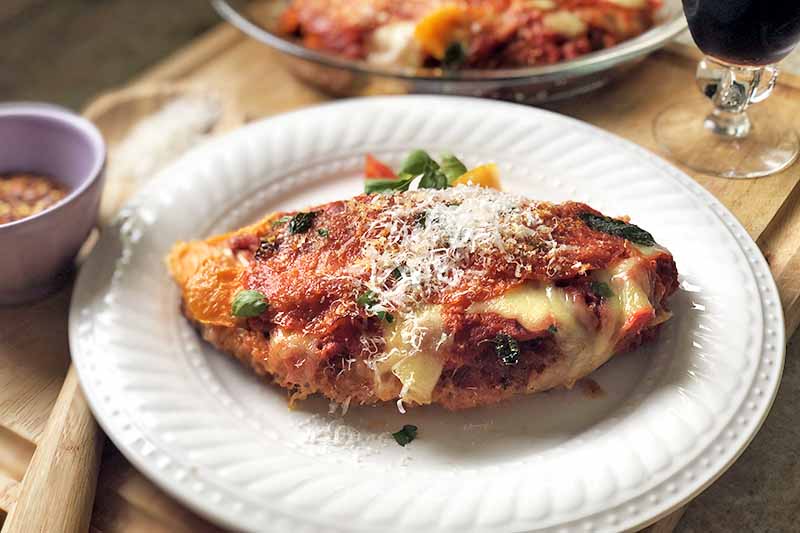
Transfer the chicken to serving plates, garnish with the remaining fresh parsley and basil, and serve.
Each whole breast will feed one or two people as an entree, depending on what you serve it with. If you’re only feeding four, I recommend portining the ingredients into two pie pans, baking one for dinner tonight, and tightly covering and freezing the other for later.
Leftovers will keep in the fridge for 3-5 days.
Already baked, the frozen dish will keep for up to 3 months and makes a great reheated leftover meal. Straight from the freezer, bake covered with foil at 350°F to heat through, until the center of the cutlets are warm, about 45 minutes.
You’ll Never Make Pepperoni-less Parmesan Again
Once you’ve experienced the luscious, lip-smacking difference that adding pepperoni to homemade chicken parmesan makes, you’ll be spicing up all of your favorite Italian dishes with deli meats before you know it.
Chicken piccata with pancetta? Salami lasagna? Go comfort food crazy. You deserve it.
Got Italian food on the brain now? Same. These main course recipes with chicken will steer you right in that delicious direction:
- Thick and Creamy Italian Gnocchi Chicken Soup
- Creamy Chicken Parmesan Bake
- Tuscan Chicken with Vegetables
When it comes to the great parm debate, how do you take yours? Eggplant? Chicken? Veal? Give up your parm preferences in the comments below! And don’t forget to give this recipe a five-star rating if you loved it.
Photos by Fanny Slater, © Ask the Experts, LLC. ALL RIGHTS RESERVED. See our TOS for more details. Originally published on March 14, 2011. Last updated: October 16, 2023 at 11:23 am.
Nutritional information derived from a database of known generic and branded foods and ingredients and was not compiled by a registered dietitian or submitted for lab testing. It should be viewed as an approximation.
About Fanny Slater
Fanny Slater is a home-taught food enthusiast based in Wilmington, North Carolina who won the “Rachael Ray Show” Great American Cookbook Competition in 2014, and published her cookbook “Orange, Lavender & Figs” in 2016. Fanny is a food and beverage writer, recipe developer, and social media influencer. She was a co-host on the Food Network series “Kitchen Sink,” was featured on Cooking Channel’s longtime popular series “The Best Thing I Ever Ate,” and continues to appear regularly on the “Rachael Ray Show.”