Take one little peek at these lovely little cake pops, and you’ll be instantly lovestruck!

I really love getting something sweet for Valentine’s Day. And by sweet, I mean something I can most definitely eat.
Take note, potential suitors out there…
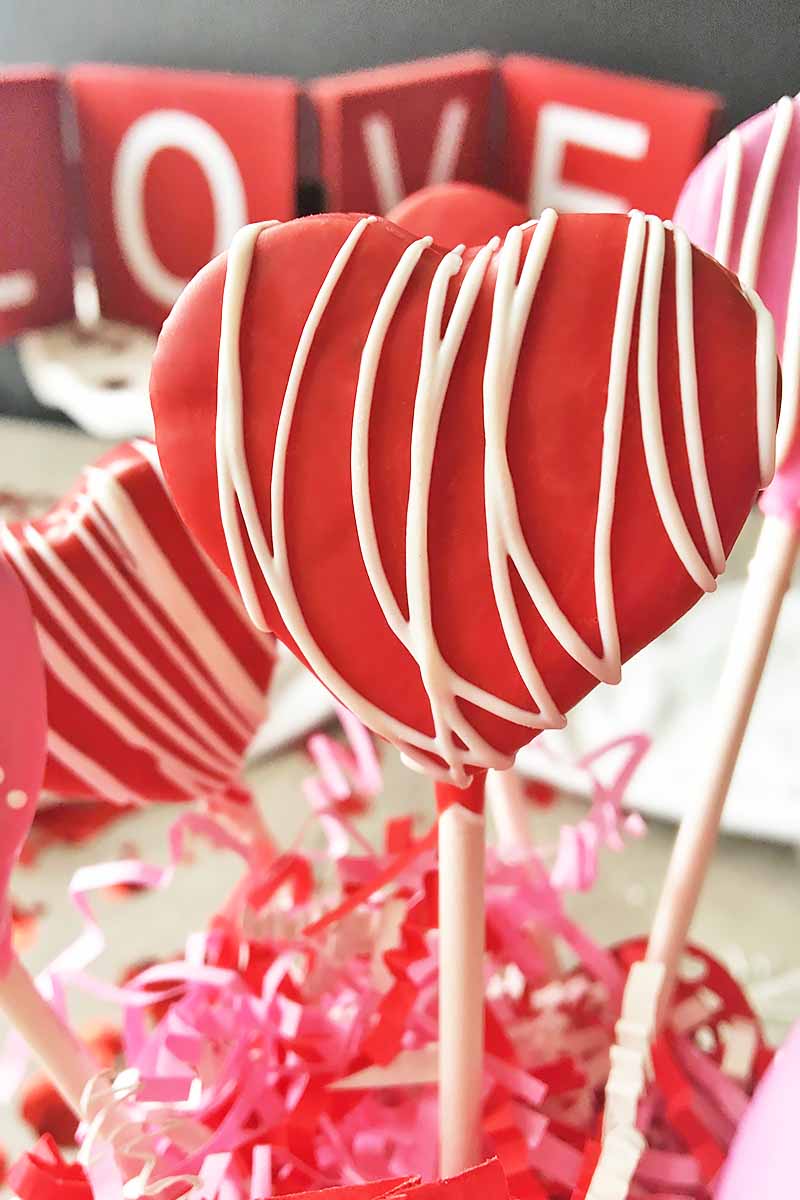
Give me chocolates! Give me candies! Give me cookies! Give me these Valentine’s Day cake pops!
My heart-shaped cake pops are covered in chocolate and sprinkles, with a luscious red velvet cake filling.

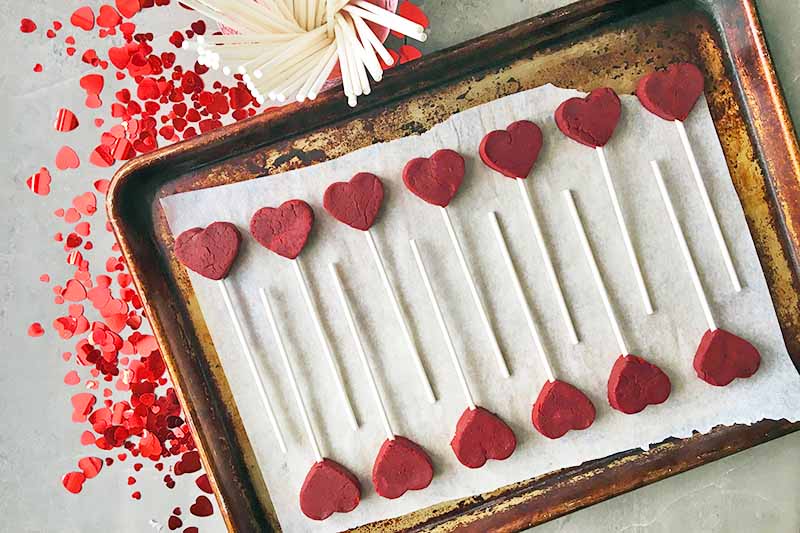
I use a different technique than just rolling individual pops. For fun shapes, you can easily use small cookie cutters, like hearts.
If you want to explore other shapes, stick with cookie cutters that have a simple design. If you attempt anything too intricate, it will be difficult for the cake to maintain its shape.
In other words, hearts are perfect!
You can say, as you’re handing this tiny treat to your beloved, that these hearts have literally been pierced by Cupid’s arrow – just like yours.
So. Corny. It. Hurts.

Be excessively sweet this year for Valentine’s Day, you little love bug. Go ahead and make this recipe below. And don’t forget to follow my Cooking by the Numbers section, to get all the details you need for your desserts to turn out perfectly.

No broken hearts, please!
Print
Valentine’s Day Heart Cake Pops
- Total Time: 2 hours, 5 minutes
- Yield: 30-40 cake pops 1x
Description
Flowers and cards don’t stand a chance when you present your sweetie with these heart-shaped cake pops for Valentine’s Day.
Ingredients
- Two 8-inch red velvet cake rounds
- 1 cup prepared vanilla or cream cheese frosting
- 3 12-ounce bags of chocolate melting wafers, assorted colors
- Vegetable shortening, as needed
- 30–40 wooden lollipop sticks
- Sprinkles and sanding sugar, assorted colors
- 1 foam block
Instructions
To Make the Cake Base:
- In a large bowl or in the bowl of a stand mixer, crumble the cake until no large chunks remain.
- By hand or with the paddle attachment, mix in the frosting a little at a time, starting off with just a couple of tablespoons. Mix until a dense but still crumbly dough forms that you can mold into balls with your hands. Be careful to avoid adding too much, so the mixture does not get too soft and moist. You will not need to use all of the icing. Refrigerate the dough for about 20 minutes.
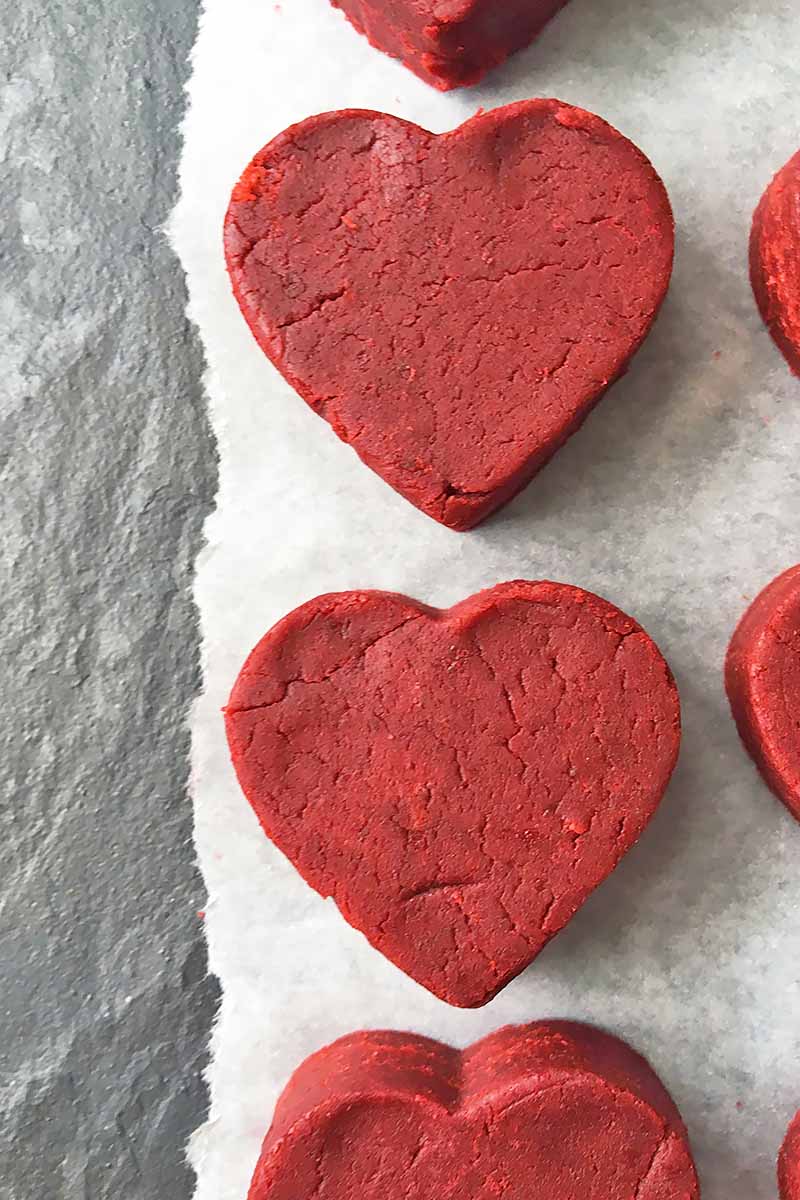
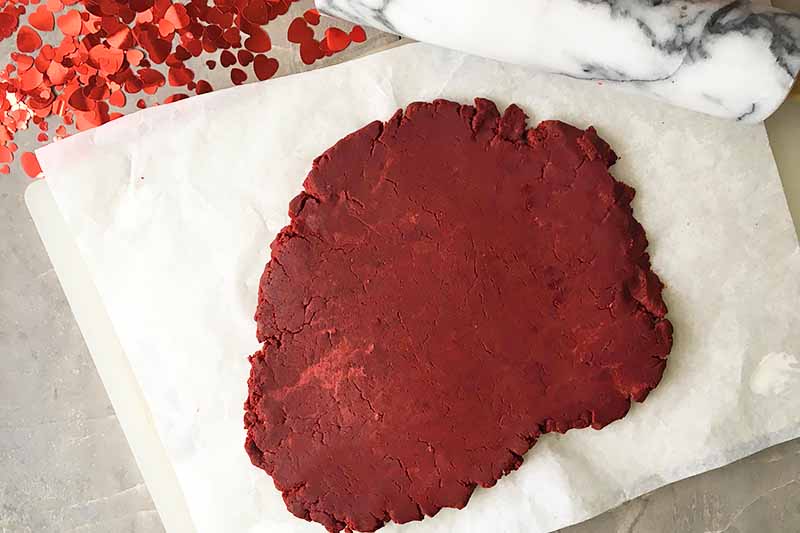
- Tape a sheet of parchment on a flat surface. Evenly roll out the chilled dough on top of the parchment paper with a rolling pin to about a 1/4 to 1/2-inch thickness. With a small heart-shaped cookie cutter, cut heart shapes from the dough.
To Insert the Sticks:
- Microwave just a few wafers of chocolate until completely melted.
- Dip a lollipop stick in the melted chocolate, and carefully insert a lollipop stick on the pointy bottom of each heart, pushing through to about halfway up each heart. Fix any cracks or bumps with your fingers. Place the shapes on a baking sheet lined with parchment paper.
- Refrigerate the pops for about 1 hour to set the structure.
To Coat and Decorate:
- Remove the cake pops from the fridge. Melt the chocolate candy wafers according to package instructions. If it looks too thick for dipping, stir in vegetable shortening 1 teaspoon at a time to thin it. Let cool slightly, stirring occasionally, for 5 minutes.
- Dip each pop in the chocolate until completely covered. Gently tap the stick against the edge of the bowl to remove excess melted chocolate.
- Once the excess chocolate is removed, immediately apply the sprinkles before the coating sets. If you want to apply an additional layer of chocolate, wait for the first layer to harden before decorating with an additional layer.
- Stick each pop upright in the foam block to harden and allow to set completely before serving immediately, or store in the refrigerator until ready to serve.
- Prep Time: 2 hours
- Cook Time: 5 minutes
- Category: Bite-Sized
- Method: Baking, No-Cook
- Cuisine: Dessert
Cooking by the Numbers…
Step 1 – Prepare the Dough
Follow Foodal’s step-by-step guidelines on how to make perfect cake pops: mix the cake with the icing until you achieve the right texture and density.
Refrigerate the dough for about 20 minutes, to let it set slightly before rolling.
Prepare your work surface as the dough is chilling: place a piece of parchment paper on a flat surface, like a cutting board, table, or countertop.
I like to tape the parchment paper to the work surface, to prevent it from moving around as you’re rolling.
Place the chilled dough on the parchment paper. Using a rolling pin, evenly roll out the dough to between 1/4 and 1/2 inch thick. Don’t roll it out any thinner – you want the cake to be thick enough that you will be able to insert a lollipop stick without the dough falling apart or tearing.
Step 2 – Cut Out
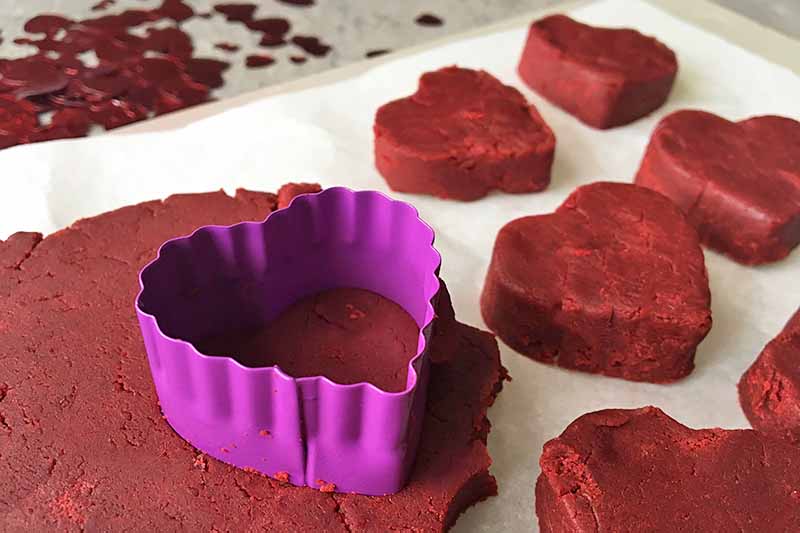
With a small heart-shaped cookie cutter (I used one that was about 1 1/2 inches wide), cut heart shapes from the dough. Gently push the cake through to the other side of the cookie cutter to remove.
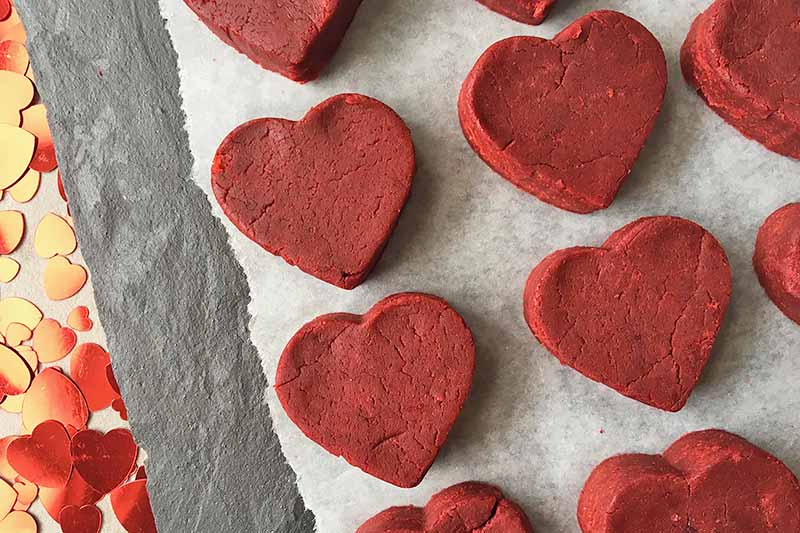
Reshape and press together any cracks that have formed on either side. Set aside on a sheet pan lined with parchment paper.
Step 3 – Apply Sticks and Set
Melt a few chocolate wafers in the microwave. One at a time, dip the tip of each lollipop stick in the chocolate, and very carefully insert a stick through the pointy bottom of each heart, pushing through to about halfway up each heart.
Reshape and press together any cracks that have formed on both sides.
Place them on a baking sheet lined with parchment paper. Refrigerate for about 1 hour.
Step 4 – Apply the Base Coating

Remove the pops from the fridge and let sit at room temperature while you melt the chocolate.
Melt the chocolate coating and let cool slightly for about 5 minutes. Once it has cooled slightly, dip each one in the chocolate, swirling it to completely coat the surface.
Gently tap it on the side of the bowl to remove any excess, using your fingers or a toothpick if necessary to guide the excess melted coating back into the bowl. Keep tapping and swirling the stick until all excess chocolate is removed, and you have a smooth, even layer.
If the chocolate gets too thick or too cold to work with, re-warm in the microwave, and stir in a little vegetable shortening.
Step 5 – Apply Decorations

Apply any sprinkles while the chocolate is still wet and has not yet set. The chocolate will harden quickly, so you want to work fast to make sure the sprinkles stick.
If you want to apply a second layer of chocolate decorations, wait for at least 10 minutes for the base to harden and set. You don’t want the second layer to melt into the base layer!
Get as kitschy as possible for Valentine’s Day! Use all the fun, heart-shaped sprinkles, bows, red and pink nonpareils, and sanding sugars that you can find. Or, try making your own sprinkles, using my recipe for royal icing.
Step 6 – Set Completely and Serve

Place the pops back on the foam block to completely set, about 20 minutes. Once the chocolate has completely set, your bite-sized desserts can be eaten immediately, or they can be stored in the refrigerator for up to 1 week.
You can carefully wrap each individual treat in cellophane and store on a large platter. Or, you can keep them upright on the foam block, and gently cover with a large sheet of plastic wrap or aluminum foil.
Eat! Enjoy!
Shot Through the Heart (In a Good Way)
You’ll give love a good name, if you make these heartfelt treats for Valentine’s Day.

I’d skip the flowers this year, and turn on your oven instead for some homemade holiday baking. Imagine, arranging them in an adorable bouquet in a cute vase or box, surrounded by red, pink, and white decorations. What a sweet gift that would make – and edible, too!
Not into baking for Valentine’s Day? Step away from the oven, and make our Strawberry Milkshakes instead!
What do you think of this heart-shaped idea? You can choose to make the round balls, as I have done in the past with my Halloween and Christmas ones, but I like the extra flair of the shaped option.
Try it this year, and be sure to let me know how they turn out – fill the comment section below with all your sweet thoughts!
For other Valentine’s Day gifting ideas, make some of our favorite recipes:
- Valentine’s Day Royal Icing Cookies
- Einkorn Heart Cakes with Chocolate Shells
- Healthy Smoothie Parfait
Photos by Nikki Cervone, © Ask the Experts, LLC. ALL RIGHTS RESERVED. See our TOS for more details.
Nutritional information derived from a database of known generic and branded foods and ingredients and was not compiled by a registered dietitian or submitted for lab testing. It should be viewed as an approximation.
About Nikki Cervone
Nikki Cervone is an ACS Certified Cheese Professional and cheesemonger living in Pittsburgh. Nikki holds an AAS in baking/pastry from Westmoreland County Community College, a BA in Communications from Duquesne University, and an MLA in Gastronomy from Boston University. When she's not nibbling on her favorite cheeses or testing a batch of cupcakes, Nikki enjoys a healthy dose of yoga, wine, hiking, singing in the shower, and chocolate. Lots of chocolate.