So you’ve overcome your fear of yeast, you know all about flour, you’ve fallen in love with the science behind gluten, and you are an expert at kneading dough.
Now you are just a few steps away from creating an endless array of beautiful homemade breads! And best of all, these last few strides will let you stretch your creative muscles and tune into your artistic side.
There are so many options for shaping breads: from the tight crumb of sandwich loaves to the small rounds of rolls, locked-in fillings, knots, braids, and twists.
With just a few shaping technique tips and some examples of fun designs, you will be on your way to making expert-level breads in no time!
Step 1: The Pre-Shape
Once your dough has finished its bulk fermentation – a fancy name for the primary rise – it’s time to do a pre-shape.
I like to think of the pre-shape as a way of slowly nudging the gluten into its desired position. Your pre-shape will be determined by the final shape that you want your bread to have.
Here, I will explain three simple pre-shapes to prepare a wide variety of final designs, two for single-serving breads, and one for a full loaf.
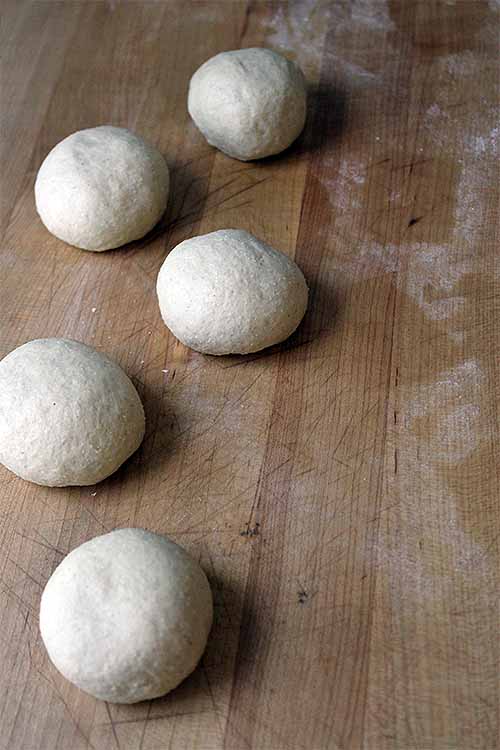
1. The Roll
This is the most basic shape for single-serving breads. It can be flattened out into pita (like in our recipes for sour barley pita or einkorn flour pita), molded into hand-pies, fried into donuts, and so much more.
When making dinner rolls, this is actually the only shaping that’s necessary!
First, divide your dough into the desired portions – 2- to 3-ounce pieces are a good size for many single-serving applications.
When portioning, make sure to cut with a bench knife rather than pulling or tearing. You’ve worked so hard to build that gluten strength – don’t break all the strands now!
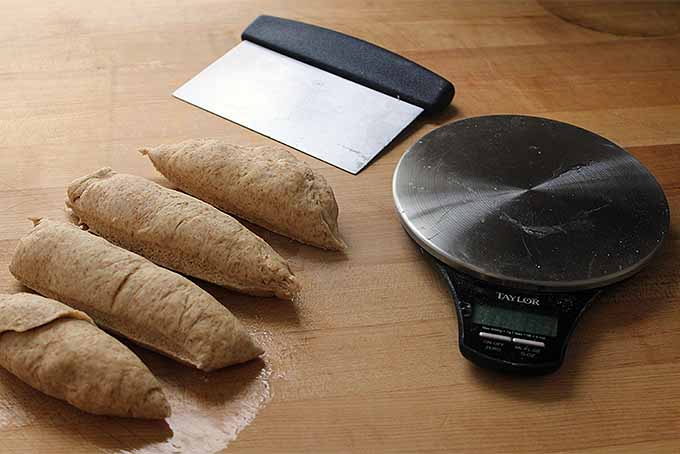
Try to portion with as few cuts as possible. Again, you want to maintain the network of gluten strands that you have created.
Additionally, it is harder to shape a roll that’s made up of lot of small pieces. It is much easier to work with a single piece.
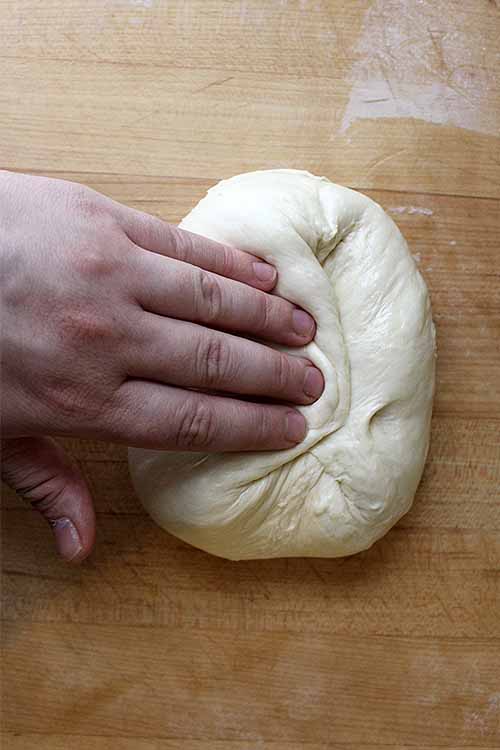
Fold your dough in half with any small pieces folded into the center, so that you have a smooth surface on the top.
Cup your hand so that your fingers create a cage. Roll it against the table, passing it around the outer edge of your palm.
It is tempting to roll the whole piece like a ball. Unfortunately, this accomplishes nothing!
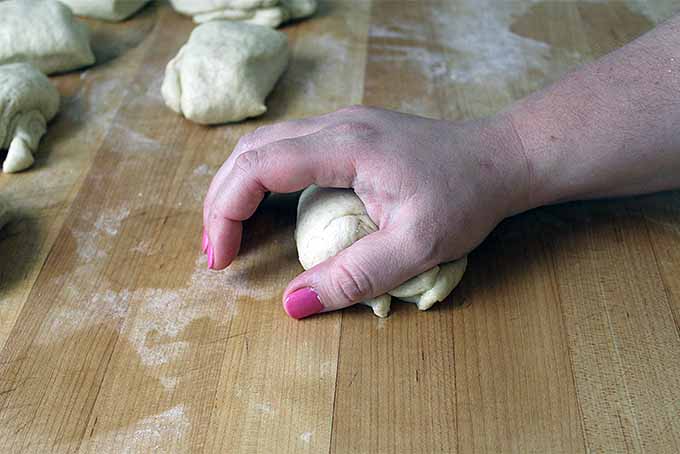
Instead, imagine that the top of the dough must stay in place. As you shape, you are pulling the sides underneath, so as to create tension on the outside.
A well-shaped piece will hold its rounded shape as it sits on the counter.
2. The Snake
This method works well if you want to work your bread dough into a knot or twist. It reminds me of playing with Play-Doh as a child. I would work the vibrant putty into snakes, and watch with fascination as they elongated under my palms.
Divide your dough into the desired portions, aiming to cut long, thin pieces. The gluten won’t want to stretch too far in any one direction, so longer pieces to start will allow more flexibility in your end length.
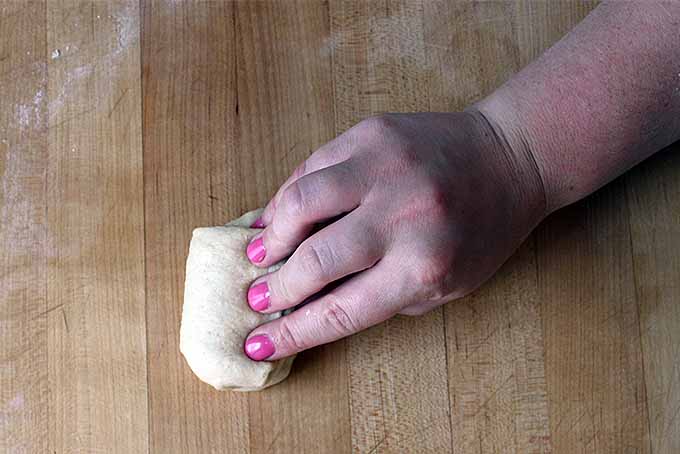
Flatten the rectangular piece into a long rectangle, so that the longer edge is parallel to your body. Fold the far horizontal edge towards you, and press the edge into the center of the rectangle.
Continue rolling and pressing until you’ve formed a tight log. Roll against the table under your palms until it reaches the desired length.
If your dough begins to spring back as you roll, let it rest for five minutes to allow the gluten to relax.
Because you are stretching the gluten strands in just one direction, they are bound to get a bit upset – they prefer to stretch equally in every direction. After a short rest, they should become more cooperative.
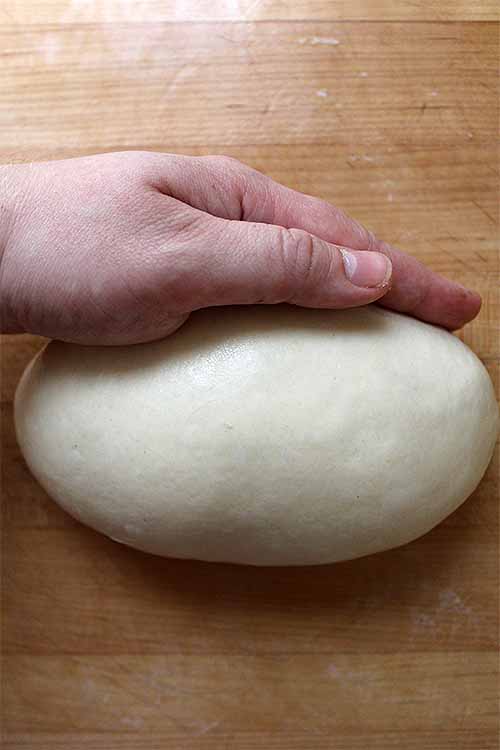
3. The Round
This larger version of the roll is the simplest and most common pre-shape for a full loaf of bread.
Divide your dough into the desired portions. Fold it in half to create a smooth surface on the top.
Pull it towards you to create surface tension on the sides, rotate 90°, and pull again.
Repeat this motion until the round has a taut, smooth surface and can hold its shape on its own.
Step 2: The Final Shape
After you’ve finished your pre-shape, it is time for the bench rest. During this rest, the gluten relaxes a bit from its long workout.
The bench rest is quick – you don’t want to give the yeast too much fermentation time, you just want the gluten to have a quick nap before the final shape and proof. About ten minutes will suffice.
Here is where you have lots of creative freedom.
Bread shaping as an art form has a long history, particularly in France. Shaping allows different bakers to distinguish themselves as artists, and also allows them to create myriad breads using just a few types of dough – saving both time and money in their bakeshops.
In some apprenticeship programs, aspiring bakers were required to invent a new bread shape of their own before being dubbed “master bakers.” You can join their tradition by experimenting and creating your own masterpieces.
Some types of dough lend themselves well to particular shapes. For instance, a high-fat mixture like a brioche can be handled more like clay, while a sticky, lean variety is better suited to the simplicity of the sandwich loaf.
I will note suggestions for every design, but don’t let these hold you back!
Once you’ve finished your final shape, you must let the dough proof at room temperature before baking. Cover lightly with plastic wrap to avoid allowing a skin to form on the outside.
Proofing times will vary depending on the size of your bread, the temperature of your kitchen, and the type of dough that you use. This could range from 30 minutes for a small roll up to an hour and a half for a sandwich loaf.
You’ll know the shapes have finished proofing and are ready for baking when you can gently press the top and the indentation slowly releases back into place.
From The Roll:
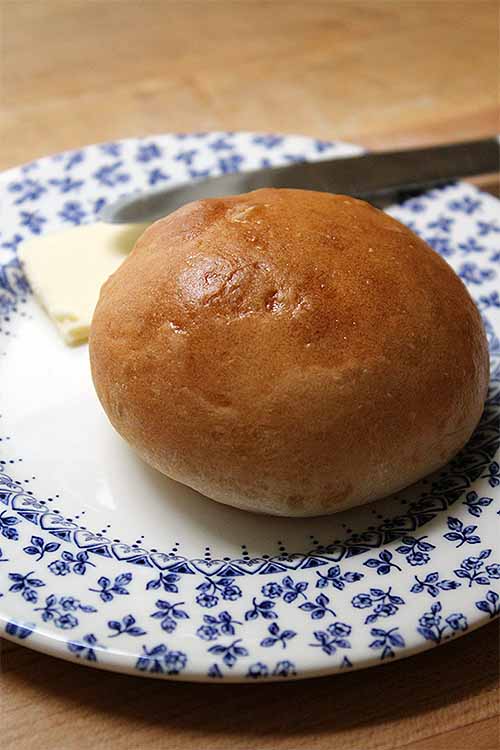
Dinner Rolls
When making dinner rolls, your pre-shape also serves as your final shape.
Once you’ve rounded off your pieces, you can set them on a baking sheet lined with a silicone mat, sprayed with pan spray, or lined with parchment and sprinkled with cornmeal.
This shape works well with myriad types of dough, but it is particularly tasty when you use an enriched, or high-fat, mixture, like a brioche.
When the rolls have finished proofing, brush them with an egg wash and bake at 350°F for 20-30 minutes, until they are nicely browned on top.
Hand Pies
To make a simple hand pie, assemble immediately before baking. Follow the directions above for dinner rolls, all the way through the proofing stage.
Once the bread shows the signs that it’s ready for baking, press the center down with your fingertips and fill with your preferred filling.
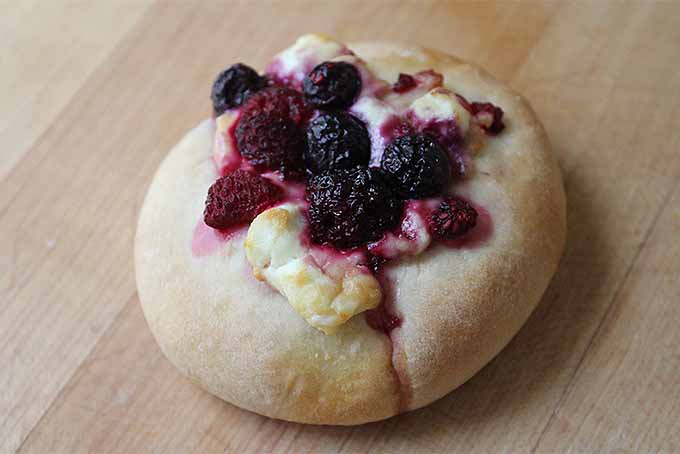
Try goat cheese, berries, and honey; or caramelized onions and bacon. The variations are endless.
Bake at 350° for 20-30 minutes, until the edges are browned.
From the Snake:
Knots
After the pre-shaped snake has rested for ten minutes, tie it into a knot.
Take the right end and pull it under the left to create a loop. Then pull it up, over, and through the center hole. Tuck both ends underneath the bottom of the knot.
Place onto a baking sheet lined with a silicone mat, sprayed with pan spray, or lined with parchment and sprinkled with cornmeal.
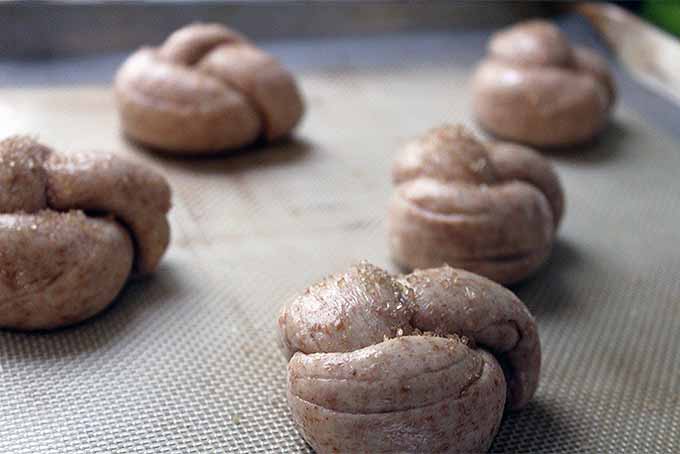
This works nicely with a hearty dough, like a lean (meaning without butter or eggs) whole wheat, brushed with honey and sprinkled with sea salt.
Alternatively, try using Chelsea’s Roasted Garlic recipe to make tasty garlic knots! Or go the super easy route and use store-bought pizza dough to make our easiest ever garlic knots!
Proof until ready for baking, and bake at 350° for 20-25 minutes.
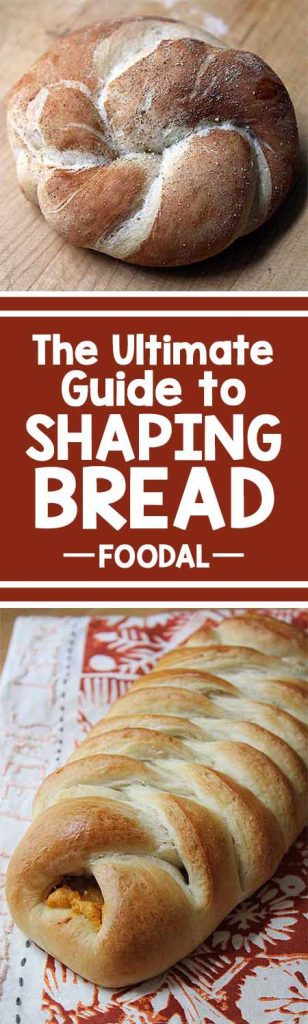
Twists
Once your pre-shaped snake has rested, fold it in half. Holding onto the creased side in ione hand and the two ends in the other, tap the dough against the counter gently to lengthen.
Twist the pieces together, then wrap the ends toward one another, and press together into a ring.
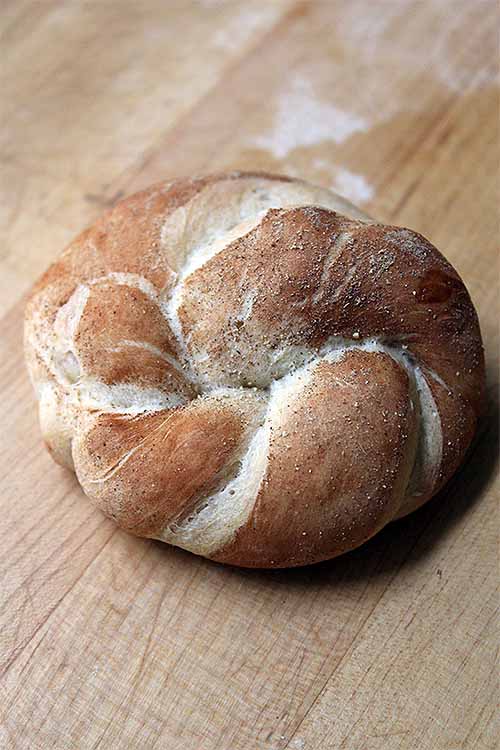
This shape works nicely with a lean dough in sweeter applications. Try using the white dough from our Cinnamon and Cardamom Bread.
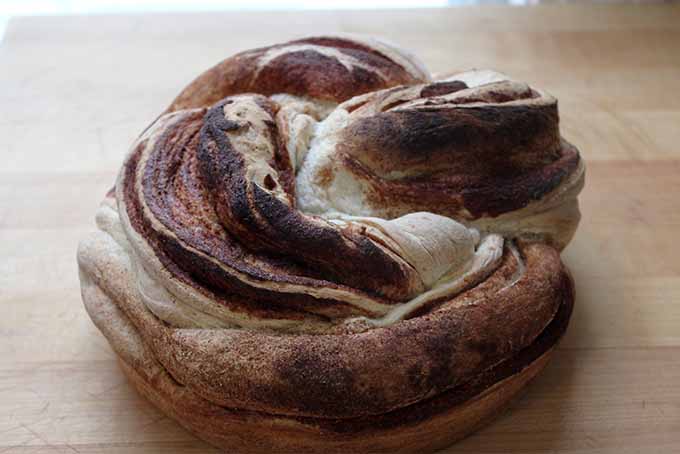
Bake at 350°F for 20 minutes, until the outside has formed a crust.
From the Round:
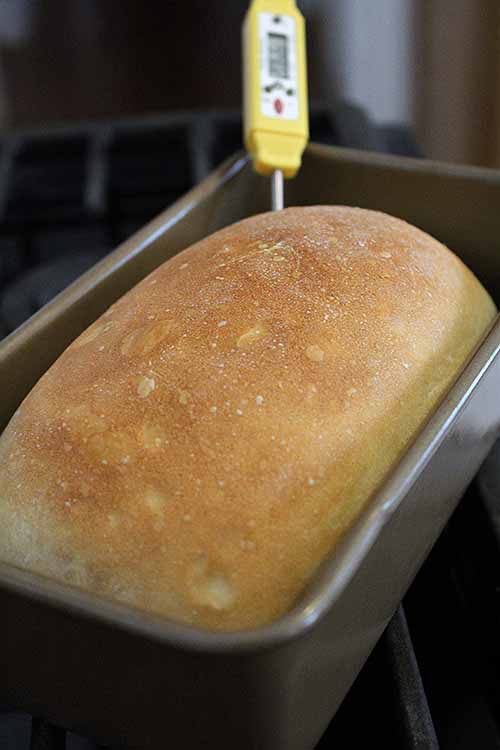
Sandwich Loaf
Once you’ve pre-shaped your round, prepare a loaf pan by spraying it generously with pan spray.
Flip the round upside down on a lightly floured counter so that the smooth side is facing down.
Starting at the edge furthest from you, pull up and into the center of the round. Repeat with the bottom edge, then the right and the left edges.
Returning to the starting edge, fold the dough in half and flip so that the smooth side is now facing up, and the seam is on the bottom. Gently pull it towards you to create a taught skin before placing into the loaf pan.
For a rich sandwich bread, this works nicely with a brioche. For a leaner option, try a long-fermented dough, like the Mark Bittman’s no-knead recipe.
Let proof until the loaf shows signs that it’s prepared for baking, about an hour and a half. Bake at 400°F for 45-55 minutes, until a thermometer inserted into the center of the bread reads between 180°F and 200°F.
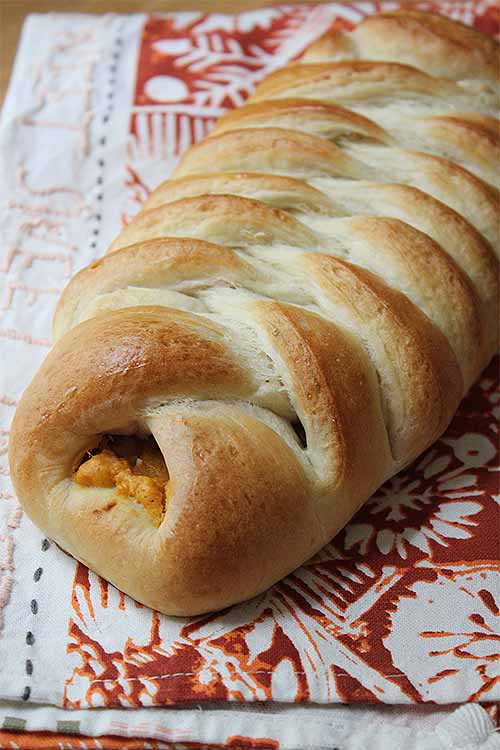
Locked Braid
This bread is perfect for brunch. Flip your rested round onto a lightly floured counter so that the smooth side is facing down.
Lightly flour what is now the top of the dough, and gently roll into a 12-by-8-inch rectangle so that the longer side is parallel to your body.
Cut 8 4×1-inch slices on both the left and right sides of the rectangle, starting at the outer edge so that you have 4 inches free in the center.
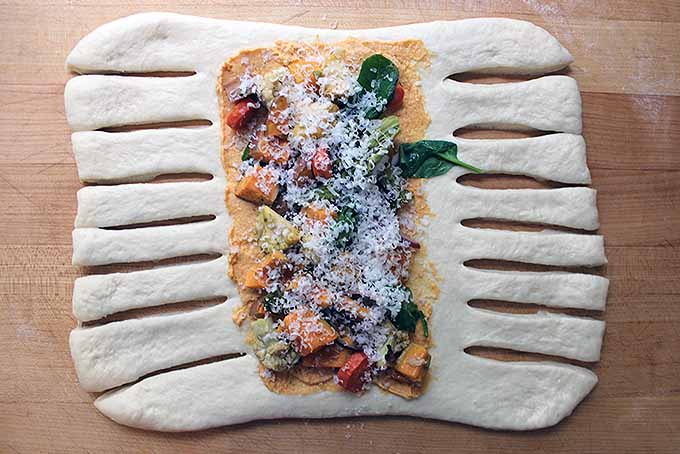
Place the filling of your choice in this center third of the dough. my preference is for goat cheese, caramelized onions, and roasted garlic – I’ve even been known to include some scrambled eggs, softly set at 145°F, when serving this bread at brunch!
Starting on the left side, take turns stretching and crossing each strip diagonally down to the strip below, creating a braid that holds the filling in place. Pull the final strip across the bottom, locking the filling inside.
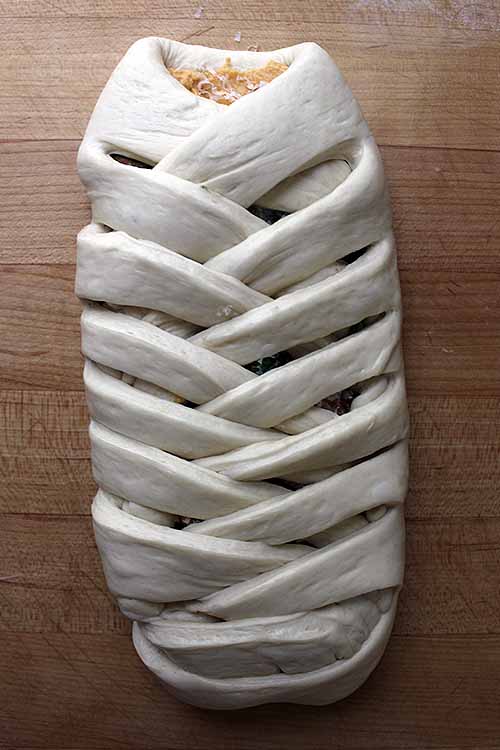
This bread works nicely with a sweet and tender enriched dough, like a challah or brioche.
Allow the loaf to proof until it shows the aforementioned signs it is ready for baking, about 30-45 minutes. Brush with an egg wash and bake for 30 minutes at 350°F.
What Shapes Will You Create?
You are now equipped with six different ways to shape breads! Let these suggestions serve as a starting point to launch your own creativity.
Test these shapes with your favorite bread dough recipes, mix up the fillings, and finish with a variety of spices or salts. Whip out your favorite bread knife and you’re set for a great meal or an awesome snack.
What is your favorite way to shape dough? Will you try changing up the usual shape with your go-to dough recipe? Let us know in the comments!
Photos by Kendall Vanderslice unless otherwise noted, © Ask the Experts, LLC. ALL RIGHTS RESERVED. See our TOS for more details.
About Kendall Vanderslice
Kendall’s love of food has taken her around the world. From baking muffins on a ship in West Africa and milking cows with Tanzanian Maasai, to hunting down the finest apfelstrudel in Austria, she continually seeks to understand the global impact of food. Kendall holds a BA in Anthropology from Wheaton College and an MLA in Gastronomy from Boston University, and has worked in the pastry departments of many of Boston’s top kitchens. Based in Somerville, Massachusetts, Kendall helps to run a small community supported bread bakery and writes about the intersection of food, faith, and culture on her personal blog, A Vanderslice of the Sweet Life.


Wow! This is impressive! I always wondered how bakers made all those shapes with the bread, it had always been a mistery for me, now I can see the truth 😀 Thank you for sharing this!
That locked braid is pretty neat! Thanks for posting all those pictures. There seems to be such an art to shaping bread, and all of this looks fun to try. When I was a kid and we had leftover bread dough, I would sculpt it into animals. Sometimes my penguins and fish and rabbits came out looking pretty lumpy, but I could always tell what they were. It might be a fun idea to do a bread shaped like a fish, sprinkled with sea salt (like a pretzel) and maybe some strips of candied lemon or orange to decorate “gills” and “fins”. Just a silly thought. 🙂
What a fun idea! I love the thought of shaping extra dough into animals. I’ve been making lots of pie lately and have had lots of scraps leftover — I think I’ll have to use your idea to use those up as well!
This is a neat article and I learned some new things. I never thought of cutting the dough instead of tearing. It makes sense that you wouldn’t want to break up your gluten more than necessary. Another thing I never thought of was pre-shaping your bread and then letting it rest again before the final shaping. I will have to try it the next time I make a batch.
The twist looks like a simple way to pretty up a plain loaf of bread. I really like the locked braid as well. It’s very pretty and I love filled breads. I want to try this one with an apple, cinnamon and raisin filling. I bet this would be really good with pizza type fillings as well. Thanks for the great ideas
Ooh I’m drooling over the suggestion of an apple, cinnamon, and raisin filled bread! I think I will have to give that a try!
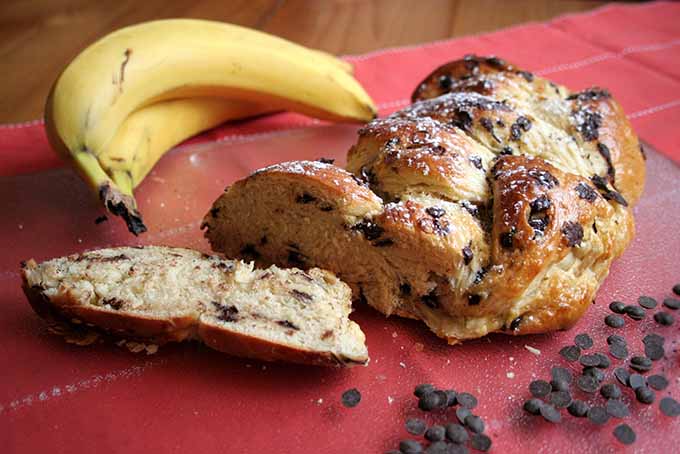
I was hoping to see how to plait or braid bread as you mention in step 9 of your chocolate banana yeast bread recipe. “Next: you’ll braid them together!” Sounds as exciting as the exclamation point suggests, but how? For those not familiar with the process, can you describe it also?
Thanks
Great question, Larry. If you’re familiar with braiding hair, a 3-strand bread bread is achieved through the same process- simply line up three dough ropes of equal length parallel to each other and begin to form a loose braid by gently lifting and crossing alternating outer pieces over the top of the current middle piece. If these were numbered 1, 2, and 3 and you want to start with the right piece, you would proceed by crossing 3 over 2, 1 over 3, and repeating down the full length, then tucking the ends underneath the loaf.
Some bakers like to start at the middle and braid either end rather than starting at the top and working their way downwards, in order to achieve a tight and uniform look without any risk of tearing the dough. More complicated braids with additional pieces of dough can be achieved in much the same way, with additional criss-crosses built in to achieve a uniform pattern down the length of the loaf. Hope this helps!