(Plus Our Recipe for Pate Brisee)
Jump to the RecipeWhen people hear that I’m a baker, they inevitably begin with an ooh and an ahh, then follow with a description of their most frantic baking disasters.
Should I mix my dough by hand, or in a mixer? Is the food processor okay?
I follow the instructions to a T, but my crust shrinks when it bakes! Should I freeze? Should I blind bake?
Butter, shortening, or lard?
The truth is, there is no one perfect way to make a pie crust. Part of its beauty is in its simultaneous simplicity, and abounding diversity.
Instead, I’m going to talk you through a few top tips that will improve any recipe, and prepare you to master all the pies that come your way.
Demystifying Dough: Understanding What’s Going On
In every wheat-based dough, you are dealing with the effects of both gluten and fat.
You can either fight against them, or learn how to make them work with you. The latter will always yield the finest results.
The method for this process is called “cutting in” – you slowly cut fat into flour to achieve the desired texture of dough.
As you cut in the fat – be it butter, shortening, cream cheese, or lard – it will be worked down into small pieces. And you want these pieces to be spread evenly throughout the dough because they will release steam during baking, leaving flaky layers in your finished crust.
But you must know when to stop working them in, so as not to coat the flour. Once this happens, the flour can no longer take in water to hydrate the gluten strands.
Once you’ve finished adding in the fat and pour in your water, the gluten strands begin to form. While they need to intertwine the tiniest bit to give your crust its structure, any more than what’s absolutely necessary will leave it tough to chew.
Thankfully, this is where that fat you’ve just worked in so carefully comes in handy. Fat will help you to keep the gluten from developing too far.
Learning to read the signals in the careful dance between fat and gluten is key to creating a flaky dough. Thankfully, there are four simple tips that can help you out along the way.
4 Tips to Flaky Dough: Wrangling that Fat and Gluten
There are four basic tips that will improve any dough. Whether you are working with butter, shortening, cream cheese, or lard, these tips will ensure a flaky crust every time.
1. Cold Ingredients
Always begin with the coldest possible ingredients – at the very least, cold fat and water.
Cold fat will work itself into smaller pieces without coating the flour, while warm fat is apt to smear. This is true whether you are working with butter, shortening, or lard.
Working with chilled ingredients grants you much more leniency when cutting in – you are not likely to ruin your crust with something as slight as one too many turns of the paddle when you’re using more forgiving ingredients that start out at a cooler temp.
Cut your butter, cream cheese, shortening, or lard into small cubes, then place in the freezer for 15-20 minutes before mixing your dough.
Similarly, cold water will help your dough to pull together without overstretching those gluten strands. I like to measure out a big pitcher of ice water, then pour off the amount that I need just before adding it to my dough.
2. Stop in Time
What’s the best way to cut in fat? I’m often asked this with the expectation that the answer is either a mixer, food processor, or by hand.
In fact, my answer is just a bit less direct: use whichever method helps you to stop in time. There are benefits and downfalls to all three methods, but the constant here is the need listen to your dough.
If Using a Mixer:
Keep it on the lowest speed, and watch carefully as the paddle turns. Once the flour starts to build up onto the sides of the bowl, stop the machine.
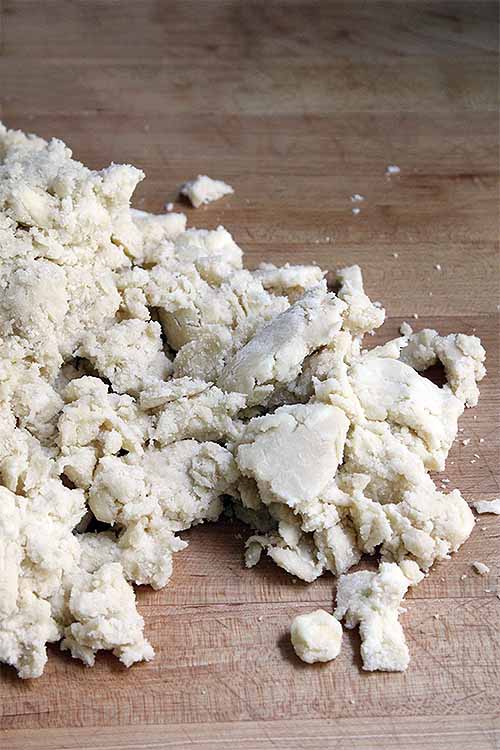
If you can clump a fistful of the mixture in your hand and it will hold its shape, it is done – even if a few large pieces of butter remain.
If you try to hold a fistful and it simply crumbles, continue to mix for just a few more rounds.
Don’t have one of these time (and wrist) saving devices? Be sure to check out Foodal’s Stand Mixer Guide. They aren’t all created equal and many can’t handle the rigors of blending dough.
In the Food Processor:
You are looking for similar signs: butter cut into small pieces, and a mixture that just holds together.
The benefit of using a food processor is that it is easier to break the butter into small pieces without overmixing the dough.
The downside? You don’t have the advantage of watching it change with every turn.
If you’re in the market for a new one, get the skinny with Foodal’s Food Processor Guide.
When Cutting in Fat by Hand:
It is best to use a pastry cutter if you’ll be working that dough by hand.
As with the first two methods, cold fat is key. While this technique might offer more control than the other two, you will warm the dough as you work it with your hands, increasing the likelihood of smearing.
No matter which method you prefer, you can achieve a beautiful crust. The key is working slowly and attentively so that you can watch and listen to your dough.
3. Add Water Carefully
Once the fat is incorporated, it’s time to add the water.
Your carefully mixed fat has left you with some butter coated with flour, some flour coated with butter, and some flour that remains dry. As you add the water, you hydrate both the flour that coats the butter and the flour that remains dry.
As the water works its way into the flour, gluten strands will begin to unravel. A net of gluten will begin to form between the layers of butter, which provides the strong, flaky layers that are indicative of a good dough.
But add even the littlest bit of extra water or work, and that gluten network goes from strong but tender to leathery and hard to chew.
Many recipes recommend adding water a tablespoon at a time. The idea is that the amount your dough will need depends on the amount of dry flour that is prepared to suck it in. This will vary each time you make your dough because you will never cut in the fat the exact same way.
But this method increases the likelihood that you will overmix your dough.
As you learn to feel the signs of a properly cut-in dough, you will begin to achieve enough consistency that you can afford to add your water all at once. Until you get this feel, I recommend following the proportions offered below.
When you’ve added the water, stop mixing as soon as it has been fully absorbed. You don’t want to keep mixing until a smooth dough is formed when you’re making a pie crust.
4. Shape Gently
Once the water has been absorbed, turn the mixture out on to the counter. Depending on your final pie goals, you will want to shape the dough into one or two rectangles, balls, or discs. By finishing the dough by hand, you are able to work it directly into this final shape without over-kneading.
Carefully pull the crumbly pieces together, and knead once or twice just until it holds together. Gently form it into the shapes you need, wrap tightly in plastic wrap, and set in the refrigerator to chill.
Rolling It Out
Giving your dough some time in the fridge accomplishes two things:
First, it gives the fat some time to cool down. As you’ve worked it, you’ve warmed things up – and it needs to cool off, lest you lose those flakey layers.
Second, it gives the gluten time to rest. I like to compare gluten to a toddler: if you fight against it, it will fuss and complain. But if you listen to it, let it rest, and let it think your plan is actually its own idea, it will do exactly as you please.
Once you’ve let the gluten rest into its new position and the fat has chill firmly into place (for as little as 30 minutes in the fridge, or as long as a week or two in the freezer), it’s time to roll it out. If you’ve followed the tips that I’ve provided carefully up until this point, you’re on the path to pie crust perfection!
But don’t rest easy quite yet – this next process can make or break the final texture of your dough.
Fear not, we’ve got a few more simple tips for you:
1. Get things cold, but not too cold.
I can hear the moans now. What? You just said to let things chill in the fridge! Now you don’t want it so cold?
As with all of the steps that we’ve already completed, pie dough is all about balance.
If the dough is too cold, it won’t want to roll. Not only will this tire your arms, it will likely crack the dough as well.
If you’ve chilled things for more than an hour, pull it out and let it rest at room temperature for about 5 minutes before proceeding to roll.
2. To roll in each direction, move the dough (not the pin).
You’ve floured your counter, and you’ve floured your dough. You’re rockin’ and ready to roll. But with every pass, the dough springs back and you just don’t know what to do.
Remember what I said about that gluten? That it’s like a toddler who wants every action to be his own idea?
When you roll back and forth in the same direction, you’re stretching him out just one way. To show you that he doesn’t want follow, he springs straight back to where he came from.
Instead, you need to roll evenly in all directions. But wait! Before you start to pass the pin north, south, east, then west, there’s one more key: With each pass of the pin, rotate the dough rather than the direction of your pin.
By moving the dough, you are helping the gluten to relax naturally, and ensuring that it is not sticking to the table as well. If it gets tricky to turn, just add a bit more flour before you set it back down.
Always be gentle, and try to use just the tips of your fingers. Remember, your hands are warm, but you want your dough to stay cool.
Some bakers and pastry chefs like to use a marble rolling pin or to roll on top of a marble slab, for the cooler temperatures that they offer.
3. Pinch the edges together for the most even round.
This is particularly important in your first few rolls.
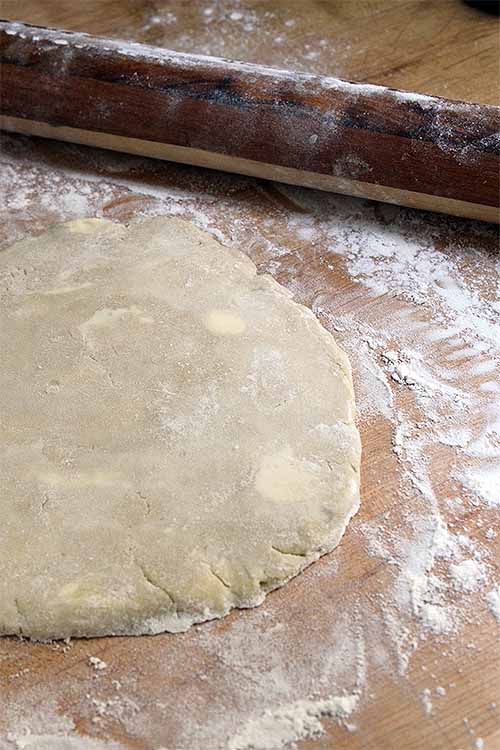
As you start to stretch the dough out into a circular shape, the outside edges threaten to crack and spread apart. Gently pinch these cracks together between each roll. Otherwise, you’re likely to end up with a not-so-round final piece.
4. Use your rolling pin to transfer.
Once you’ve got a perfectly rolled piece, the most frightening step is the transfer. Oh, the dread of tearing that carefully formed sheet!
Here’s what you need to do:
Gently flour the top of the dough as well as your pin, then roll the dough loosely onto the pin.
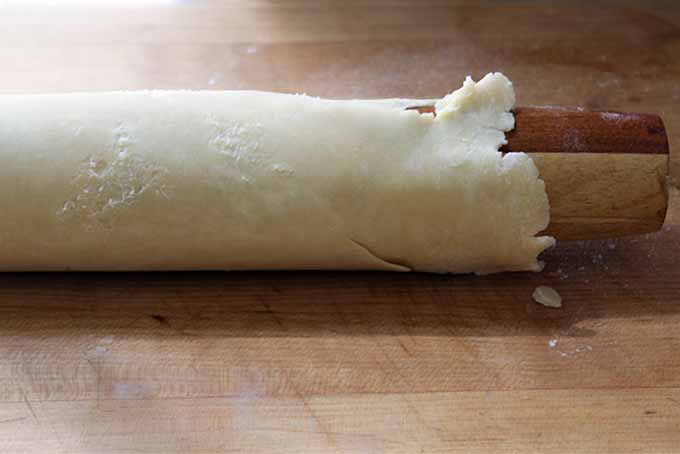
Pick it up carefully, and drape it gently onto your pie dish as you unroll it.
Adjust the position of the dough if you have to, and press it into your plate with your fingertips.
You did it!
The Cleanest Edge
Once you’ve successfully transferred dough into your pie plate, it’s time to trim it up and make a nice, clean edge.
If you plan to add a top crust, allow yourself about a half-inch overhang. Trim a clean edge, and use the leftover pieces to patch up any holes along the sides or bottom of the dough, or to create decorative cutouts, like I describe below in the Shapes section.
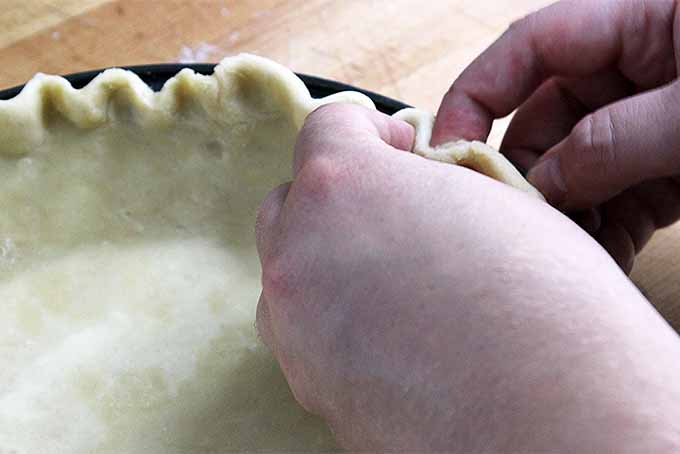
If you won’t be using a top crust, allow a full inch of overhang. Trim just as you would above, then tuck the outside edge under and crimp all the way around, using your thumbs or two fingers to create a scalloped edge, or the tines of a fork to create a different pattern.
Now it’s time to let things rest… again. You’ll be using the freezer this time. Give your crust another 30 minutes at least, or chill overnight if you can bear to wait!
Blind Bake
No, this isn’t like flying blind or winging it in the kitchen. What I’m referring to here is baking your pie shell before it is filled.
There are only 2 instances when you need to blind bake your crust: when your filling is custard-based, or no-bake.
A custard-based filling cooks in less time than the dough, thus a blind bake is necessary to ensure you don’t end up with overcooked custard, or undercooked dough.
The necessity of a blind bake when using a no-bake filling is hopefully quite obvious – you don’t want to serve raw dough!
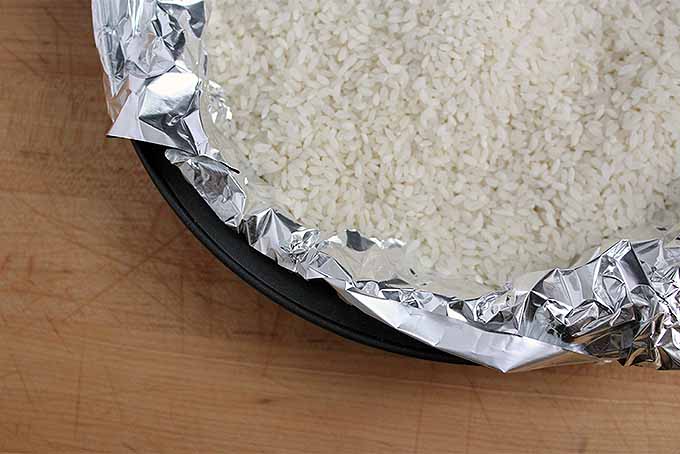
After your crust has rested in the freezer, line it with parchment paper or aluminum foil, and fill it with some type of weights. Pie weights, dried beans, uncooked rice, or even pennies will do. Make sure the weights are spread across the bottom in an even layer and pushed up a bit on the sides.
These weights will prevent the bottom from puffing up, and the sides from sagging down.
If you’ve ever had an issue with shrinking crust, a lack of sufficient freezing or poor distribution of weights before baking is most likely to blame.
Bake the weighted crust at 350°F for 15 minutes. Remove the weights and liner, then bake for another 10 minutes or until golden brown.
Top Crust 3 Ways
The stressful parts are over – congrats! Now it’s time to move on to something more fun.
Here are three fancy options for finishing your dough:
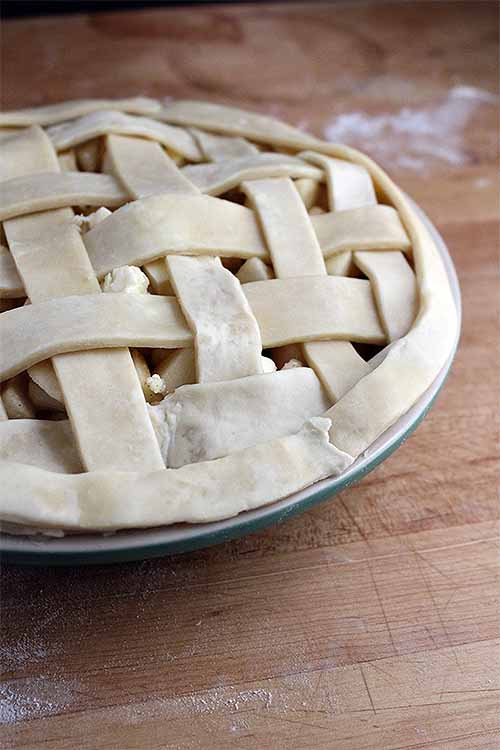
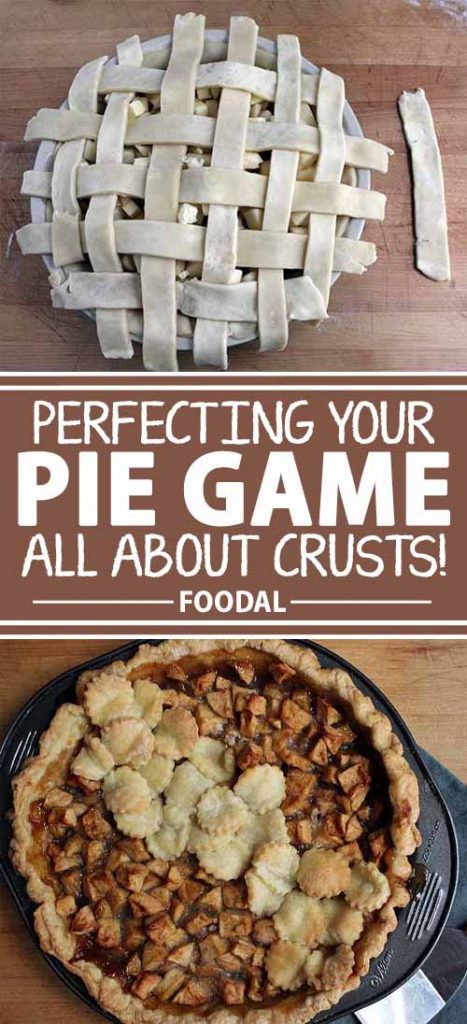
1. Lattice
Perhaps one of the most popular methods for finishing a pie, this one can seem far more intimidating than it should.
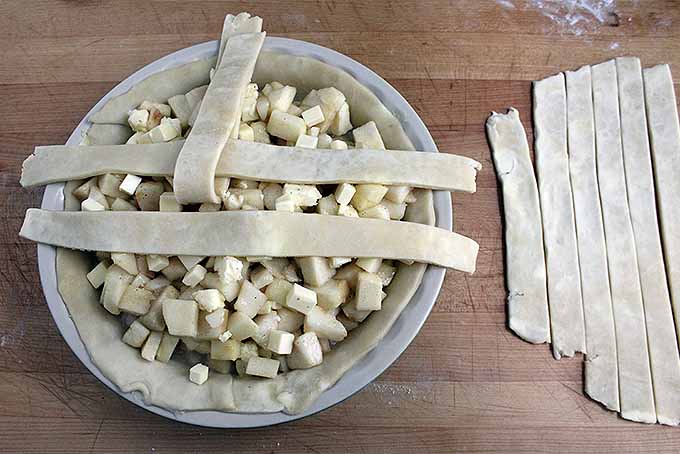
Once your bottom crust is finished and the filling is made, roll out your second disc of dough. Cut it into strips, as thick or as thin as you desire, but of equal size.
If you want a lattice that is completely closed, you will need enough strips to cover the top of the pie twice. If you prefer gaps where the filling is visible in between, then you need just enough strips to cover it once.
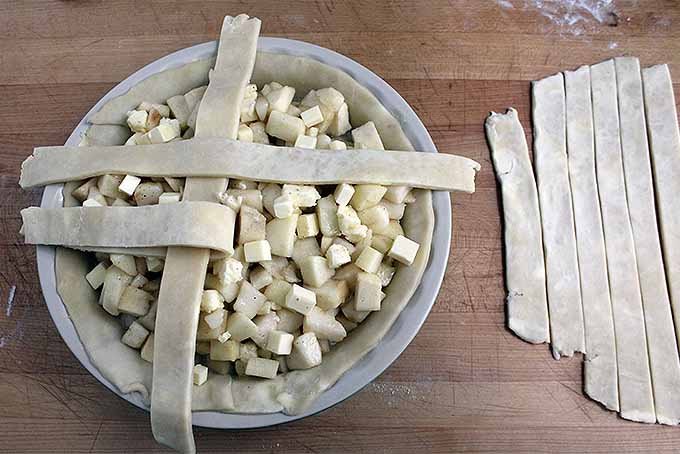
Start by placing two strips just off center, one oriented vertically and another placed over that, oriented horizontally.
Place another vertical piece parallel to the first.
Lift up the first vertical piece, and place another horizontal piece underneath it, parallel to the first.
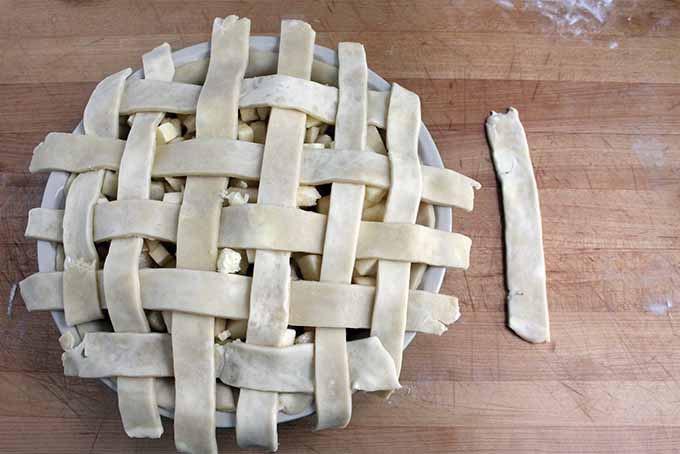
Repeat this process until the pie is covered, lifting up alternating strips.
Trim the ends to form a clean edge. To finish, either crimp the pieces together with a fork, or place one final strip around the perimeter of the pie.
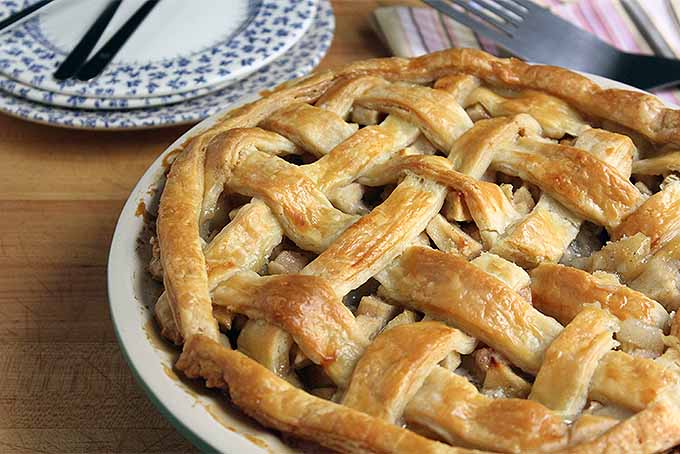
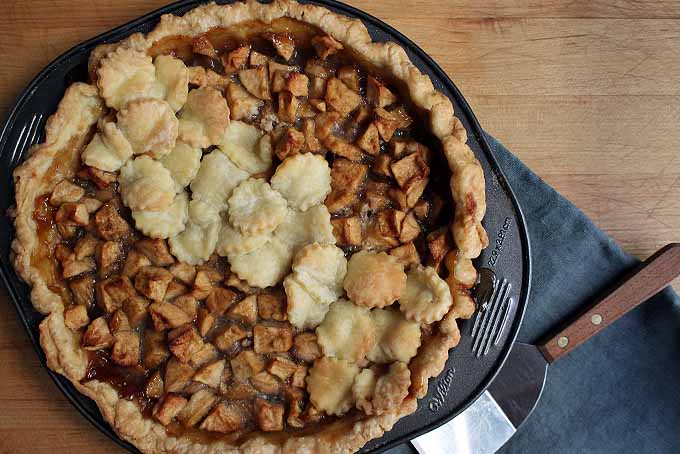
Apple Pear Pie With Cardamom and Ginger – Get the Recipe Now!
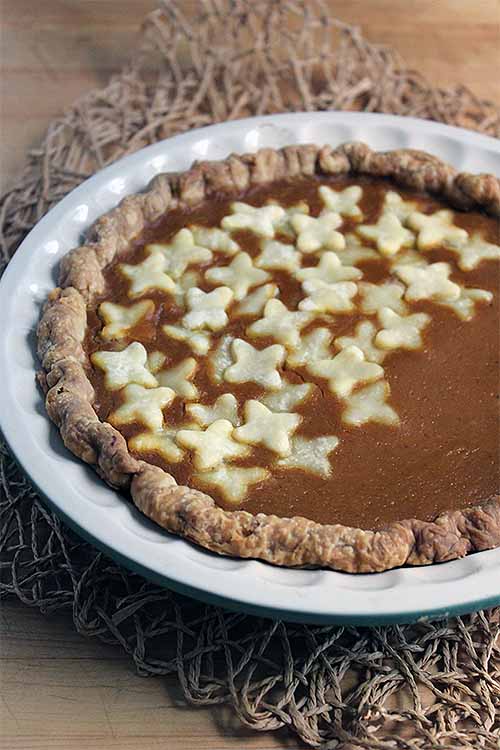
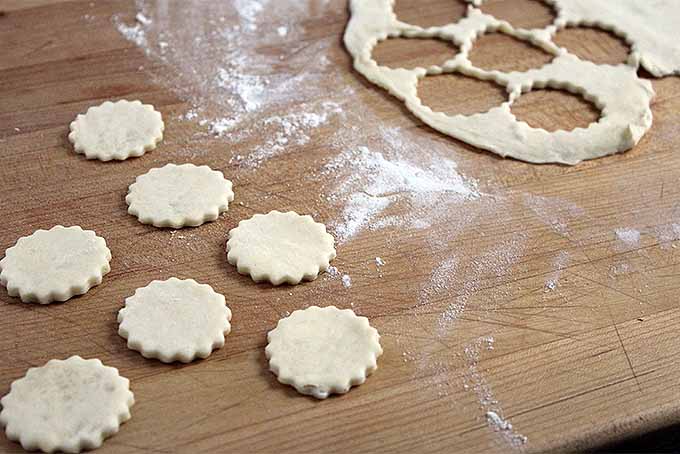
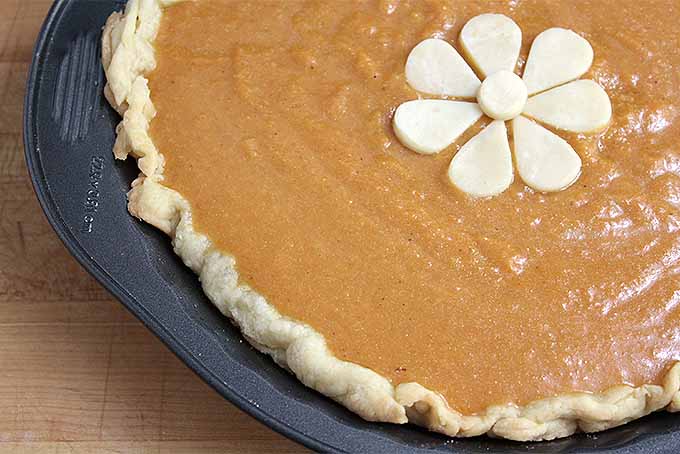
2. Shapes
One of my favorite final touches is cutting out shapes with a cookie cutter to place on top. I like to use either a single piece in the center, or lots of pieces that are layered to create a full crust over the pie.
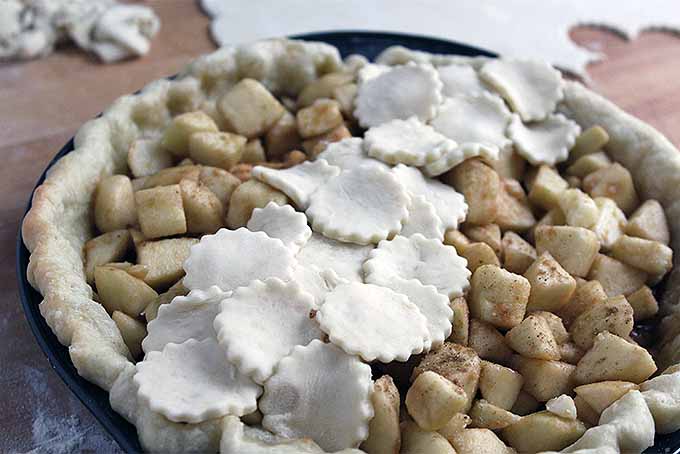
To create a single piece as decoration, you can use the scraps leftover from trimming the crust. If you prefer to cover the entire pie, just roll out a disc of dough, and cut out a few dozen pieces (depending on the size of your cookie cutter).
Layer as you please to cover – whether you opt to create a fun design over the entire pie, a diagonal from one side to the other, or to cover just half the pie, your design will be unique and totally photo-worthy.
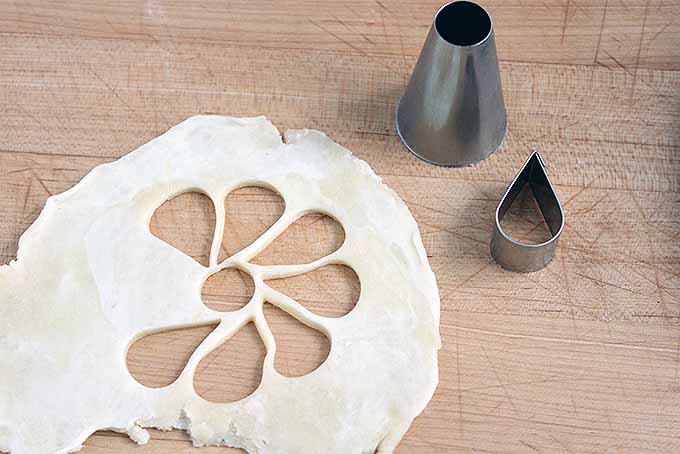
3. Cut-Out
Finally, another easy way to decorate a pie is to punch a decorative shape out of your top crust, rather than slicing the usual vents. This is essentially the inverse of the option above.
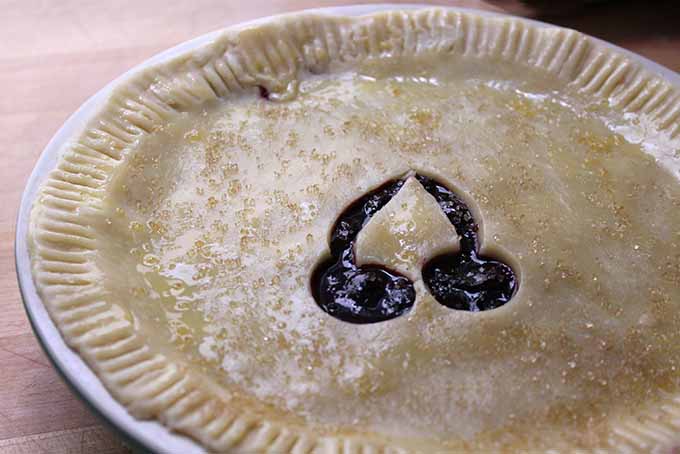
When covering the pie with a full top crust or a cutout, roll it onto the pin as you did for the bottom piece, and then roll it out over the pie. Trim the edges, with a full inch of overhang this time. Tuck the ends underneath the edge of the bottom crust, and crimp them together to hold it in place.
Alternatively, trim the edges with a half-inch overhang, and crimp with a fork to hold the pieces together.
The Perfect Pate Brisee
Pate Brisee is the simplest type of pie dough, the classic French pastry crust. Its name means short crust pastry, “short” being the baker’s term for a high ratio of fat to flour. It is flaky, salty, and rich with buttery flavor.
This dough is perfect for both sweet and savory applications. It can transition nicely from an apple pie in the fall to a lemon meringue in the summer, and a rich Quiche Lorraine in between.
The Recipe

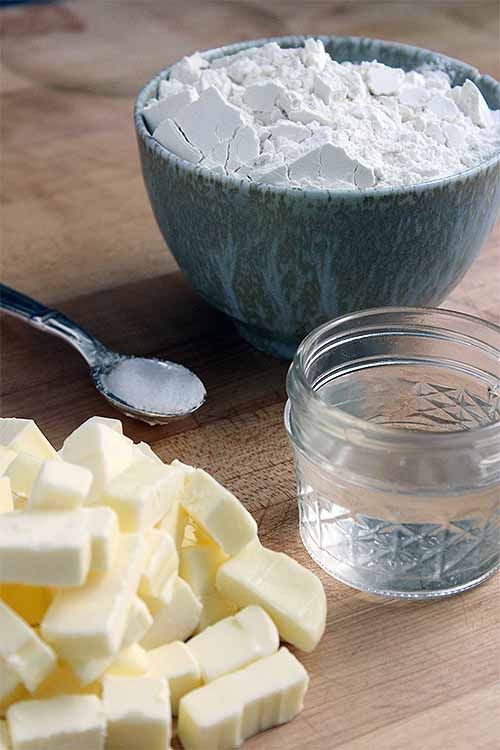
- 2 cups all purpose flour
- 1 teaspoon salt
- 2 sticks unsalted butter (1/2 pound or 16 tablespoons)
- 6 tablespoons ice water
- Using the paddle attachment on a stand mixer, a food processor, or a pastry cutter, incorporate the butter into the flour and salt until it is broken into pea-sized pieces.
- Add the ice water and mix until the water is absorbed.
- Turn onto a clean counter and knead lightly one or two times, to form one or two smooth discs.
- Wrap each piece in plastic wrap. Refrigerate for at least one hour, or freeze up to 2 weeks.
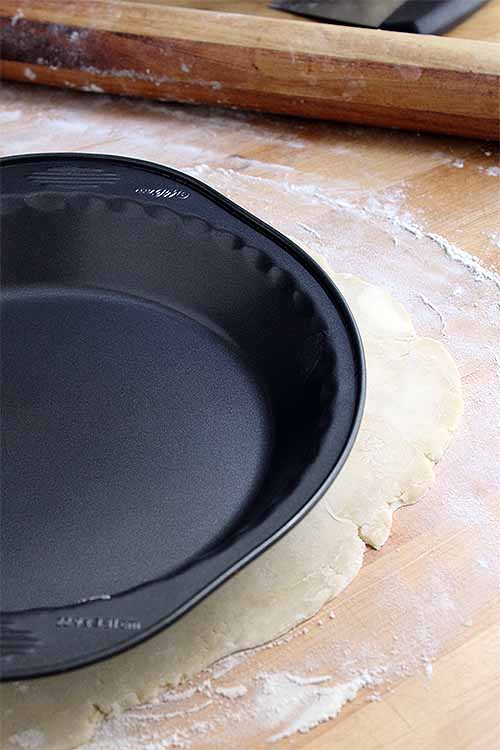
- Once the dough is chilled, roll it out until it will fit the base of a pie plate, with a little bit of excess.
- Roll the dough carefully onto the rolling pin and transfer it to the plate. Press into the bottom of the pie dish, then trim around the edges of the plate. Place back into the refrigerator for at least half an hour to chill before filling or blind baking.
For vegan pie crust recipe, look here.
Recipes to Try
Pumped to try out a perfect pie, but don’t know where to start? Give one of our many pie recipes a try:
The Flawless Bake
You’ve made it to the final stage – but I’ll ask you for just a bit more patience. Let the pie rest for another half hour, or else that gluten will still want to shrink. Place it in the fridge to chill.
Once the oven is preheated to the temperature your recipe calls for, brush the top of the pie with a whisked egg, and it’s ready to go.
Bake according to your recipe. Once it is finished, let it cool completely on a wire rack for at least one hour.
Now, you’ve received an expert lesson in both patience and pie-making. Reward yourself with a giant slab of your beautiful, tasty creation!
Oh, and if you need help removing all those pits from fresh cherries, be sure to read our review of the best cherry pitters!
Tell us in the comments about your own tried and true pie making tips.
Don’t forget to Pin It!
Photos by Kendall Vanderslice, © Ask the Experts, LLC. ALL RIGHTS RESERVED. See our TOS for more details.
About Kendall Vanderslice
Kendall’s love of food has taken her around the world. From baking muffins on a ship in West Africa and milking cows with Tanzanian Maasai, to hunting down the finest apfelstrudel in Austria, she continually seeks to understand the global impact of food. Kendall holds a BA in Anthropology from Wheaton College and an MLA in Gastronomy from Boston University, and has worked in the pastry departments of many of Boston’s top kitchens. Based in Somerville, Massachusetts, Kendall helps to run a small community supported bread bakery and writes about the intersection of food, faith, and culture on her personal blog, A Vanderslice of the Sweet Life.


Yay! I have been thinking about baking some apple tarts. It must be the fall feeling bringing out my sweet tooth. I love my treats but I’m afraid of getting my dough just right. I don’t think I’ve ever had a disaster with crust but my mom (who is a good cook and baker) always claims she can not make them and maybe that has scared me off. I’m hoping these tips will help me out with that.
The apples are all ripe on the tree and they were really good in the apple crisp and oatmeal we ate recently. Maybe I will have to buy some butter and make a pie tomorrow.
Hopefully you’ll give it a try! There’s nothing like a homemade pie and you’re so lucky to have an apple tree in your yard.
I agree! Apple pies are always delicious, but made with fresh apples from your own backyard is really a treat! Good luck with your crust making endeavors.
This is fantastic! I am the primary cook in our house, and I happen to “specialize” in the desserts department. That being said, I can NEVER get pie crusts to turn out perfectly. With the holidays coming up, I have been stressing this factor since I cook for a large crowd. Lots of helpful tips here.
I have gotten so used to making the same pies, so the rest usually turns out the same, so often times the crust can set it apart. It is tough though, so thanks for these very well done tips in case I ever venture outside of my comfort zone.
Oh the awful, frustrating pie crust! I learned a lot in this post- I didn’t know that keeping things cold was so important, so that’s my first mistake. 😉 I also didn’t know it so important to weigh down the dough prior to baking. I have had so many misshapen and burned disasters that I’ve been using pre-made frozen products for years. This gives me the inspiration to try again and see if I can make one worth saving. Thanks for posting this!
I’m glad these tips were helpful! Yes, chilled ingredients are so so important, but its something that is often under-appreciated.
Yay! This is just what I needed. Thanks for all these great tips and instructions. I’ve never been really good at making this despite the fact that my mother can like a pro. Now, I should be able to pull it off, with these great directions. I’m definitely more willing to give it a try, now that I better understand how it all works.
The latter recipe sounds fantastic. I’ll be bookmarking this page for future reference (not to mention future baking projects). Thanks!
For me, resting the dough before baking is the thing I’ve learned most recently and is the thing that’s made the most difference to my pastry making. Pity I had to get to well over sixty before I learned that simple trick!
One of my mistakes while making pie crust was adding water too quickly which in turn made the dough quite “slimey”, I had to work extra hard to make it work. Resting the dough with yeast mixed in is definitely the way to go.
Thank you for the tips. I feel I understand how to cut in the fat and roll out the dough, but I’ve been having issues with it not turning out tender enough. This may be, in part, due to me not always chilling my fat long enough. I tend to start baking on a whim, so ingredients aren’t always at the proper temperatures when starting out. Sometimes, however, even when I do chill everything properly, my crust still turns out too tough. I now know that I may be adding too much water which, apparently, can cause a tougher texture. I’ll definitely have to watch that more closely. Pictures showing the consistency of the dough at each step would be very helpful. Or, better yet, a video.
If you are having issues with it being too tough, it is most likely due to being mixed or handled too much. If your butter is not cold enough, then it is probably getting over worked in the cut-in stage. But it is also easy to over mix when you add water. It should still be crumbly when you pour it onto your counter, and should be gathered together very gently.
Another issue could be if you are re-rolling dough scraps — these will be very tough. I try to only use re-rolled scraps for decorative pieces on top rather than as the crust itself. I hope these tips help! I will see about getting some more photos of the dough’s consistency.
I made this recipe exactly as it is written and it was 100% perfection. I will save this recipe for all of my future pies, quiches, etc! Five stars for SURE.