We occasionally link to goods offered by vendors to help the reader find relevant products. Some of these may be affiliate based, meaning we earn small commissions (at no additional cost to you) if items are purchased. Here is more about what we do.
Among the many electronic kitchen appliances, voice-operated gadgets, and seemingly endless supplies of attachments and accessories available today, the humble and hardworking box grater continues to hold its position as a popular kitchen tool.

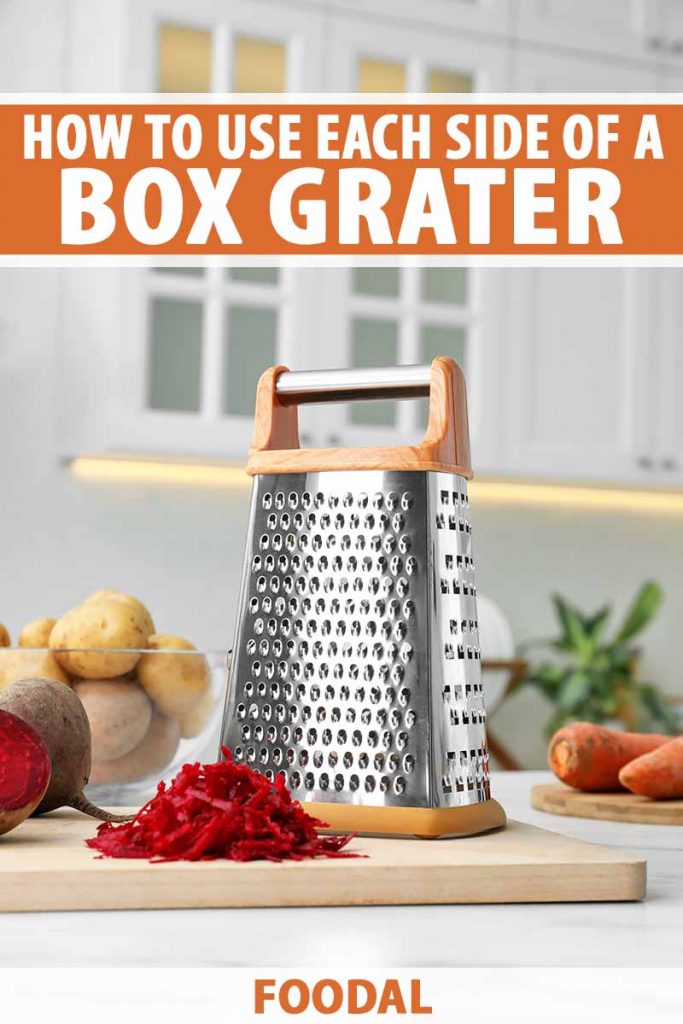
The box grater is a standalone prep tool with four sides. Designed to facilitate zesting, grating, shredding, and slicing tasks, each side has a different style of blade.
Created to serve a multifunctional purpose in the kitchen, it has an evolutionary design based on that of a simple handheld cheese grater.
First invented in the 1540s and redesigned throughout the following centuries, cheese graters for home use helped to stretch small household budgets.
As a crafty tool that helped home cooks stretch small morsels of cheese in trying times of food shortages, notably during the Great Depression in the 1920s, a cheese grater helped to make use of cheese scraps that would soon expire.
Because home cooks with limited supplies of meat and vegetables could distribute and melt grated cheese across a larger surface area, dishes appeared fuller and more abundant.
As a tool that does far more than grating cheese alone, the box grater helps the present-day home cook prepare a wide range of ingredients, from a block of cheddar to a bunch of carrots.
If you own a box grater, or you’re thinking of purchasing one, we’re here to give you our advice on the best way to use this handy kitchen tool.
Read on to learn about each side of a box grater, and collect useful tips for adopting the best techniques and cleaning methods.
How to Use a Box Grater
The Standard Four Sides
The basic features of a standard four-sided box grater are virtually the same amongst most brands and models we have reviewed. These have a boxy shape, an open hole at the bottom, and a handle on top.
Three sides have round blades in graduated sizes: one small/fine, one medium, and one large. The fourth side has a single blade for slicing. You may occasionally see straight blades on all sides or holes of a different shape instead of round ones.
All of these blades most commonly operate in just one direction, though you may come across models with bidirectional blades.
While standard models are constructed entirely of metal, some may feature a plastic body, soft-grip handle, or rubber feet to promote ease of use, ensure a firm grip, and keep the grater steady.
Let’s grate, shred, and slice our way through each one!
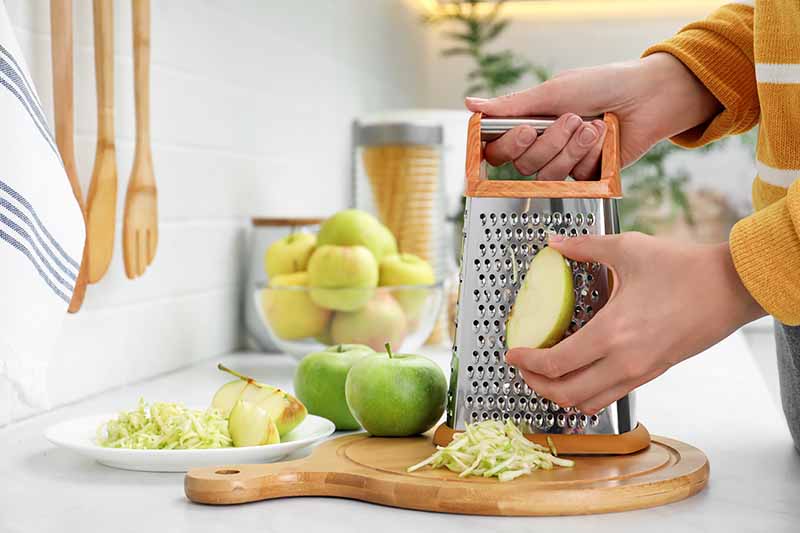
Fine
Unlike the blades on the other three sides, the finest side of a box grater is usually constructed with a series of tiny punctured holes facing outwards in the metal.
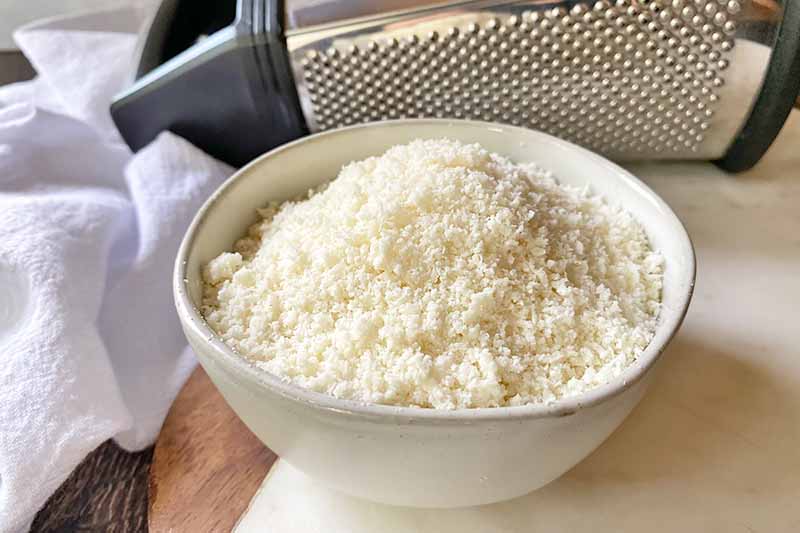
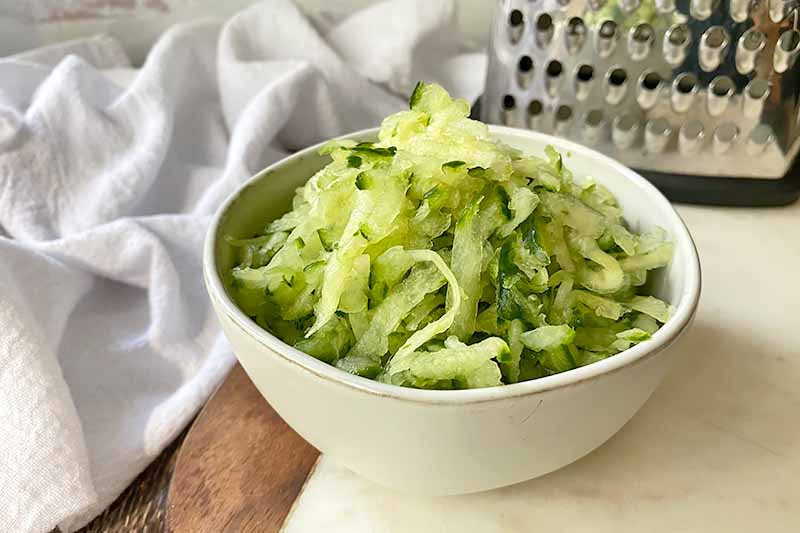
The finest option is most effective on hard and dry food items, and will help you achieve the teeny-tiniest of results to yield a finely grated finished product.
You can see just how effectively you can grate these styles of ingredients in the above photo. With the small, punctured holes of the Sabatier Kitchen Grater, available on Amazon, you can achieve a very fine and powdery result.
You’ll be able to easily pulverize dried, day-old bread to make powdery bread crumbs, or finely shave hard cheeses like Parmigiano Reggiano or a well-aged gouda to seamlessly blend in recipes for meatballs or quiche.
This side is also ideal for finely grating chocolate as well as whole spices like cinnamon sticks or nutmeg to yield aromatic powders for baking and cooking.
While another intended function of this particular design is zesting citrus fruit, I find that the amount of oil released from the peel causes most – if not all – of the zest to relentlessly cling to the rugged surface around the holes with most models.
The way the zest sticks makes it virtually impossible to remove anything in a large enough quantity to qualify as a useful amount for use in a recipe. And picking these bits out with a toothpick is a painstaking process.
Take my word for it, and leave the zesting to a zesting tool designed specifically for this purpose! You’ll still have many opportunities to utilize this side for other tasks.
Or, do yourself a favor and invest in this box grater from Microplane, which makes it a cinch to remove zest from the fine blades. You can find it on Amazon now.
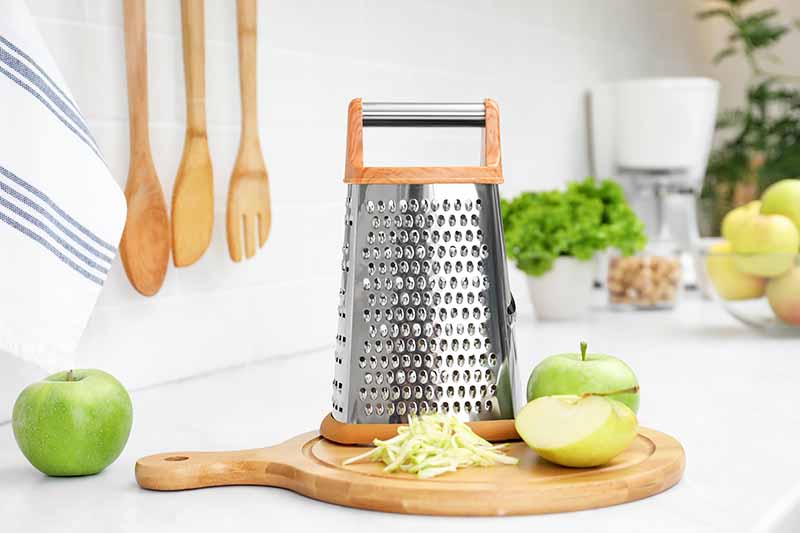
Medium
Representing the happy middle ground between a fine grind and a coarse shred, the medium-sized blades of this handy tool will help you prep your way through different fruits, veggies, and cheeses.
Are picky eaters living under your roof? Use this side when you want to process foods so they have a finer and more delicate texture to incorporate in certain recipes. If you hope to make melt-in-your-mouth cakes or muffins without too much texture, this is the side to choose to yield smaller pieces of fresh ingredients like apples and carrots.
Do you want your cheese to melt quickly and evenly in delicate sauces? Use this side for semi-firm cheeses that may be too difficult to grate with the finest facet of your gadget.
Figuring out what size you want your Parmigiano Reggiano or Pecorino Romano to be to use it as the finishing touch sprinkled on top of a perfect mound of pasta? If you’re going for not too big and not too small, make like Goldilocks and choose this side.
Buon appetito.
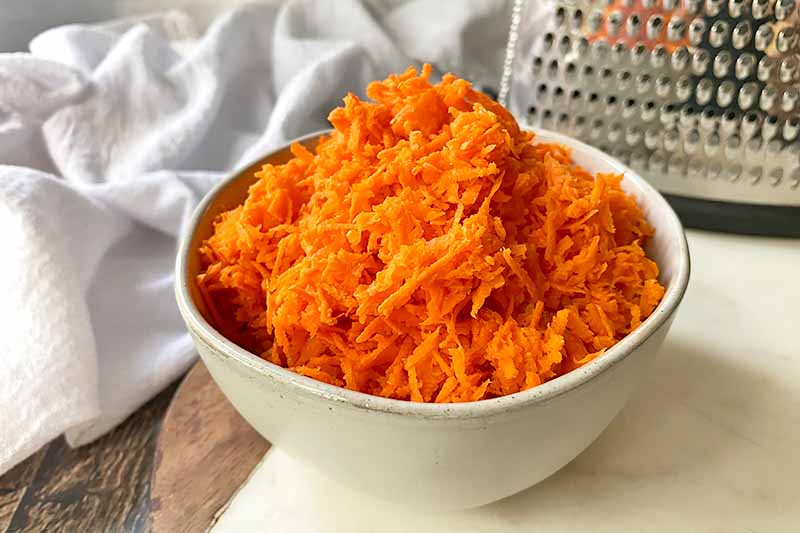
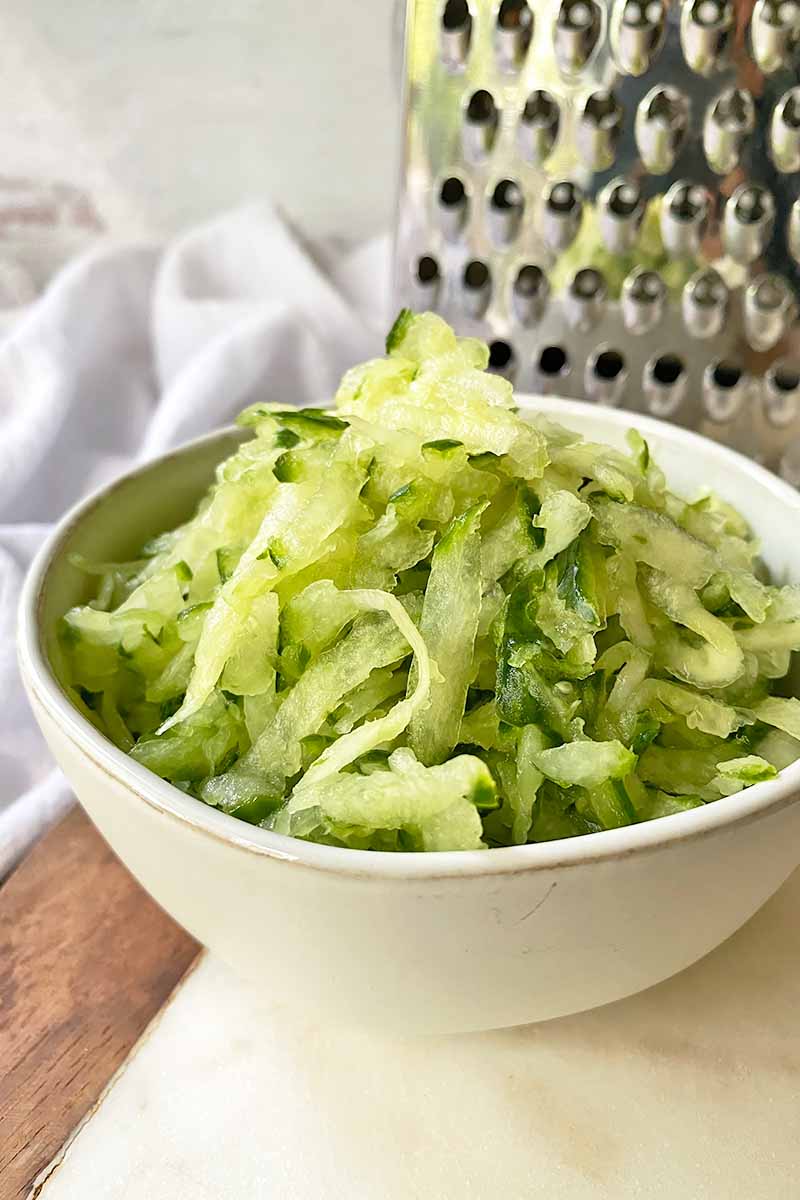
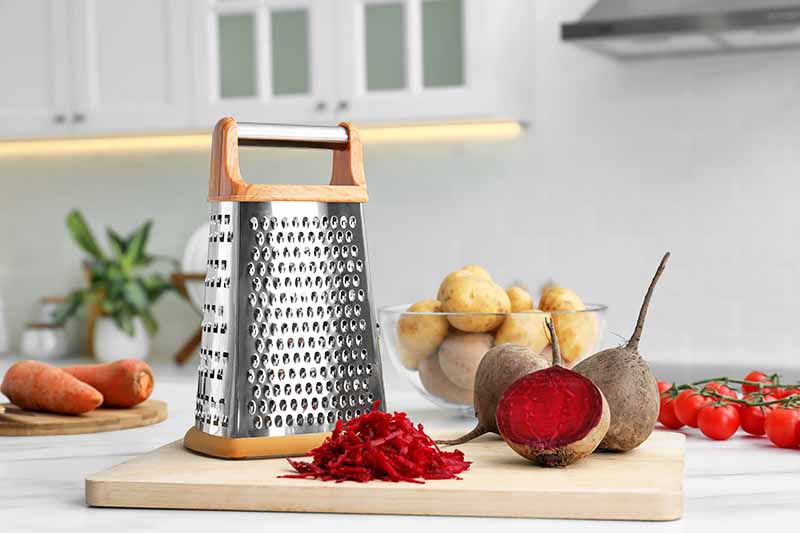
Coarse
As the side with the largest hole size, this will help you to shred, rather than grate, your ingredients. It is a highly useful choice for maintaining the structures of both hard and soft food items.
The sturdy design and no-skid base found on many models today will firmly stand in place as you shred larger and heavier food items. You can shred long and spongy zucchini when you’ve brought in a bumper crop from the garden just as easily as a sturdy sweet potato.
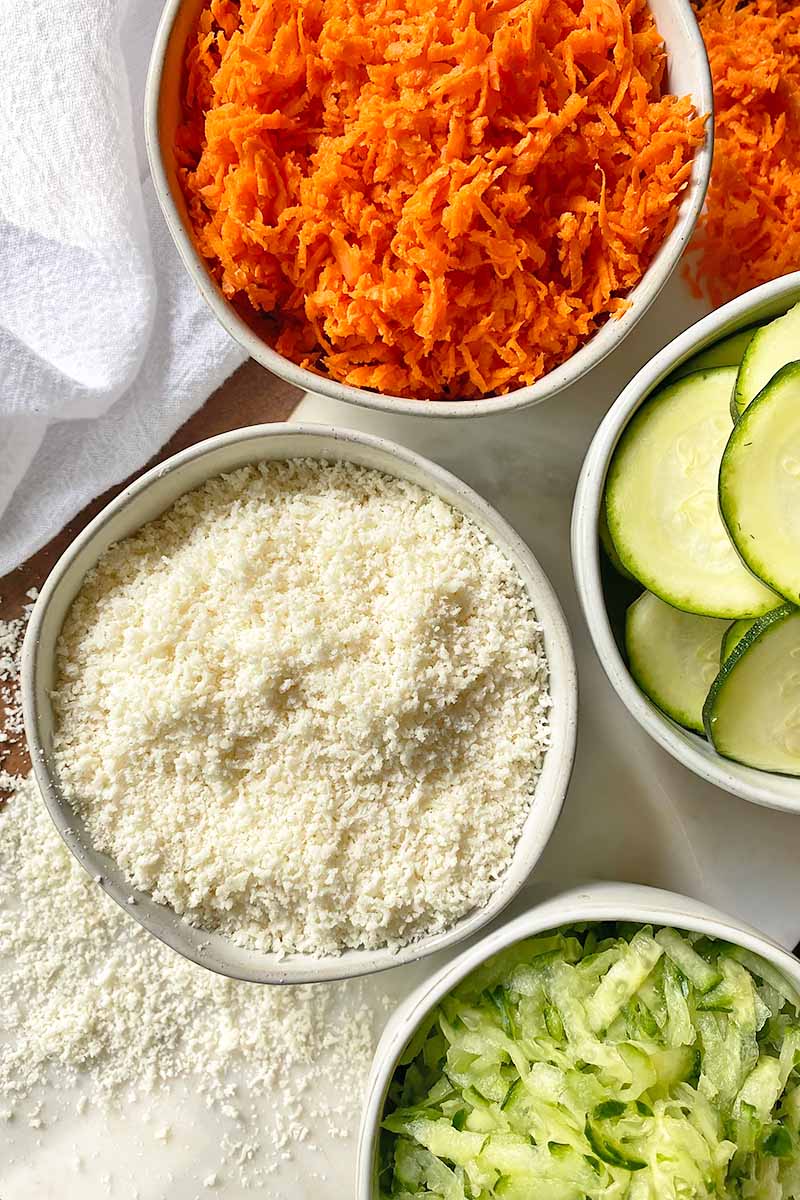
Use this side for shredding firmer vegetables when you still need girth and texture in a recipe. Use it for grating potatoes to make pancakes or latkes, and larger strands of carrots or beets for cakes, muffins, and salads.
This is also the best size for shredding fruits and vegetables that have a heavy water content. Smaller holes would obliterate the flesh, leaving you with total mush!
Use the coarse side to shred things like tomatoes for sauces, cucumber for tzatziki, and zucchini for quick breads and marmalade.
The coarse side of your gadget is also the best option for shredding softer cheeses that you may have struggled to grate with the other smaller blades, as well as hard cheeses when you’re looking for bigger pieces.
With the coarse option, you’ll be able to shred softer cheeses like fresh or part-skim mozzarella, semi-firm cheeses like young cheddars and goudas, as well as alpine-style cheeses like Gruyere, Comte, and Raclette.
Slicer
Mandolines can be scary, I get it.
We’ve done the research for you to find the best and safest mandoline for your kitchen. Beginners can think of the slicer side of a box grater as training wheels to practice on before you take off without them, when you’re ready to buy the real deal.
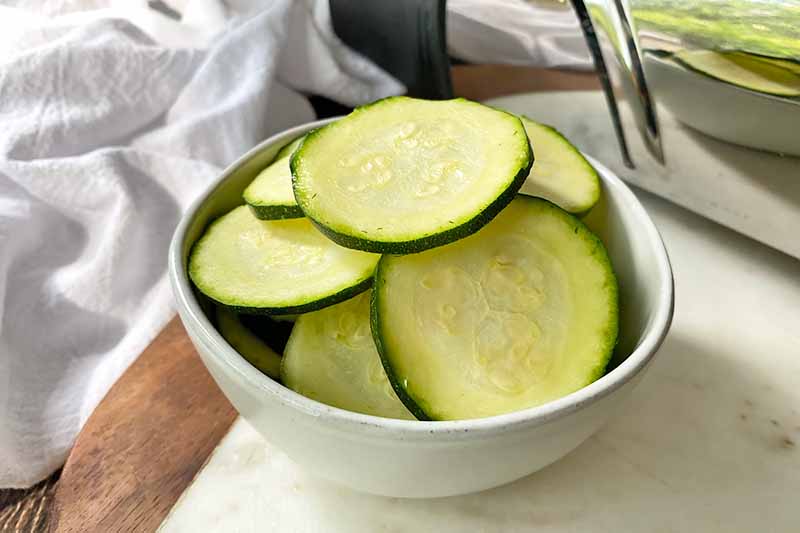
Constructed with one single blade, or multiple straight or slightly curved single blades in a vertical stack, this option is intended to cut thin and even slices of produce. Whereas mandolines provide a diverse range of thickness options, your box grater’s slicing blade is not adjustable.
I find that many cooks who regularly pull out their box grater for shredding cheese rarely turn to this side for anything – but now’s your chance to use it!
With the slicer side, you can develop your confidence in the motions that you would also apply when using a mandoline if you see yourself eventually graduating to this tool.
If you’re complacent with keeping your floaties on in the deep section of the pool, the slicer side will still yield decent results, though you’ll be working at a slower pace with more inconsistencies from one slice to the next.
However, with food of the correct size and the proper technique – which we’ll explain in the section below – you’ll be able to get the best results possible with this kind of blade.
Use this option when you don’t feel like slicing multiple rounds of cucumbers with a knife for a big batch of thin bread and butter pickles.
And you’ll have a much easier time getting through the laborious kitchen prep work when you can slice through a big batch of turnips, beets, and parsnips to make baked root vegetable chips!
The Do’s and Don’ts – Mastering the Technique
Fully equipped with knowledge on how each facet functions to meet your culinary needs, we can now move onward to learning how to master the necessary techniques!
With these quick pieces of advice, learn what to do and what not do before grating, shredding, or slicing for the first time:
DO Wear a Cut-Resistant Glove
If you have any inkling of fear regarding your safety when using a box grater, swallow your kitchen pride and wear a protective glove.
Our favorite? We armor up with the Level 5 cut-resistant glove from Dowellife. It’s available on Amazon now in small, medium, large, and extra-large sizes.
This is a smart preventative measure to avoid injury, especially when you are flirting dangerously close to the end of a piece of food with little to separate your skin from the sharp bits of this tool.
DO Select Appropriately Sized Food
Since the length and width of your box grater’s sides limit its use, you need to consider the size of the foods you wish to prep when grocery shopping and do any necessary portioning before you slice, shred, or grate.
Smaller is better, especially when operating the slicing blade side. In order to properly use the blade and get even pieces, you’ll need to start with smaller and skinnier pieces of food that don’t extend beyond the width of the cutting surface.
Semi-soft cheese and long vegetables that may be prone to breaking can be cut in half before you get to work, to avoid slip-ups.
DO Use the Handle
The handle is there for a reason – use it!
Holding the handle sturdy is another safety precaution to take as you use your box grater. A firm grip and pressure applied on the handle will keep the grater stable and fixed in its erect position.
You’ll also find that grating is significantly easier and faster with a pressured grip on the handle to hold things in place while you glide the food over the blades with your dominant hand.
Weebling and wobbling won’t be issues here, as long as you firmly grasp the handle with every slice and shred of your ingredients!
DO Use Long, Downward Strokes
For the best results, unless your model utilizes blades that cut in two directions, make sure you are moving your piece of food in long, downward strokes that utilize the full length of the side you have chosen.
With blades that face upwards, an upward stroke simply won’t do… anything! Pressing hard in an upward direction may also mash softer foods like mozzarella or tomatoes against the metal, gumming up the works.
DO Get the Family Involved
Compared to a knife or a mandoline, a box grater is a fairly safe kitchen tool that your kids can use if you want to have fun prepping and cooking in the kitchen together.
Always supervise younger children when sharp tools are in use, and let them grate the cheese or veggies! Kiddos in need of extra help may also benefit if an adult is there to hold the grater firmly in place (by the handle!) while they work… after they wash their hands, of course.
You’ll also find that grating is significantly easier and safer when you…
DON’T Forget Your Work Surface
Deciding what surface to use when utilizing your box grater is an important choice to make before you start.
Choose a large and flat plate, platter, sheet pan, or cutting board that is big enough to collect the prepped food, as well as any rogue pieces. As an extra safety precaution, place a wet towel underneath your selected work surface to keep it sturdy without slipping.
DON’T Become Distracted
This is Rule #1 in my book for any and all kitchen prep involving sharp tools!
Stay focused on the task at hand, work in a well-lit kitchen environment, and stop completely if you need to turn your attention to something else that may be a distraction.
DON’T Coat with Nonstick Spray
You may have read elsewhere that it’s a good idea to spray your box grater with nonstick cooking spray to prevent pieces from sticking to the blades. Don’t do this.
Honestly, I have never found this “trick” to be effective – any ingredient with a high moisture content will inevitably stick to the blades a little, at least with the first stroke or two.
Do you really want to worry about getting grease all over your ingredients, and needing to clean it out of all the blades?
Let gravity be your friend here! Just as you might allow the weight of a chef’s knife to carry the blade through whatever food you’re prepping while you guide it with the other hand, you want to do the same here – let the food itself do the work, making smooth strokes that glide across the grater in a downward motion. Lift the food when you reach the bottom, and go back to the top.
Chilling soft ingredients like cheese and butter before you start can also help to prevent sticking. Hold the food firmly, but do not press harder than you have to in order to slice or grate.
DON’T Try to Go Too Fast
There is no race to the finish here – be mindful that you are dealing with sharp blades! Fast and crude slicing will increase the risk of injury.
Use this tool at a moderate pace to prevent nicks and cuts, and to produce well-shaped pieces.
Cleaning and Care Tips
Leave your dishwasher out of this. The best way to clean a box grater is by hand!
Think about all of those small blades and holes – there is no way your dishwasher will be able to clean every nook and cranny fully. And there are a lot of nooks and crannies with this particularly hole-y tool!
You’ll be able to successfully exorcize any devilishly rogue pieces from your grater by blessing each and every blade with a bristle dish brush.
I would advise against using a regular dish sponge, regardless of the material – the sponge may become tattered and shred with any attempt to clean the blades.
I like the nylon bristles on the Good Grips Dish Brush from OXO, available on Amazon and via OXO.
First, run warm water over the sides you used immediately after use to quickly remove any pieces that have collected on the surface, both inside and out. Then, applying slightly firm pressure, use the brush and some dish detergent to scrape away the remaining pieces stuck in the blades. Rinse with water again, and repeat as necessary with the brush until any traces of food are totally banished!
After it’s clean, drying a box grater is simple: allow it to air-dry.
You may see some water stains this way, but trying to dry this gadget with a towel will prove to be the bane of your existence.
The individual blades can capture moisture, but that’s not all they can catch – the sharp blades and holes will snag any loose threads or lint, and potentially create new pulls or tears in dishrags and kitchen towels.
Before air-drying, vigorously shake the box cutter over the sink to remove excess water. After it’s dried, you can polish lightly with a clean, soft towel to address any water spots if they bother you, moving in the direction opposite what you would use to cut or grate on the outside, and avoiding the fine side if there’s simply no way to polish it without damaging your cleaning cloth.
Be Besties with Your Box Grater
I have developed a very special bond with my box grater – and you’ll do the same once you start to use it on a regular basis.
Over the last seven years, I have traveled everywhere with my trusty tool, from Pittsburgh to Boston to Philly to D.C., and back to Pittsburgh again.
Understanding why it has been such a loyal companion should come as no surprise – I’ve used it to prep ingredients for for zucchini bread, carrot cake, beet salad, rustic ratatouille, and many more dishes than what I can currently remember off the top of my head, not to mention making homemade breadcrumbs and shredding cheese!
Take it from me – or take it from my mom, if you want to pay your respects to the person who first bought me my very own box grater: you’ll be happy that you learned how to use this multifunctional tool properly!
If you had any doubts, questions, or confusion about how exactly to use each side of a box grater, I hope I’ve clarified any gray areas, and paved the way to your future of easy prep work using this reliable tool.
Now, let’s chat! Do you have any additional thoughts or queries I didn’t cover here? What are your favorite ways to use a box grater? Send me a message in the comment section below at your leisure.
Love this tutorial? We have so many helpful guides to develop your confidence in the kitchen! Don’t take that apron off just yet – let’s get prepping and cooking with more of our how-to articles, starting with these:
Photos by Nikki Cervone, © Ask the Experts, LLC. ALL RIGHTS RESERVED. See our TOS for more details. Uncredited photos via Shutterstock.
Nutritional information derived from a database of known generic and branded foods and ingredients and was not compiled by a registered dietitian or submitted for lab testing. It should be viewed as an approximation.
About Nikki Cervone
Nikki Cervone is an ACS Certified Cheese Professional and cheesemonger living in Pittsburgh. Nikki holds an AAS in baking/pastry from Westmoreland County Community College, a BA in Communications from Duquesne University, and an MLA in Gastronomy from Boston University. When she's not nibbling on her favorite cheeses or testing a batch of cupcakes, Nikki enjoys a healthy dose of yoga, wine, hiking, singing in the shower, and chocolate. Lots of chocolate.