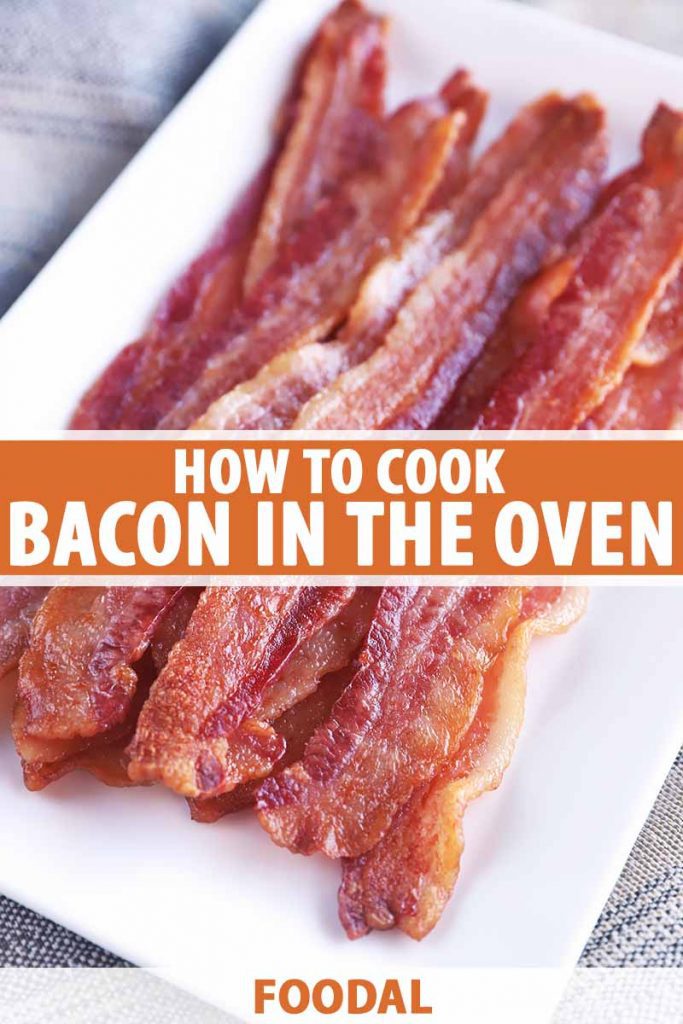
When it comes to cooking bacon, I’ll forever be an advocate of baking it in the oven.

While some occasions do call for cooking it on the stovetop – if a recipe requires it, or if you are only cooking a couple of slices, for example – I think preparing it in the oven is truly the best method to go with if you have the option.
It’s the way I learned to cook it in college, back when we were hungover and wishing for something easy to eat to start the day.
This was a time before smartphones and readily available delivery options at all hours of the day, mind you. I didn’t want to do battle with the stovetop, so I learned to make this meaty and delicious goodness in the oven instead.
Just think of all the things you can do with a few extra minutes, thanks to this hands-free cooking method, and with all of your burners free as well! You’re set up for the ultimate multitasking opportunity.
Well, if you’re not hungover, at least…
There are a few tips that I can give you to ensure that your crispy pork turns out just right, every single time. Let’s break it down, shall we?
Here’s what’s ahead:
What You’ll Learn
Use a HOT Oven and Lined Pan
Make sure your oven is hot. I mean really hot, as in 400˚F.
I like to line my rimmed baking sheet with aluminum foil or parchment paper to help with the cleanup at the end.
You can also use a silicone baking mat, but that is another item to clean, so I tend to avoid it.
Get Out Your Cooling Rack
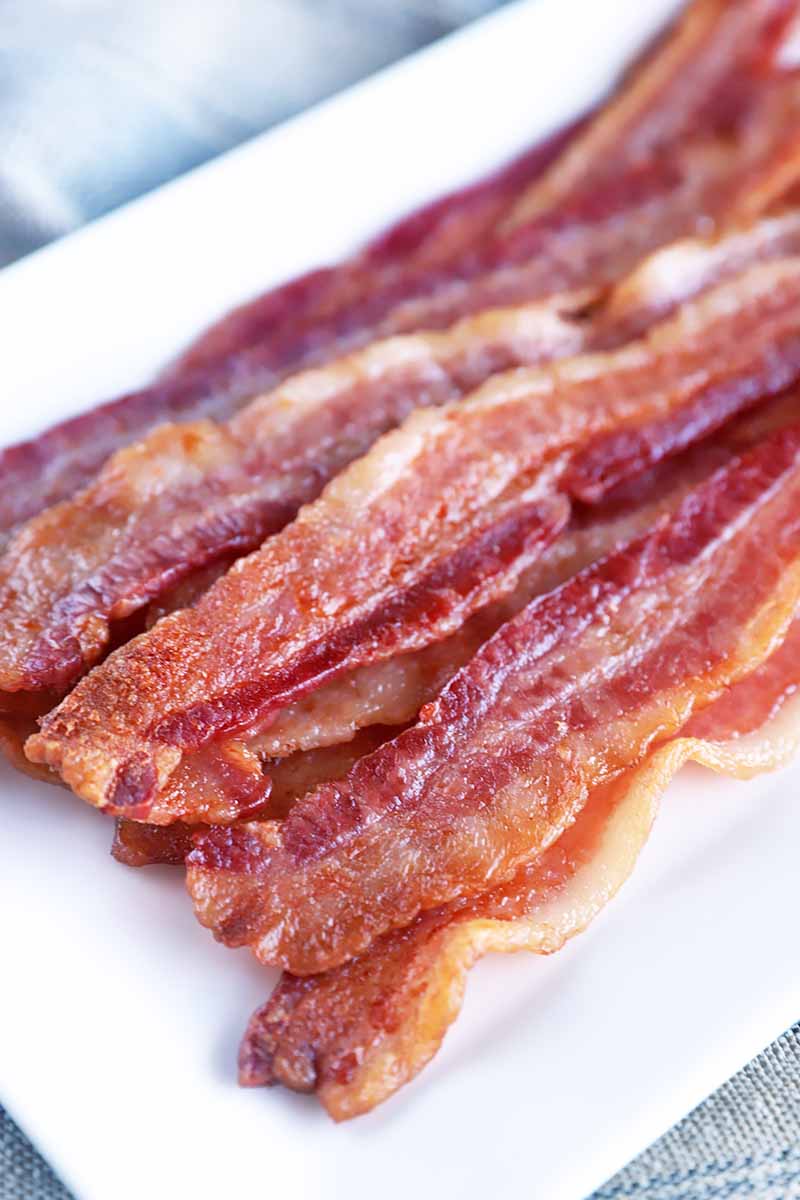
The best strips are crispy, at least in my opinion. I can’t imagine anybody wanting to bite into a soggy, slippery BLT…
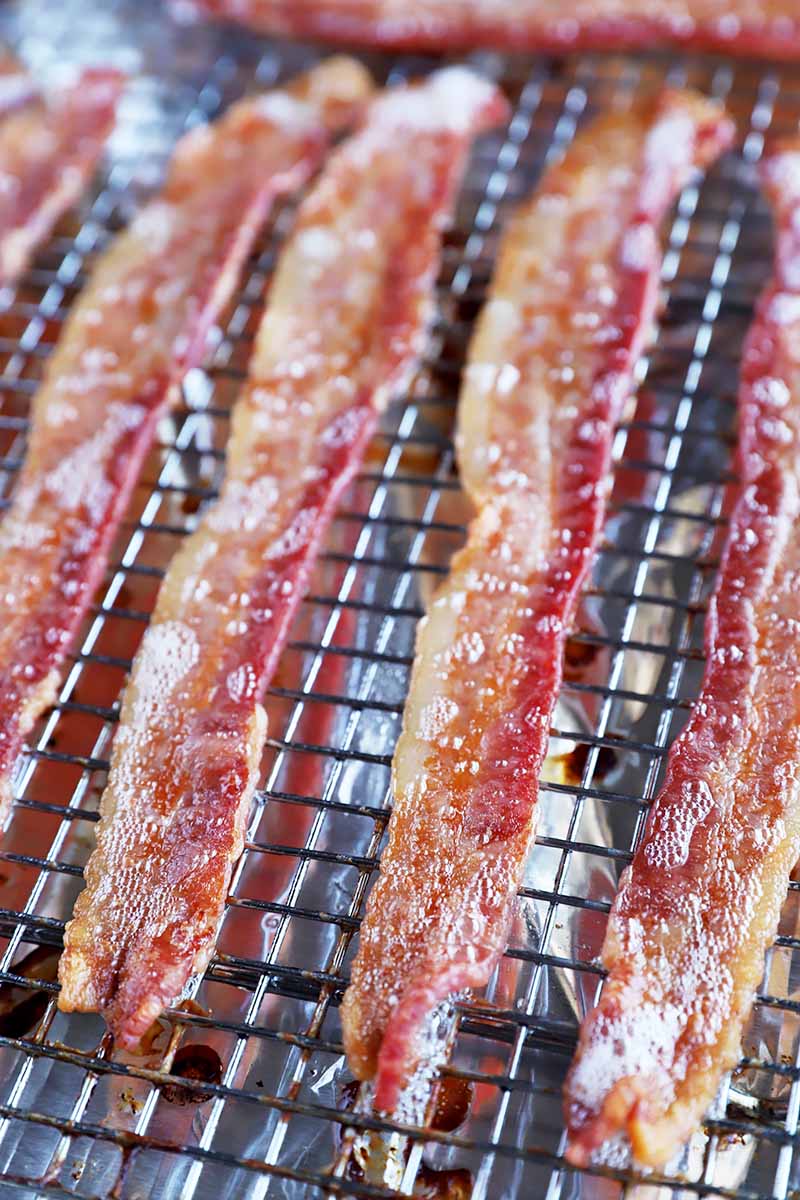
The key to mastering that crunch is in separating the meat from the bottom of the pan. You can achieve this by placing an uncoated metal cooling rack on top of your lined baking sheet.
That way, the pork cooks on all sides.
But if you like a little extra chew to your breakfast meat, don’t worry, you can skip the cooling rack if you’d like.
Drain on Paper Towels
At the end of cooking, transfer your slices in a single layer to a paper towel-lined plate, or a clean baking sheet lined with paper towels.
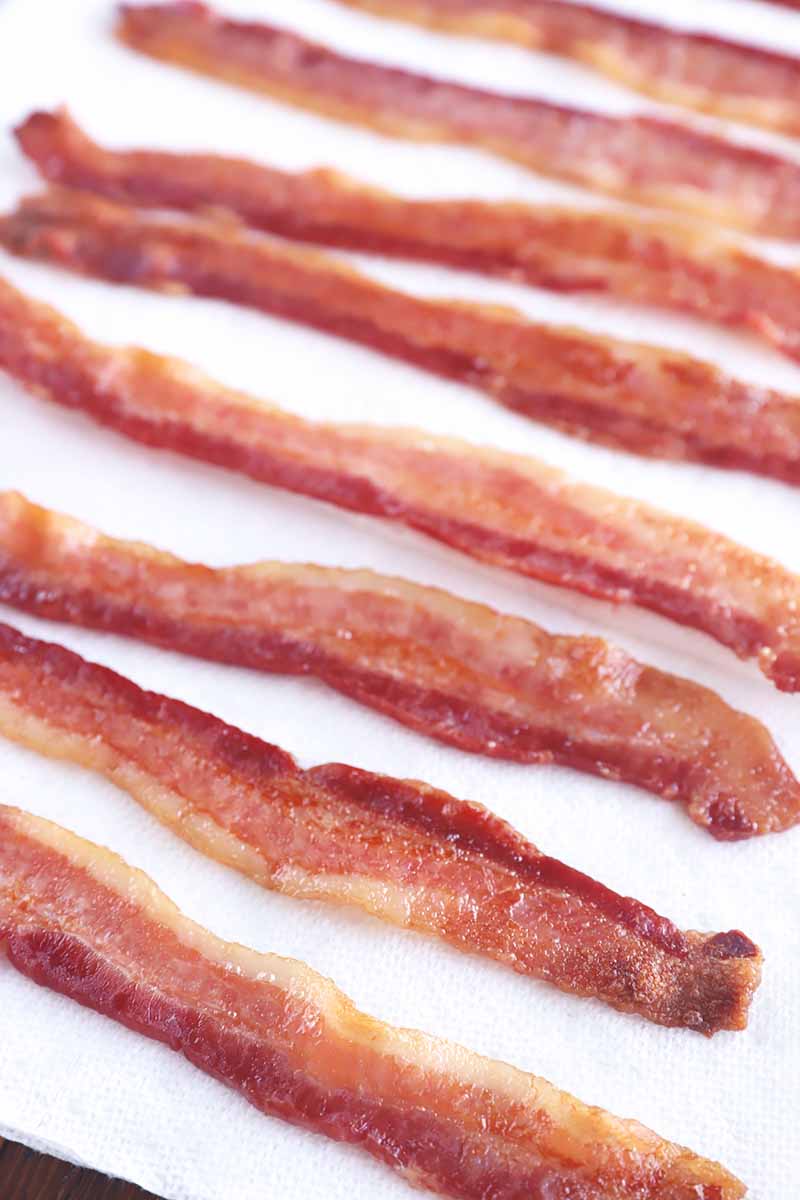
Like what you’d do if you were cooking it on the stove instead, this allows the pork to drain so it isn’t super greasy when you serve it.
How Can I Use All That Breakfast Meat?
First and foremost, serve it as is with your breakfast or brunch. This is a fantastic way to make enough to serve a crowd all at one time.
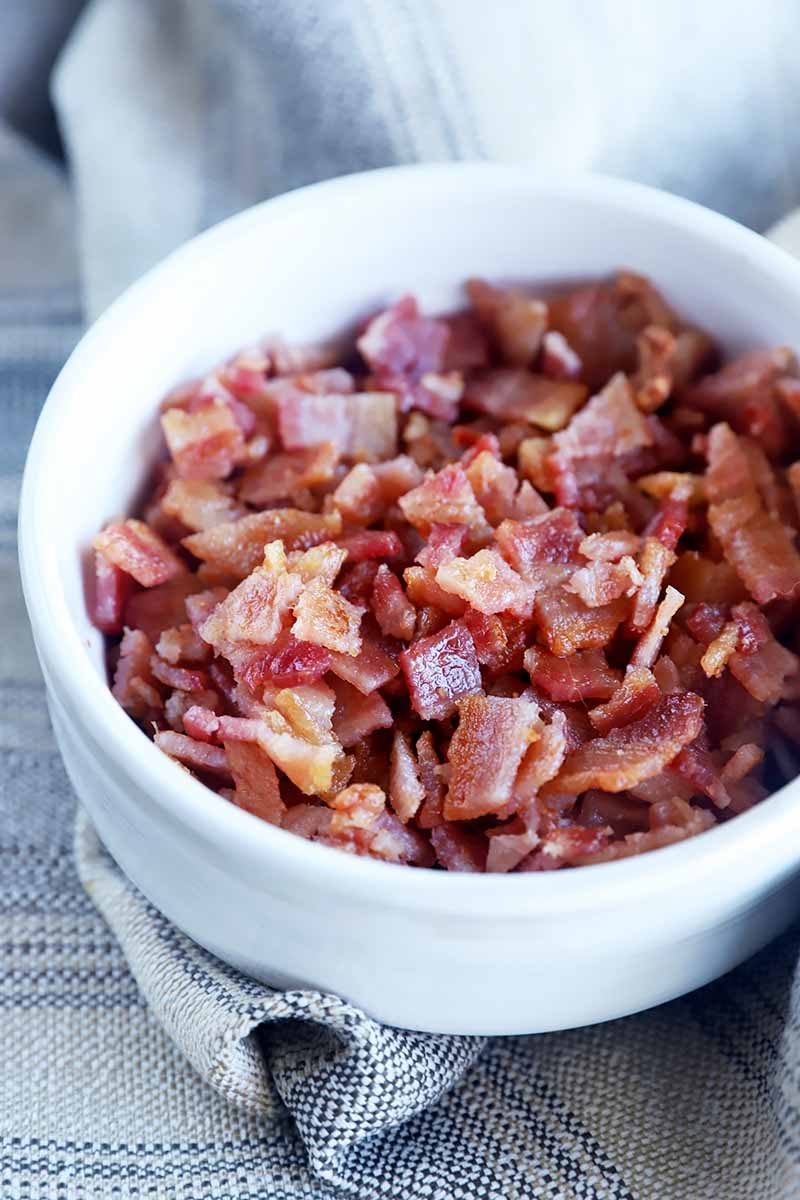
After the bacon has been drained and cooled a bit, crumble or chop it up and sprinkle it over your favorite salad.
Take your breadcrumbs to the next level by mixing in some crumbled crispy pork. Sprinkle it on top of green beans, macaroni and cheese, or your favorite veggie dishes and casseroles.
Chop it up and fold it into your favorite pasta dish or chilled pasta salad for a meaty and flavorful addition.
Top baked potatoes with crumbled pieces and your favorite toppings like cheese, sour cream, and chives.
The list goes on and on…
It also makes for a fun treat to give to your pups if you have any. Mine go absolutely mental for the stuff.
Save That Fat!
If you want, you can save the fat that collected during cooking in the bottom of the baking sheet.
Let it cool for a bit, then carefully pour it into a glass container. Allow it to cool completely, then put the lid on top and store it in the fridge. It can be stored this way for months.
It’s excellent to use for cooking, whether you are whipping up some chicken for dinner or using a bit in a salad dressing (seriously, it’s so good!).
How to Cook Bacon in the Oven
Baking bacon in the oven is one of the simplest and most straightforward approaches to cooking it that I know of. The pork comes out perfectly every single time, and you don’t have to deal with tending to it on the stovetop.
Step 1 – Measure and Prepare Bacon
To begin, you will of course need:
- 12 slices of bacon
Preheat the oven to 400˚F.
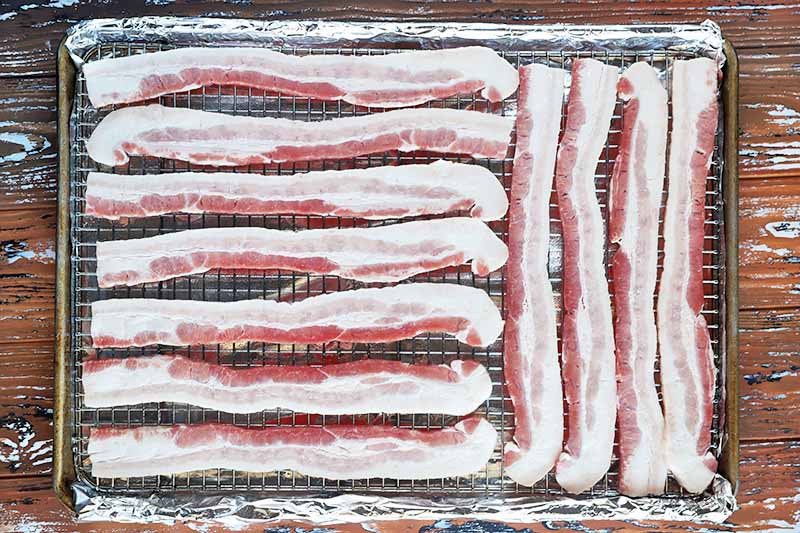
Line a rimmed baking sheet with aluminum foil or parchment paper. Set an uncoated metal cooling rack inside, and spray it lightly with cooking oil spray.
Arrange the meat slices in a single layer on the rack. Be sure not to let the slices overlap.
Step 2 – Bake
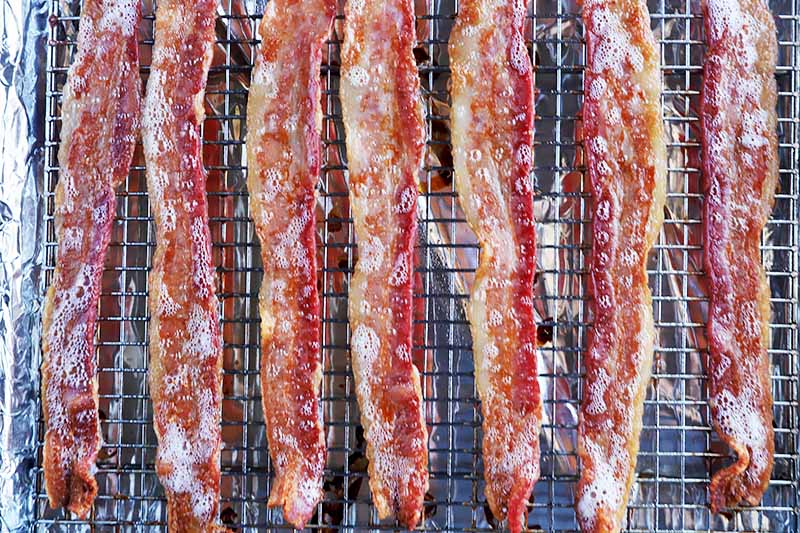
Place on the middle rack in the oven and bake for 15 minutes for regular pork bacon, or 18 minutes for thick-cut.
The baking time depends entirely on the thickness of the slices, so I recommend checking it for doneness around the 13-minute mark.
Also make sure you have read our guide to understanding your oven so you know how to check the temperature of your appliance, and are familiar with rack positioning and hot spots as well.
It’s best to know if your oven runs hotter before you begin cooking, because this could result in burnt slices.
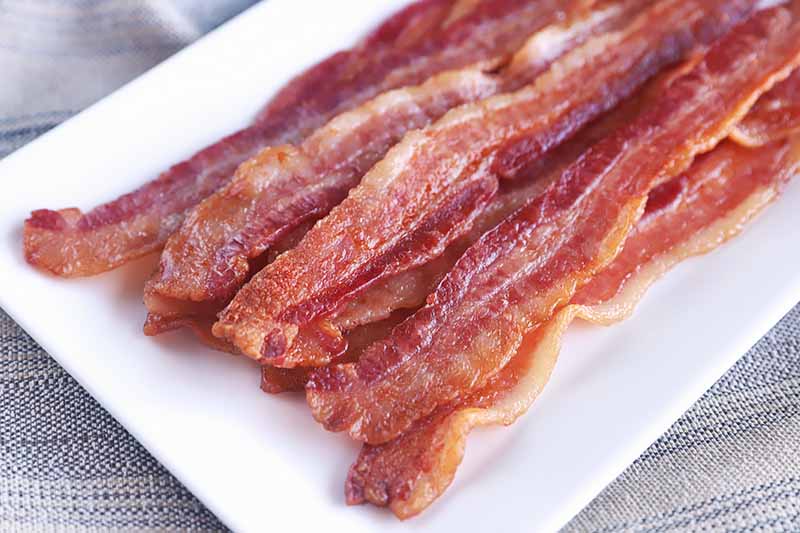
Step 3 – Drain
Remove from the oven, and transfer to a plate or clean baking sheet lined with paper towels to drain.

Serve warm, or allow to cool and chop or crumble to use in other recipes.
Can I Store Cooked Bacon for Later?
I find that a few cooked slices are nice to have on hand because you can use them to make a quick breakfast, or chop them up to use in a recipe. Thankfully, these cooked slices of pork can be prepared and stored easily.
Start by allowing the cooked meat to cool completely after it has drained. Place the slices in a resealable plastic bag, and store in the refrigerator for up to 5 days.
Will you start by eating this for breakfast, or will you use it in a recipe? Tell us in the comments below!
And if you need more advice on how to cook basic staples in the kitchen, check out some more how-to’s from Foodal, starting with these:
- How to Cook a Whole Chicken in the Crock-Pot
- How to Cook Winter Squash
- How to Cook Rice in the Pressure Cooker
Photos by Meghan Yager, © Ask the Experts, LLC. ALL RIGHTS RESERVED. See our TOS for more details.
About Meghan Yager
Meghan Yager is a food addict turned food and travel writer with a love for creating uncomplicated, gourmet recipes and devouring anything the world serves up. As the author of the food and travel blog Cake 'n Knife, Meghan focuses on unique foodie experiences from around the world to right at home in your own kitchen.