
We occasionally link to goods offered by vendors to help the reader find relevant products. Some of these may be affiliate based, meaning we earn small commissions (at no additional cost to you) if items are purchased. Here is more about what we do.
Baking is one of those things that only works when you’re 100% into the process.

From personal experience, let me tell you that cakes – even simple ones – will not come out the way you want them to without the right concentration and preparation.
Of course, there are those quick and easy recipes out there, perfect for those days when you have lots of other things to do.
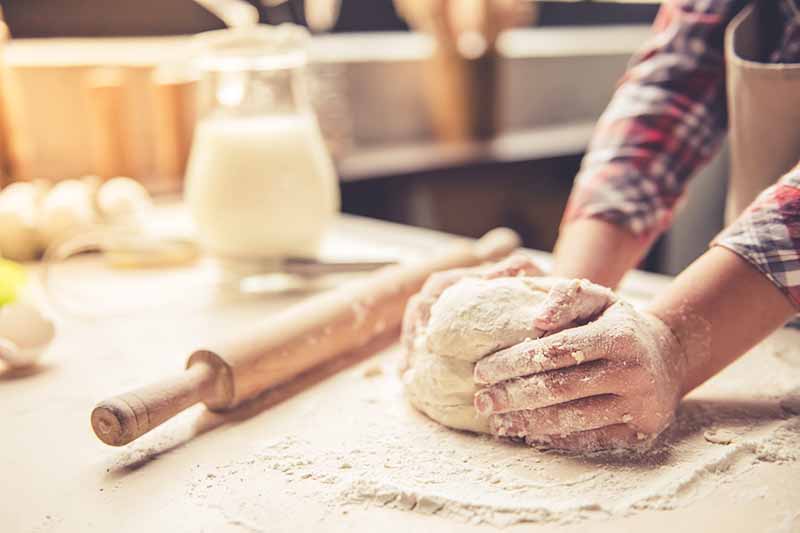
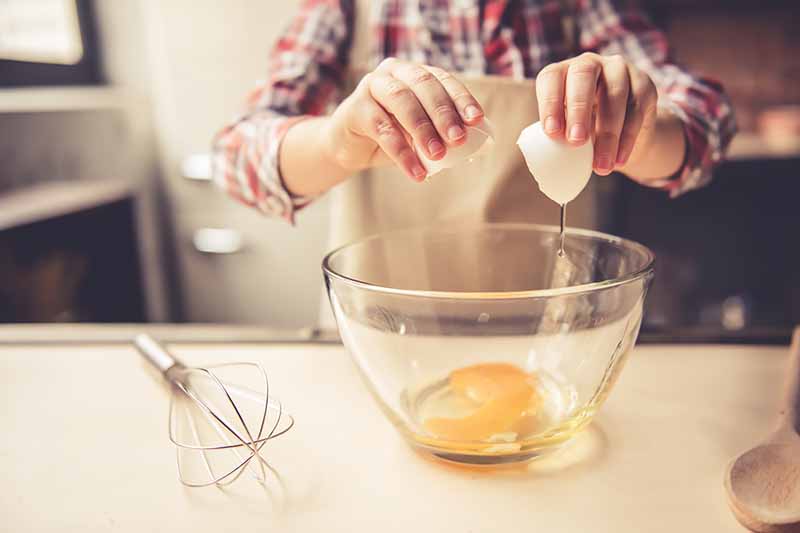
All the same, whether you’re kneading dough or whisking eggs, it will only pay off if you do it with patience, care, and good technique.
And what could be just as important, if not more important, than patience or technique?
Preparation!
Being prepared means having every utensil, bowl, and measuring cup in place, before you even begin. It’s a technique in and of itself: allowing you to work fluidly, with everything right there when and where you need it, through every single step.
This will save you time otherwise spent stressed out and searching for needed cookware in the midst of your baking mission – or combing tediously through the recipe instructions again and again… and again.
Patience, preparation, and technique are just three very basic overarching tips, and a general foreshadowing to what will truly make your baking adventure a smooth one – as smooth as that perfect batter!
But really, all this can be achieved with the help of many other neat techniques for efficient oven ventures – which we’ll take a look at in this article.
It’s time to simplify and streamline your baking routine, and become a master with our 15 tips and tricks!
15 Tips and Tricks to Improve Your Baking Routine
Getting Ready
What’s an important aspect of both preparation and patience?
In two words: time management!

Learn how to get everything ready first, before you even begin.
For example – searching for whisks or oven mitts with a hot pan in the oven can quickly lead to trouble. Instead, manage your time and plan to have utensils and other kitchen implements ready to go, conveniently in place as you go through the steps.
In the same vein, sifting dry ingredients, mixing eggs, or whipping cream is best achieved when all ingredients and equipment are exactly where they need to be, on hand for the task.
This is especially important because certain ingredients can be sensitive, batters and doughs can lose structure, and temperatures can be… well, temperamental!
The right utensil needs to be there at the exact time when you need it in those cases, too.
As such, get everything that’s required ready beforehand – whether it’s ingredients or kitchen equipment.
It also helps to thoroughly read the recipe you are to follow beforehand, so you know what you’re diving into without missing anything, especially if it’s a new and unfamiliar recipe you’ve never made before!
1. Stock the Basics
Baking should be a peaceful pastime, not a hectic experience that makes you into a stress ball!

For that reason, it’s always helpful to keep your basic ingredients stocked at all times, and to be prepared for anything.
Having those ingredients always on hand at home in a well-organized pantry, spice rack, refrigerator, and freezer can motivate you to bake more. Not to mention, this will help make baking much easier to adopt as an easy part of your routine, too.
And think of all the time you’ll save not having to make those emergency grocery trips in the middle of your baking session when you run out of flour!
It’s also a good feeling when those special occasions come up, and you know that you have most of the basics covered.
So, what are the basics you’ll need at home for some spontaneous baking? Here are a few:
- Baking soda and baking powder
- Butter (unsalted)
- Chocolate (chips and bars)
- Cocoa powder
- Dry yeast (fresh yeast has a limited shelf life)
- Eggs
- Flour
- Frozen berries and other types of fruit
- Milk
- Sugar (granulated, brown, powdered)
- Vanilla extract
Some optional goodies for stocking are:
- Canned foods (evaporated milk, pumpkin puree, coconut cream, coconut milk)
- Fresh fruits
- Ground and whole spices (warming spices in particular)
- Nuts (whole, ground, chopped)
- Shredded coconut
- Whipping cream
You might need to step out on an errand to get more specialized, seasonal items. But not having to worry about those basic ingredients will make you feel relieved, and more confident.
2. Only Choose Recipes You Can Handle
Sometimes, you’ll know days in advance that a special occasion for baking is on the way – like a wintertime holiday party, birthday, group gathering… you name it.
This will give you plenty of time to plan ahead if you need to bake in bulk.
With correct planning and time management, even the most extravagant cakes and tarts can be easier to make than you might imagine. Think about it: cake bases and pie or tart shells can be prepared even one or two days beforehand!
Some desserts may even be stored in the fridge for a couple of days, like tiramisu or a trifle, providing even more flavor and moisture than if they were eaten right on the spot.
So if you’re having trouble finding enough time around parties or holidays to prepare at the last minute, search for recipes that allow you to prepare some steps – or sometimes even the whole thing – ahead of time.
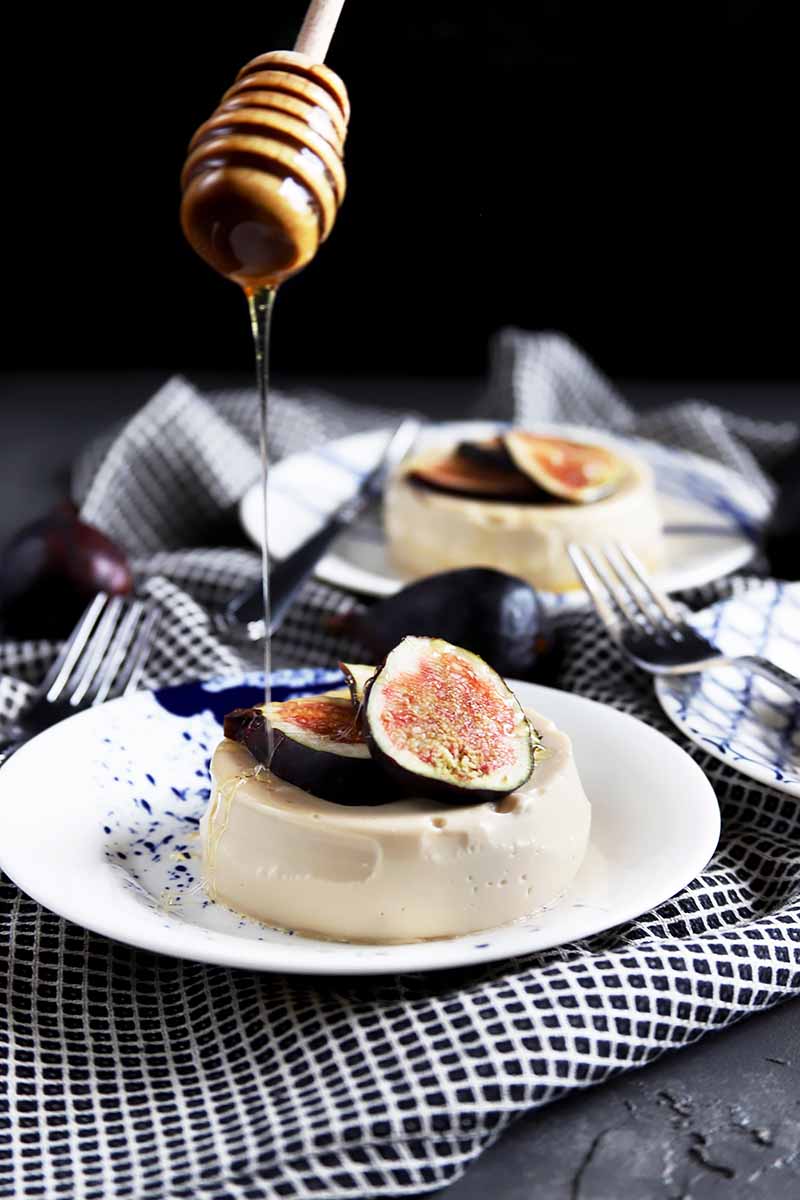
Make-Ahead Panna Cotta with Figs and Honey – Get the Recipe Now
What if you’re psyching yourself up to use a special type of baking equipment or exceptional ingredients, or to embark on a daunting baking project that’s a little out of your realm?
The answer: don’t stress yourself out.
Rather than attempting to tackle a real beast for a high-stakes party or gathering, choose a simpler recipe with only a few fancy additions to impress your guests and stretch your repertoire.
Examples might include using different piping tips to create beautiful patterns with the cake frosting, fresh fruit decorations, simple royal icing designs for cookies, or an indulgent ganache glaze.
Little flourishes like this are not so hard to do, but can really jazz up even the simplest of baked goodies with minimal effort.
Save those big baking challenges for less stressful occasions – when you’ll have time to focus, ready to fix mistakes if you make them, and available to really practice if you are a beginner hoping to master the craft.
Problem-Free Dough and Batter Preparation
There are lots of different dough and batter variations to choose from when it comes to baking. And each of them requires its own special treatment and care.
While sourdough or yeasted bread doughs love some gentle warmth over a long period of time for the ultimate rise, buttery biscuit dough, on the other hand, will only work well if it’s cold and baked immediately.
Before beginning, make sure you consider your recipe’s specific needs, and how you should properly handle the dough or batter.
Here are some tips based on my own experiences:
3. Be Gentle with Sponge Cakes
Sponge cake is more sensitive than one might think.
When it comes to this batter, the ingredients each need to have similar temperatures to bind together properly.
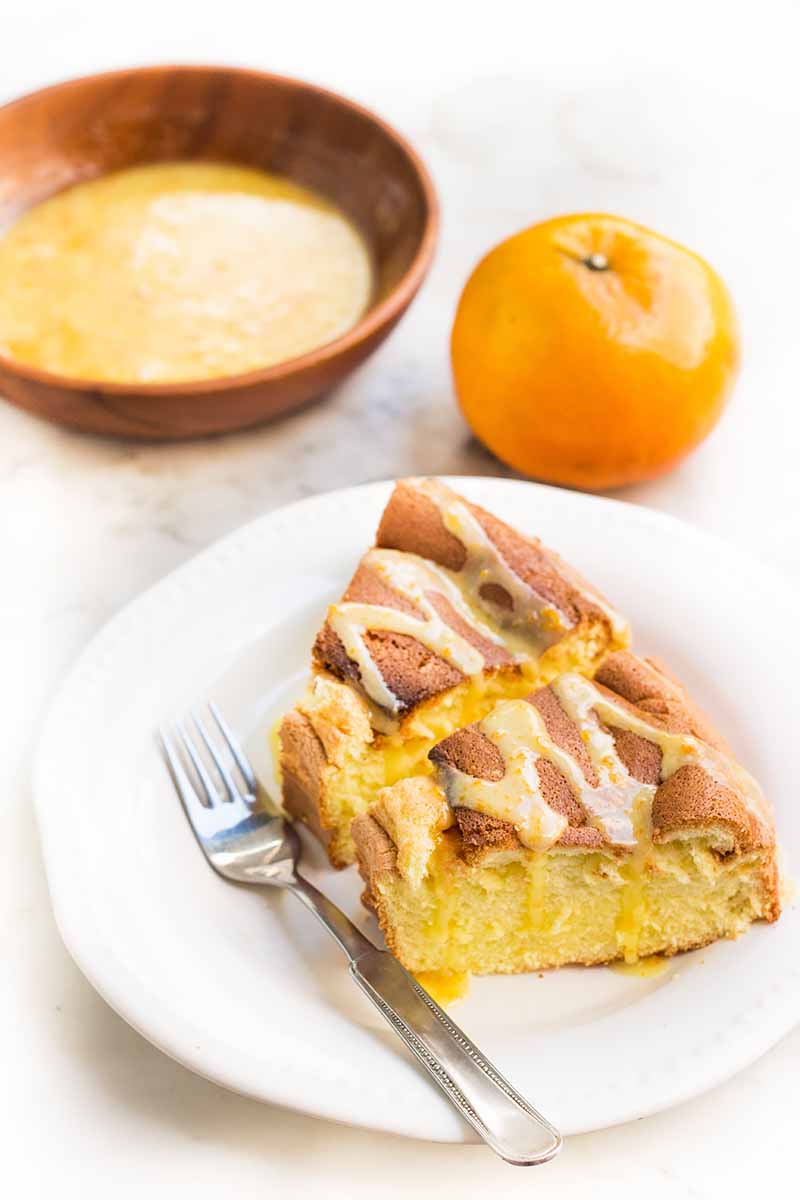
Gluten-Free Mandarin Orange Sponge Cake – Get the Recipe Now
For example, if the recipe combines eggs and butter, you should make sure they are both at nearly the same temperature before you begin. Room temperature works best.
Otherwise, your batter won’t be a homogenous mixture, it will be a lumpy mess!
Another tip with sponge cakes: don’t mix the ingredients for too long.
As soon as the ingredients come together in a homogenous mixture without lumps, you’re ready to go.
In fact, this tip applies to many different recipes you might prepare, so read those directions carefully for mixing times.
The danger of over-mixing does exist, and it can turn your dough or batter stiff, tough, and chewy – not light and airy as you had hoped!
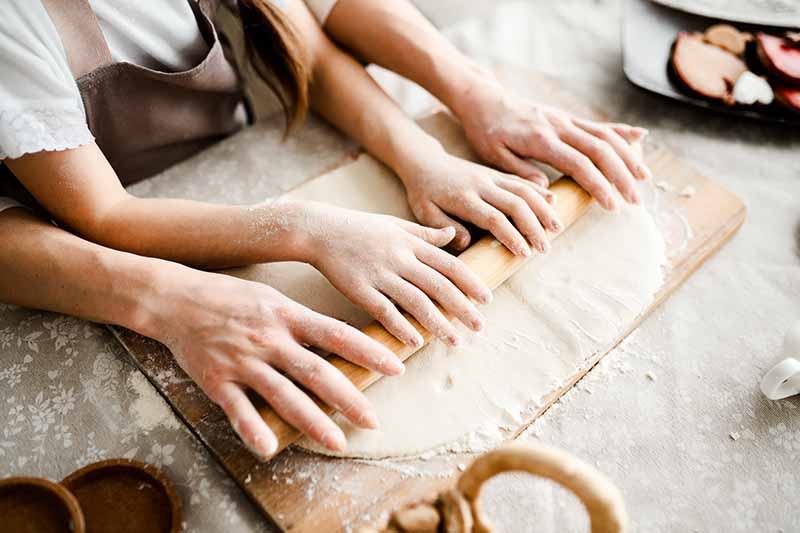
4. Keep Buttery Pastry Dough Cold, Cold, Cold
What do we all want to achieve when making homemade pie crusts?
Of course: it’s that crispy, flaky texture with buttery, full-bodied flavor that is required for wonderful baked goods such as pies, quiches, galettes, and tarts.
And for this, you’ll need cold butter.
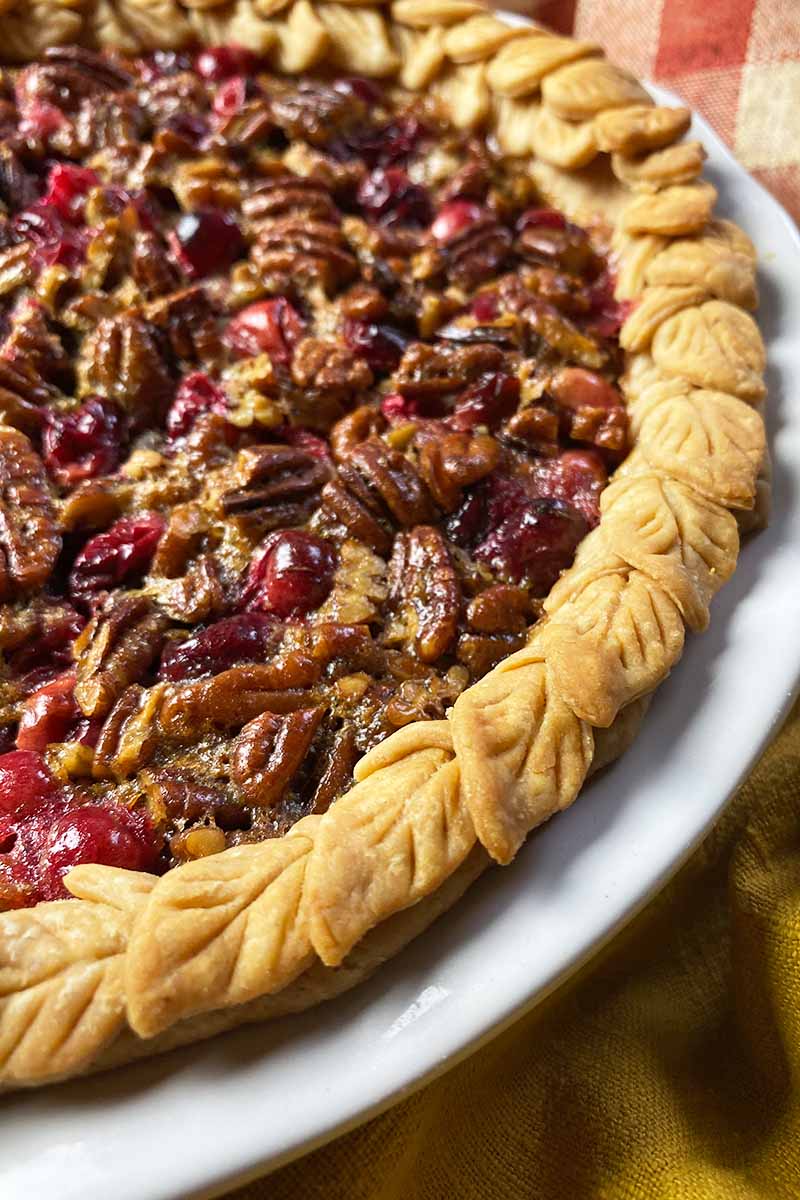
Cranberry Pecan Pie – Get the Recipe Now
Don’t worry about any small, visible butter flakes as you are forming the dough. This is precisely what makes for a wonderful pastry or crust.
Keep the dough cool after kneading and mixing, for at least half an hour or up to one day in the fridge before proceeding with the recipe. This will help everything to meld together, improving the texture.
Also keep in mind – it’s best to knead the dough with cold hands!
You can either rinse them with cold water for a while, or rub them with an ice cube and then dry.
A rolling pin that can be put in the fridge to chill works great here too, as does a cool marble slab for rolling.
Otherwise, your pastry or crust will warm up quickly, becoming sticky and soft rather than flaky.
5. Be Patient with Yeasted Doughs
Many people are afraid of preparing yeast dough. But this is absolutely uncalled for!
Whether you’re using dry or fresh yeast, it all comes down to patience – and temperature.
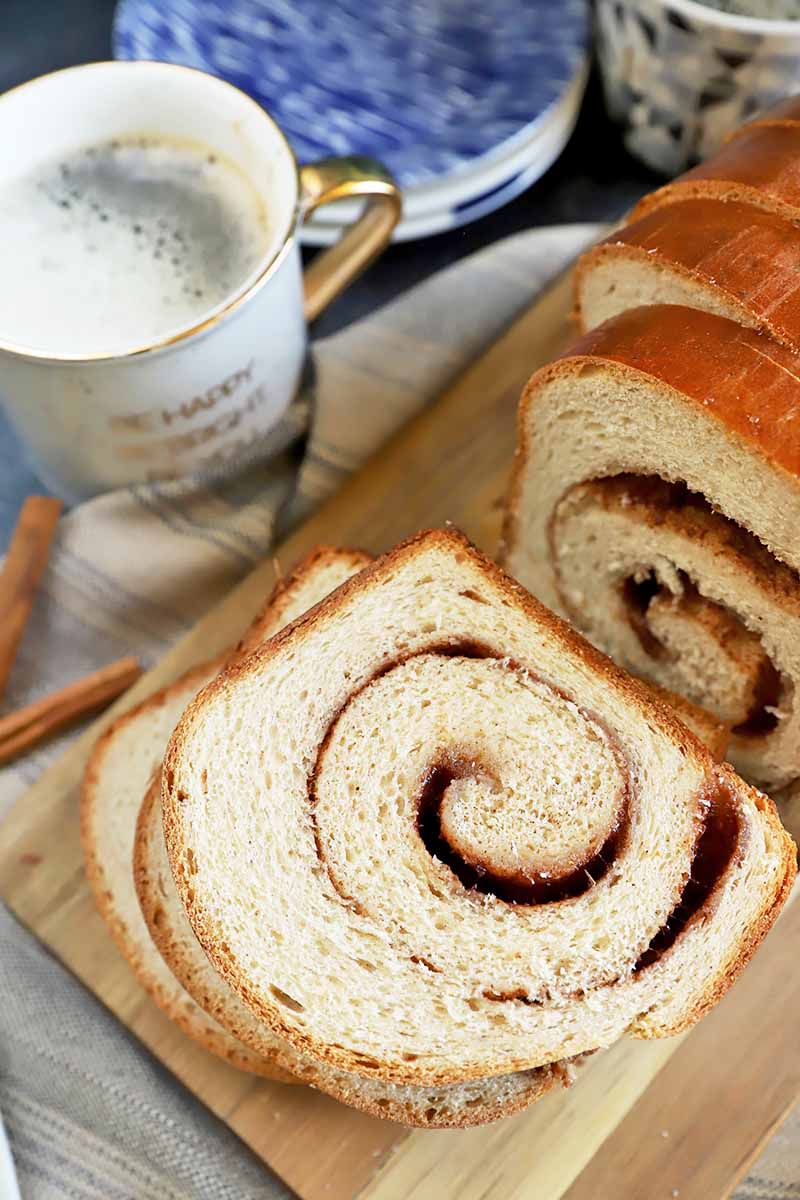
Cinnamon Swirl Bread – Get the Recipe Now
Yeast needs warmth, but don’t confuse that with high heat.
When adding water to the yeast and other ingredients, the temperature of the water should be between 100 and 115°F, which is an optimal range for yeast to activate and grow. Avoid heating it any warmer than that, or else you may kill the yeast.
Butter and eggs work great at a cooler temperature than yeast, around room temperature (70°F). This temperature is important if they are to be combined with yeast in a dough, to sustain that needed warmth.
Whether you’re making dough from scratch to bake right away or preparing it in advance, remember to take these ingredients out of the fridge 1 to 2 hours beforehand, to make sure they aren’t too cold.
Finally, you will also need to take your time when baking with yeast.
Be careful to follow the directions, and stick close to the recommended resting times for the dough.
Note that the time may vary depending on different factors such as the temperature of your house, so you also want to be on the lookout for telltale signs of readiness, like the dough rising and doubling in size.
Only then can you be sure that it will turn out just the way you want it to!
6. Prevent Soggy Cakes
Sometimes, a cake recipe may call for spreading a curd, pastry cream, compote, or another thick and liquidy ingredient on top of each round.
These runnier ingredients can soak right into a cake.
In some cases, this soak is very much desired, giving the base of the cake more flavor, or treating it as a primer – which we’ll explain more thoroughly in Tip #12!
However, a sopping, drenched base is not always what we want. How can you prevent this from happening?
When preparing a cake or torte with fruit or creamy toppings, here’s a tip that can be really helpful in preventing all that liquid from soaking into the middle:
Leave the base to cool down completely, and melt some semisweet chocolate in a double boiler or in the microwave.
Spread a very thin layer of this melted chocolate from the middle of the cake to the borders on the top, and then wait for it to set.
Keep in mind, of course: this chocolate trick might not work with all cake flavors. If you’re in the mood for a little experimentation, try white chocolate, peanut butter chips, or butterscotch chips instead.
Now you can top it with juicy fruits or cream without being afraid of a sloppy base – even if you need to chill it for another couple of hours before serving.
And let’s be honest – who wouldn’t enjoy a sweet layer of chocolate hidden in between their cake and the toppings? Definitely not me!
If you really want to avoid chocolate, you can simply spread a thin layer of the frosting you’re going to use on top of the round instead.
We also have some fun tips and tricks for preventing muffins with soggy bottoms – learn how to fix this common problem with our help!
7. Learn How to Blind Bake Crusts
In the case of tart, quiche, or pie crusts, here’s a nifty way to make sure yours doesn’t collapse or develop bubbles in the oven:
Use a technique called blind baking.
Why blind baking? Sounds a little risky!
But it’s not actually scary at all – in fact, this technique is incredibly helpful!
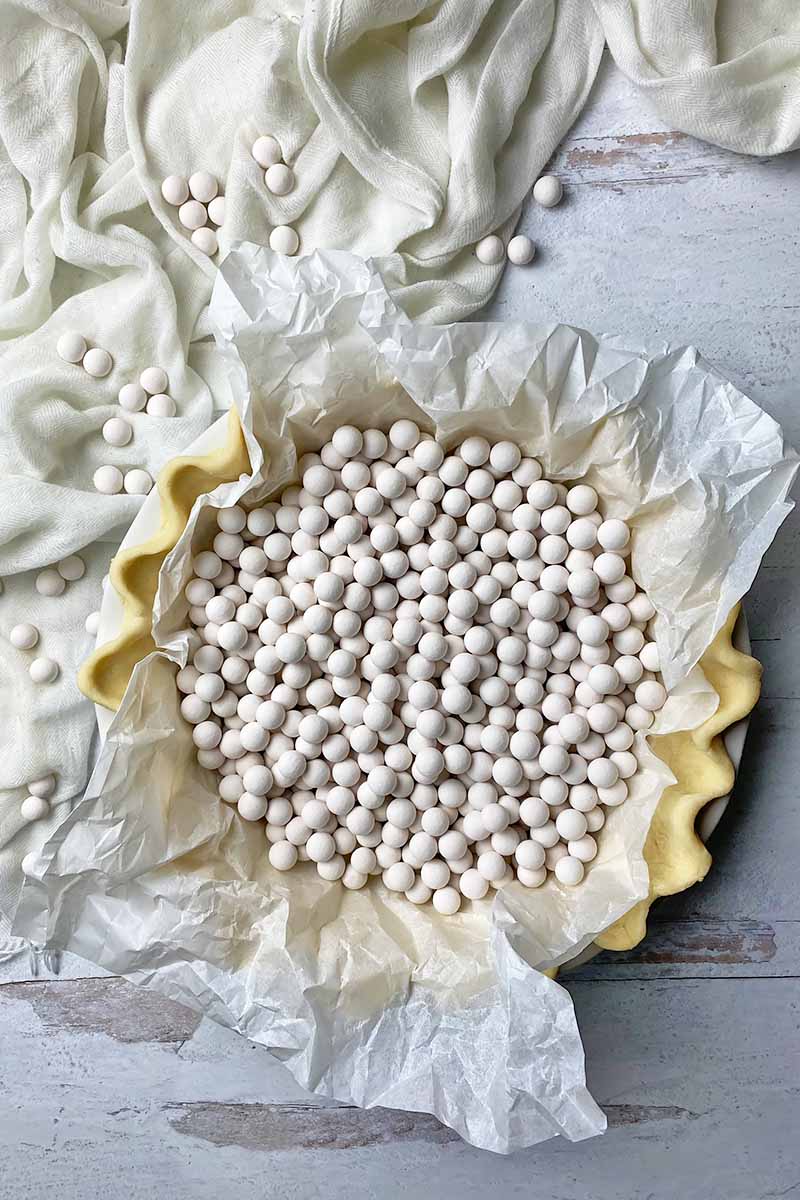
The phrase refers to partially or fully baking a crust while it’s empty as a way to ensure the perfect structure that stays crisp and dry even after adding the filling.
Blind baking can be easily done with the help of pie weights.
These can be made from various materials, from household ingredients like rice and beans to store-bought ceramic balls, like our favorite ceramic pie weights from Mrs. Anderson’s Baking, available now on Amazon.
Mrs. Anderson’s Baking Ceramic Pie Crust Weights, available on Amazon
Interested in learning more? You can study every step of this cool technique in our article on how to use pie weights to achieve the perfect crust.
8. Cut Layered Cakes Like an Expert
Whenever you prepare a cake with multiple layers, it can be a difficult beast to cut correctly without crumbling or otherwise falling apart.
But here are some tips to consider, for an easier cutting procedure.
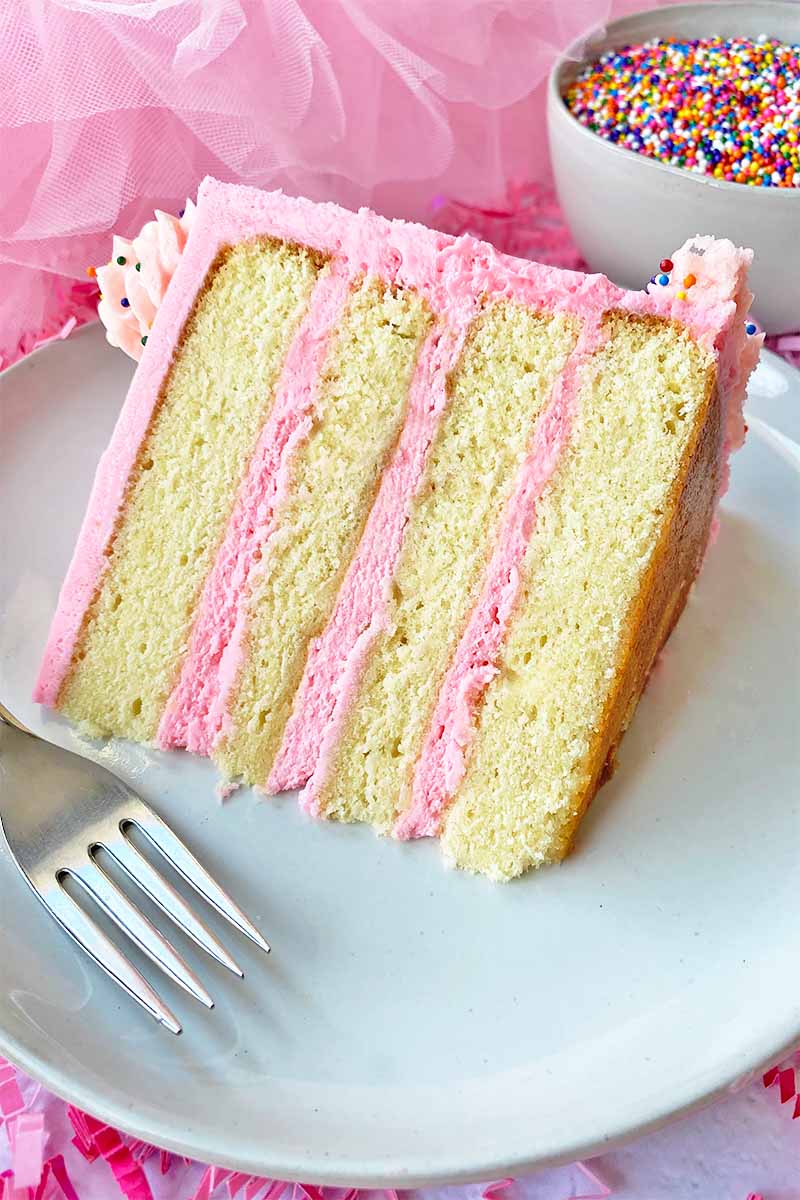
Restaurant Eve’s Birthday Cake – Get the Recipe Now
The best thing you can do? Prepare the cake batter and bake it one day in advance of your party, before it’s needed.
The cake will then have time to cool down completely and thoroughly, leading to a firmer, less crumbly texture than if it was cut immediately.
You’ll want the layers to have a level, even appearance.
If you own a long bread knife, you can cut the cake simply using your own visual judgment, if you’re confident and have steady hands.
In most cases, this will work just fine as long as you are careful. But you can actually purchase a specific tool to make sure your cake layers don’t come out uneven and crooked!
Wilton Adjustable Cake Leveler, available on Amazon
This Adjustable Cake Leveler from Wilton provides a quick and uncomplicated device to create even layers. Buy it now on Amazon.
Practical Knowhow for Special Ingredients
Whether you’re a beginner or a cake pro, sometimes things just go higgledy-piggledy – and then the whole kitchen is suddenly in a frenzied chaos!

In a blink of an eye, the milk is burnt, the egg whites won’t stiffen, or the glaze won’t stick to the cake.
All those little problems can be taken care of with some simple tricks.
The next time you’re using special ingredients like fresh berries or egg whites, or you want to spread a shiny glaze on your baked goodies, just remember these tips. You’ll soon be good to go!
9. Never Let Milk Boil Over
Bringing milk to a boil for baked recipes can sometimes be a tricky matter.
During that brief moment when you look the other way, your simmering milk always seems to take that opportunity to bubble over and become a scalded mess, with an unsightly skin on top!
To prevent the milk from rising over the top, you have a very simple solution here:
Just use a bigger pan!
With a smaller pot, the smaller surface area keeps the bubbles too tightly packed with little room to expand – the only place to go is up!
With a larger pot, and therefore a larger surface area, the bubbles have more room to expand across the entire diameter of the pan, and won’t be forced to travel only vertically.
However, be sure to still keep an eye on the stove so that it won’t burn.
Keep the heat between low and medium-low rather than blasting it at a higher temperature. Because the milk will be shallower in a larger pot, it won’t need as much heat to start boiling.
10. Stop Berries from Bleeding into Your Batter
You may have encountered this problem before. When preparing cakes or muffins made with berries, sometimes they can take over and color the whole cake with an unpleasant mix of purple, gray, and red.
How can you keep this from happening?
Here’s one trick: add them to the batter last, when all of the other ingredients have already been combined, and stir them in gently. Very gently!
And another idea? You could also completely skip mixing the berries into the batter and just place them on top instead, like we do in our easy strawberry slab cake recipe.
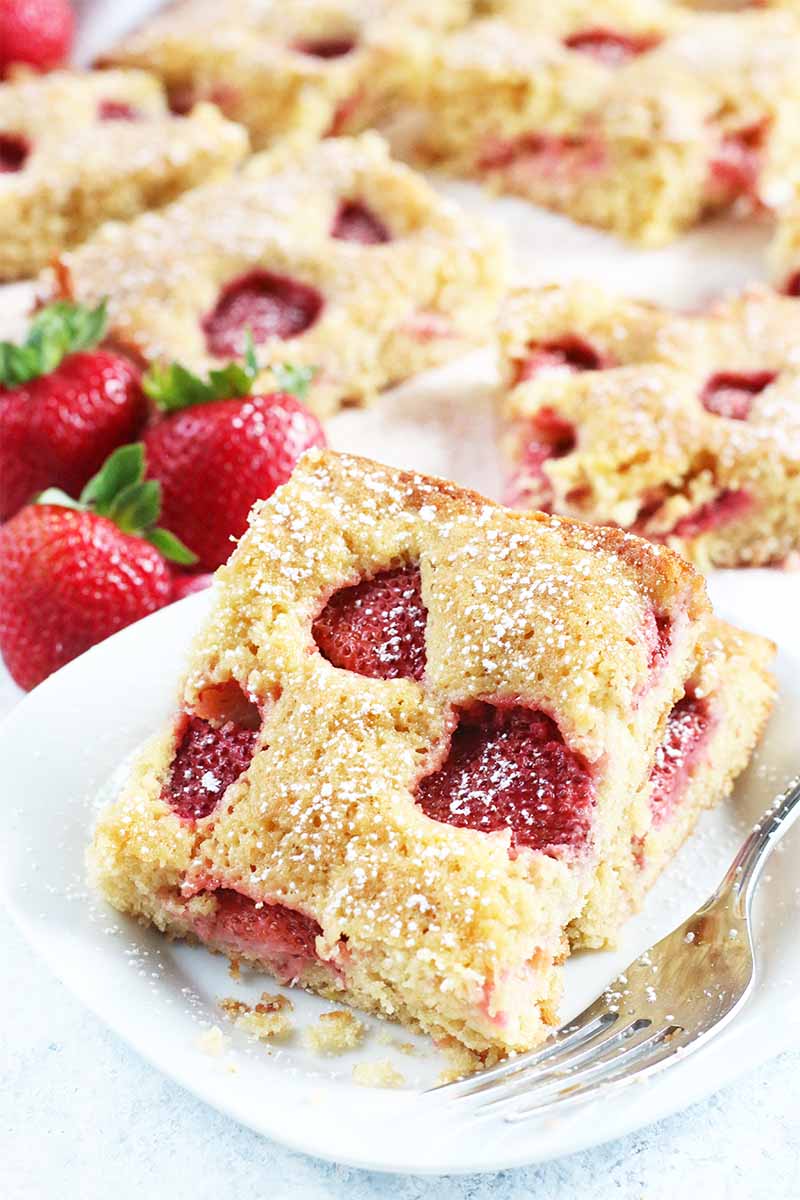
Easy Strawberry Slab Cake – Get the Recipe Now
Another hint for when you’re using frozen berries: do not thaw them!
Just take them right out of their bag or container directly before using, breaking them up first as needed.
Place them in a small bowl, dust with plain flour, and gently mix. The fruits are then covered with a thin layer that prevents them from leaching their natural juices and color into the mix! Add this to the batter, and then give it a gentle stir.
The same procedure applies for fresh berries. Wash and then leave them to drain completely. Coat lightly with flour, then carefully stir in.
These tips are also useful for when your added fruits sink to the cake’s bottom while baking.
11. Stiffen Egg Whites to Perfection
Whipping egg whites can be a fast and easy process, only taking a few moments of vigorous whisking to yield cloudlike results.
But sometimes they just won’t stiffen – and all of your hard work is put to waste.
How can you avoid this?
First, make sure absolutely none of the egg yolk has made its way into the egg whites. If you didn’t know this already, even a little drop of yolk can prevent your whites from whipping properly!
An easy way to keep in control of this when separating eggs is to crack each one into a smaller cup or bowl before combining the white with your bigger batch.
That way, if any shells or a bit of yolk sneak into the mix, you can easily scoop out what you don’t want without contaminating the whole bunch.
If an egg is beyond saving with too much of the yolk mixed in, simply store that one in an airtight container in the refrigerator and use it within the next few days for another purpose, like making a savory mozzarella and asparagus omelet.
Another reminder: don’t use kitchen equipment that has just been used for another purpose or that needs some cleaning, even if it looks relatively clean to the naked eye.
What you may not realize is that these may still be coated with a layer of fat, oil, or grease that can interfere with achieving the texture you want – particularly plastic bowls, mixer beaters, and rubber or silicone spatulas.
You always want to thoroughly clean and dry whatever you are using immediately before whisking the egg whites.
For the very best beaten egg whites, allow the whites to sit at room temperature for 20 minutes or so before whipping. They will be able to whip up to a greater volume when at room temperature, rather than straight from the refrigerator.
Plus, a little pinch of salt or cream of tartar can help to speed up the stiffening process, and hold those peaks for all your angel food cakes, or extra fluffy pancake or waffle batter.
Also take into account the freshness of your eggs. To determine this, all you need to do is a simple, common household egg test.
Here’s how: place an egg into a glass filled with cold water. Fresh eggs will float perfectly horizontally and parallel with the surface of the water and the tabletop. Older, less viable ones may contain trapped air that can cause them to “flip,” making them float bottoms-up, top-up, or generally perpendicular to the water surface or tabletop.
If the latter is the case, set them aside in the refrigerator for another purpose – any recipe that doesn’t rely on an angelically light texture from whipped egg whites will do just fine with older eggs, as long as they aren’t past their expiration date.
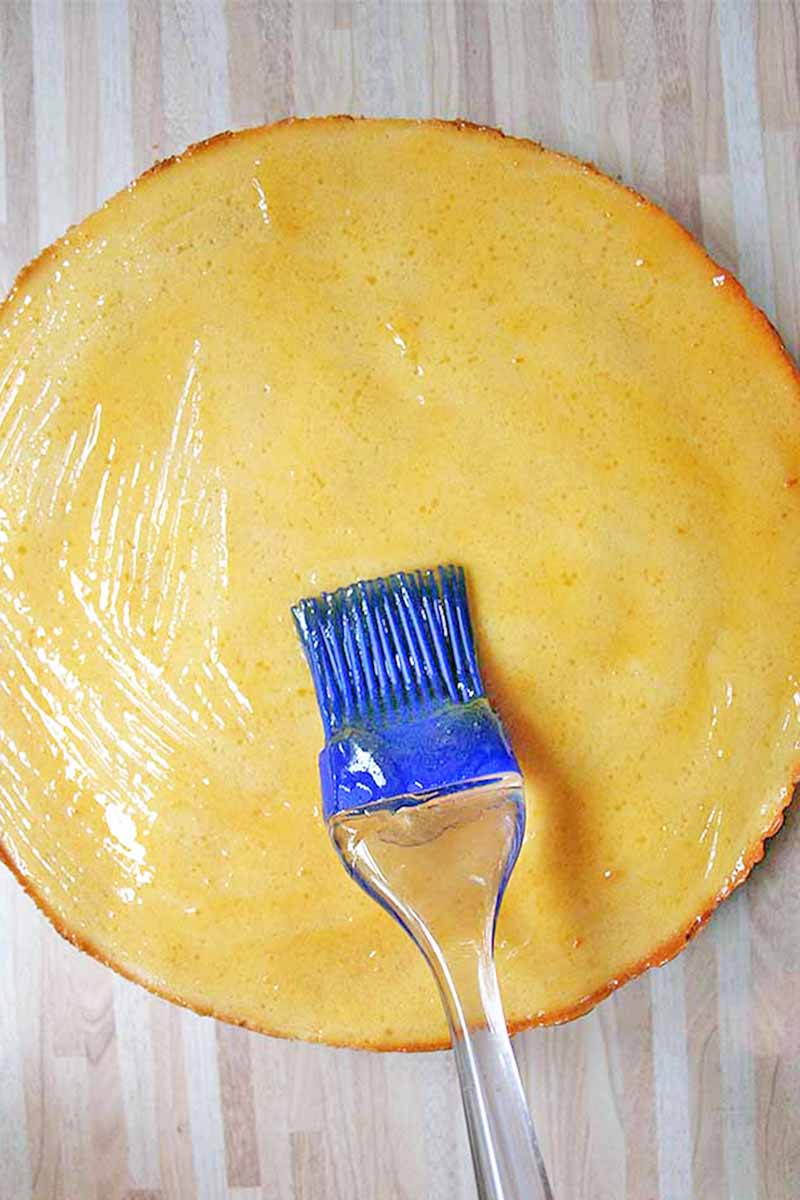
12. Apply Glaze Properly
Here are the magic words for glazing many cakes: apricot jam!
I know, this may sound pretty specific. But the technique of using it as a “primer” layer for your icing, frosting, or ganache is actually a very widely known baker’s trick!
Not only does it help the final frosting layer to cling to your beautiful work, it also provides a subtle, fruity twist that pairs well with the flavor profile of many baked goods.
Even so, do feel free to replace the apricot jam with any other fruit jam flavor you prefer for your baking – others will work, too.
German Baumkuchen Cake – Get the Recipe Now
To achieve an even, shiny glaze coating, the jam must be free of any fruit pieces or seeds. There are three options to remove them:
- Blend the jam with an immersion blender until completely butter-smooth
- Press the jam through a fine mesh sieve
- Buy a seedless, smooth variety, like a jelly without any pieces
Once you have a smooth, non-chunky jam, place it in a small saucepan with a few tablespoons of water or juice, just enough so the texture feels easily spreadable when it is heated. If too much liquid is added, you risk making your carefully prepared baked goods soggy.
Bring the jam to a boil over high heat, stirring constantly. Then take it off the stove and immediately spread it on top – and/or on the sides, depending on where you will be glazing – of your baked good.
Do this while it’s still hot and fresh out of the oven for the best results. Set aside to cool completely.
With the jam layer in place, it will be a lot easier to spread the icing and make it stick. Plus, the jam coating will stay on the outside of the cake, without soaking in or making it crumble!
You can use jam not only as a frosting primer, but to also give your baked goodies a shiny look that is perfect to display on its own. A glistening apricot glaze would be the perfect final touch on fresh fruit cakes or fruit tarts.
Time-Saving Quick Hacks
Spontaneous guests have arrived or relatives have announced they’re coming over, and now it’s you who’s in charge of setting up the coffee table and preparing some sweet treats.

What to do when you need a quick fix at the last minute?
In this section of our guide, we have gathered some tips that will save you time when it comes to being quick and creative as a baker.
With some simple ingredients in stock, you can create wonderful crusts. And in just a few steps you can take a delicious treat out of the pan that’s ready to serve.
So, let’s take a look at the best tricks that will help you to shine in the kitchen when you’re short on time.
13. Take Advantage of No-Bake Crusts
The Cookie Monster would love all those simple ingredients you have at home for making no-bake crusts – because the greatest ones are made of cookies, of course!
A crunchy, crumbly, crispy crust can be prepared in less than 10 minutes, and with practically any type of cookie or cracker – though certain types come more highly recommended by me.
Especially for no-bake cheesecakes, fruit tarts, and chilled pies, this is a wonderful solution.
You can use almost any kind of drier, crumbly cookie, or other types of crunchy ingredients such as cereal.
Some excellent examples are:
- Amaretti cookies
- Animal crackers
- Biscotti
- Chocolate wafers
- Cornflakes
- Graham crackers
- Ladyfingers
- Sandwich cookies
- Shortbread cookies
- Speculoos
If you own a food processor, simply put your cookies in and blend them up into fine crumbs.
Alternatively, you can place the ingredients of your choice into a zip-top freezer bag, releasing as much air as possible before sealing the bag. Using a rolling pin, meat tenderizer, or frying pan, gently beat the cookies, crackers, or cereal into crumbs.
For a springform or pie pan of approximately 10 inches in diameter, you’ll need about 7 ounces of finely crumbled cookies, crackers, or cereal, and 1/3 cup unsalted butter – or a little less if you’re using a cream- or peanut butter-filled cookie.
I also like to include a small pinch of coarse kosher salt.
Gently melt the butter, allow it to cool, and mix it with the crumbled cookies and salt. Place the mixture into the pan, and work it flat into the bottom and slightly up the sides.
You can either use your hands for this and press the crumbled cookies into the pan with your palms and fingers, or use the bottom of a cup to even out the surface.
Leave it to set in the fridge until the butter has become firm, for about 1 to 2 hours – or stick it in the freezer for even faster results.
Better yet, prepare a few of these in advance, tightly cover them in plastic wrap, and keep them in the refrigerator for up to one week or in the freezer for up to 6 months so they’re ready to go. That way, you can pull one out and prep a delicious dessert at a moment’s notice!
If you have chosen to freeze your pie shell, you will need to leave it out at room temperature for about one hour prior to filling so it has some time to defrost.
While the crust is chilling or defrosting, prepare your filling.
A French silk mousse makes a wonderful option, as does vegan avocado chocolate pudding, or German-style chocolate or vanilla pudding with a little whipped cream on top.
You can also take advantage of nut-based no-bake crusts. These healthier alternatives use ground nuts as the main ingredient instead of cookies. Combined with more natural sweeteners like dates, maple syrup, or honey and other ingredients, you can make a deliciously soft and chewy crust.
14. Double Recipes
When you’re really in a baking mood, don’t let that fleeting feeling go to waste!
Why not save some effort for next time, and double up whatever recipe you might be working on?
You can freeze all types of dough up to 6 months in advance, including cookie dough already portioned out in individual scoops, as well as pie or tart dough already formed in discs large enough for a single pan.
For surprising your guests or on spontaneous celebratory occasions, simply thaw your past creations, and you have a whole new baking project ready to go – with most of the work already done!
Think about it: you only need to prepare it once, but you can benefit from your hard work twice with this type of strategic meal prepping.
15. Successfully Remove Baked Goods from the Pan
Baking is tons of fun! But it can be a buzz-killer and a time waster when that treat you worked so hard on just won’t slide out of the pan in one fell swoop.
It’s always a pity when some pieces stick to the bottom or sides, and whatever you’ve made doesn’t come out whole – and sometimes this happens even if you grease the pan.
And here you are, scraping out the corner bits and trying to manipulate them back onto the bread or cake in true Frankenstein’s monster fashion.
Wonder if anyone will notice…
But have you ever thought about lining your loaf or springform pan with parchment paper completely, instead of just covering the bottom?
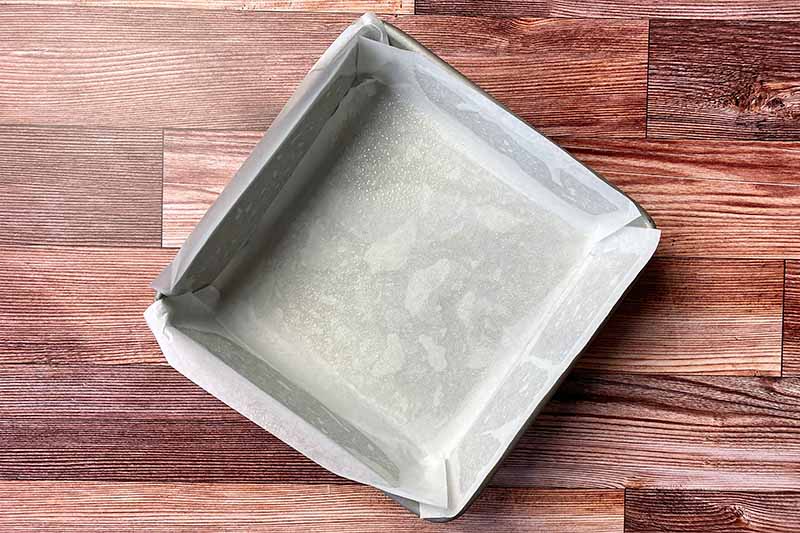
Simply create a sling, with two pieces placed perpendicular to each other in the bottom of the pan, and pressed into the sides. Leave a few inches of overhang for easy removal.
For circular pans, consider lightly greasing the pan, then coat in a thin layer of flour.
And don’t you dare forget to cover a baking sheet with parchment paper or a silicone mat when you’re baking cookies! This simple act will keep your beautiful cookies from sticking.
And one last thing – always avoid removing your treat immediately from the pan after baking. When they’re still delicate and sensitive straight from the oven, allow them 5 to 15 minutes to slightly set before you kick them out of their original home.
After giving your treat a few minutes to cool off, this makes it so much easier to take out without any crumbles or remains left behind. It works great for me every time!
And Now, Let the Baking Begin!
With these helpful ideas and suggestions, your next baking session will surely be a success. It’s the experienced baker’s tips and tricks that can turn a regular sweet treat into a perfectly gorgeous and heavenly delight.

And if you are looking for even more assistance with making cakes, I suggest reading our basic cake baking guide for the best advice and suggestions.
Still a little scared to bake some sweets at home? Get started with our easy, no-bake recipe for chocolate butter balls or date truffles. No oven required!
What about you? Do you also have some foolproof tips of your own when it comes to baking? Or do you have your own secret for making fluffy batter or a shiny glaze?
Let us know what you think about our baking tips and share your thoughts, experiences, and ideas below.
Desperate for more help making your next batch of cookies in the kitchen? We’re here for you! You’ll love our entire collection of tutorials and articles, but start with these pieces of baking advice next:
- 19 Flour Types for Gluten-Free Baking
- How to Bake with Whole Grains at Home
- Tips for Baking at High Elevations
Photos by Nikki Cervone, Meghan Yager, Felicia Lim, and Nina-Kristin Isensee, © Ask the Experts, LLC. ALL RIGHTS RESERVED. See our TOS for more details. Product photos via Amazon. Uncredited photos via Shutterstock. Originally published on December 27, 2016. Last updated on MAY 10, 2023. With additional writing and editing by Nikki Cervone.
About Nina-Kristin Isensee
Nina lives in Iserlohn, Germany and holds an MA in Art History (Medieval and Renaissance Studies). She is currently working as a freelance writer in various fields. She enjoys travel, photography, cooking, and baking. Nina tries to cook from scratch every day when she has the time and enjoys trying out new spices and ingredients, as well as surprising her family with new cake creations.


