We occasionally link to goods offered by vendors to help the reader find relevant products. Some of these may be affiliate based, meaning we earn small commissions (at no additional cost to you) if items are purchased. Here is more about what we do.
Okay, okay. So maybe that title is a little bit of a lie. I made these into knots, so they’re not really rolls. But people don’t search for “dinner knots” on Google (that sounds kind of awful), so I stuck with rolls.
To be fair, you could totally make these into regular ol’ rolls. They would be amazing. And it would save you like 6.5 minutes of prep time.
Or, you could spend the extra 6.5 minutes required to turn this easy dough into something that will make your guests/spouse/kids go, “Wowwwww.” Knots are a traditional shape for making rolls, and once you’ve got the technique down, that little bit of extra effort really pays off.
So, yeah. Knots.
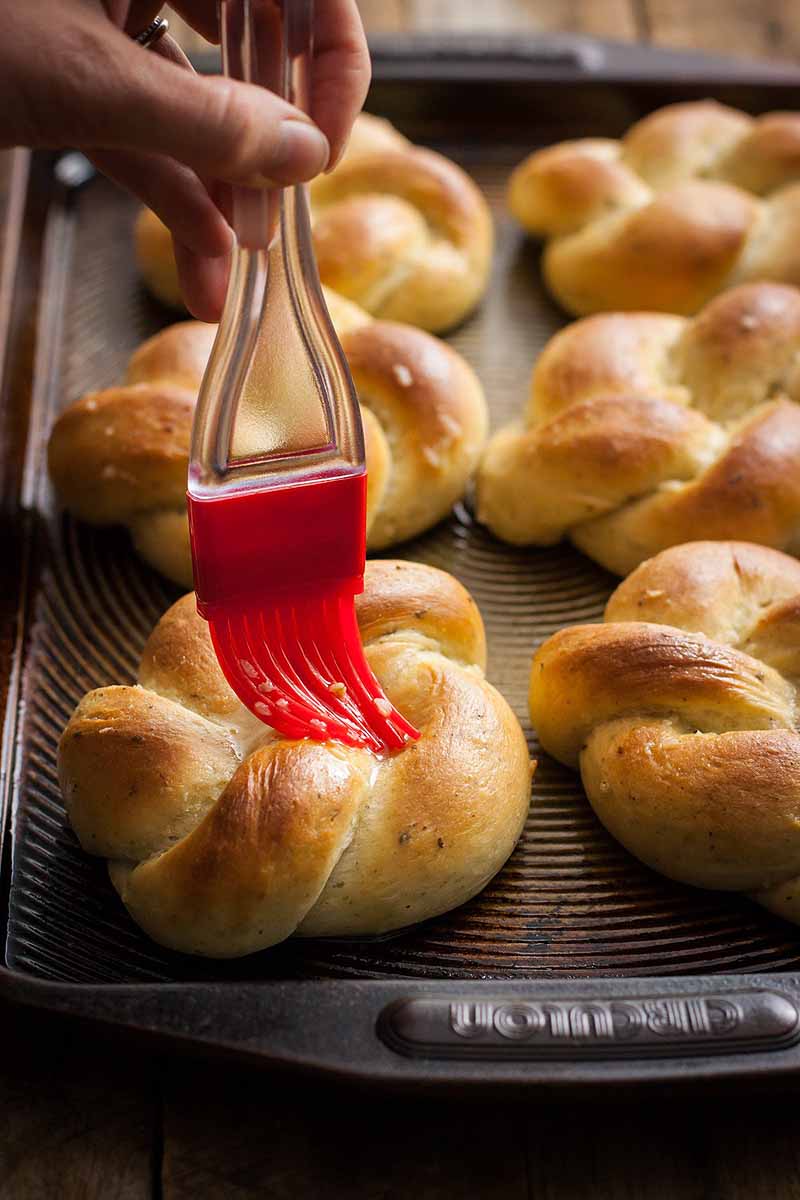
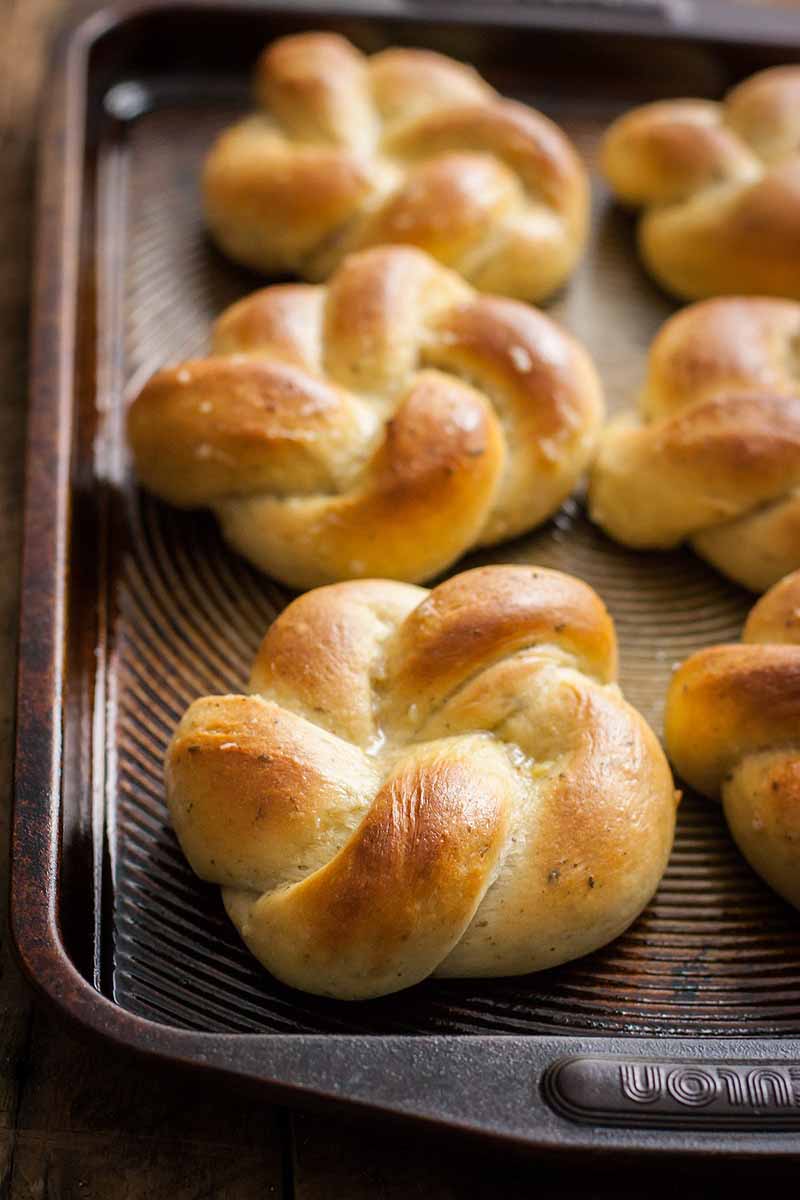
Do you want to know what’s going on in that photo up there? I do.
I’m brushing the baked knot rolls with some melted roasted garlic “butter,” made with dairy-free vegan margarine. Um, yes please.
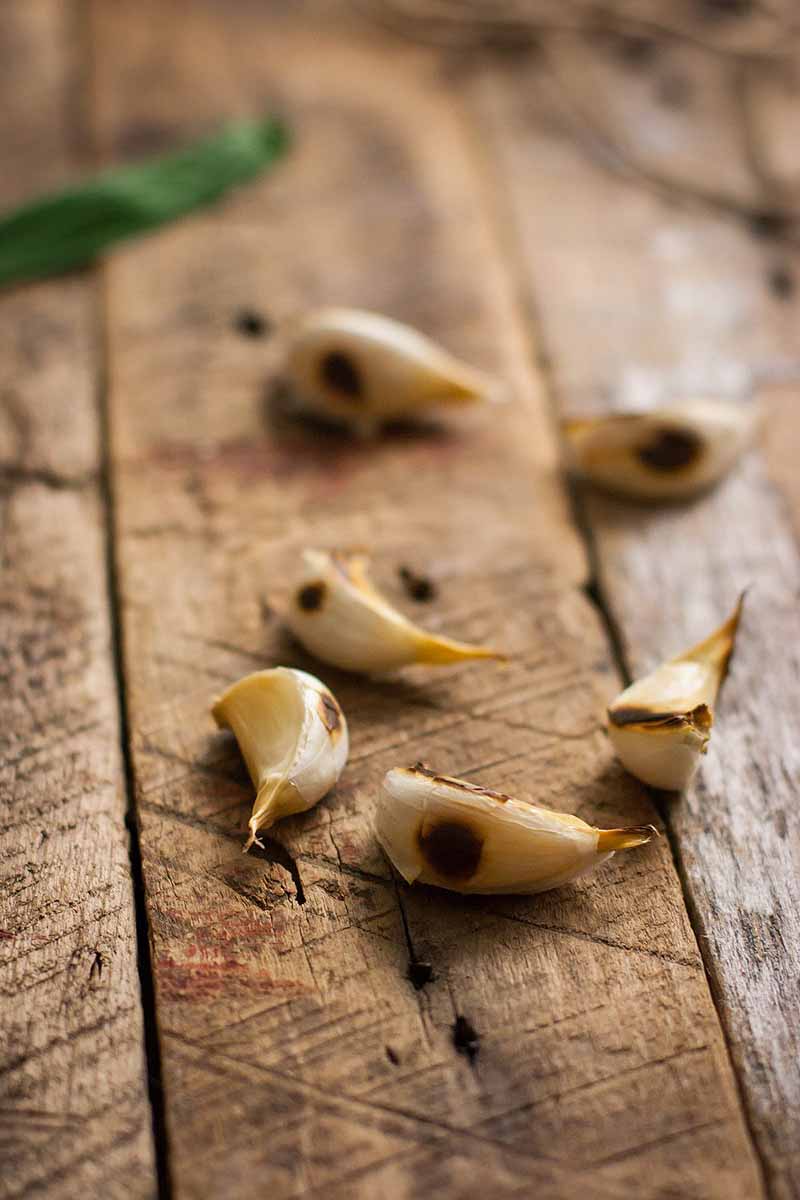
And that up there ^^ is roasted garlic. I don’t roast my garlic like most people do – you know, a whole head of garlic in the oven covered in foil for an hour. And that’s because I don’t usually want a whole head’s worth every time I want roasted garlic.
Instead, I do it like I learned from my favorite Mexican cookbook, Rick Bayless’s Mexican Kitchen.
To roast the garlic, all you do is put some cloves with the skins on in a heavy skillet over medium-high heat and let them cook for about 15 minutes, turning every now and then. The goal is to get them to blacken just a bit on each side. When they’re done, each clove will be nice and soft, and the skin will fall right off. Voila! Roasted garlic in just the right proportion for whatever you’re making.
This recipe uses the flavorful ingredient twice – first, in the dough itself, and second, in the melted roasted garlic “butter” that gets brushed on top. SO GOOD.
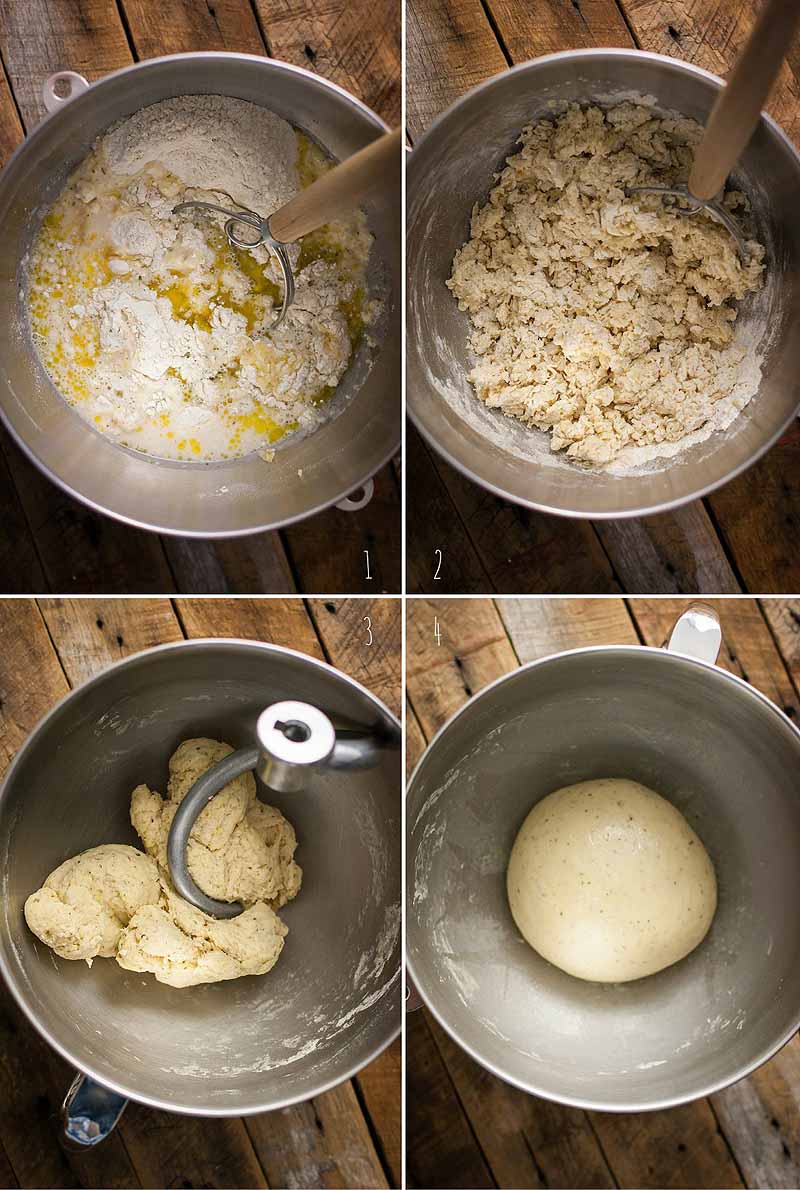
Moving on: The dough. If you’ve ever made any kind of bread before, this recipe will be a breeze. It’s pretty standard. If you’ve never made bread before, this is a good place to start!
The dough is really soft, and easy to work. Not too sticky, not too stiff. It also has some amazing flavor components in it, like Italian herbs, nutritional yeast (for a delicious vegan cheese alternative!), and a bit of olive oil.
You really never can have too much of that olive oil.
The trick to making these knots is rolling out the dough like I illustrate in the photos below. When you do that, it is SO EASY to make the long ropes that you’ll need.
Instead of having to make long ropes from little balls of dough with gluten structures that will be fighting you the whole way, with this method you actually start with the shape you’re trying to achieve in the end. Duh!
This won’t work for certain kinds of artisan breadmaking, but for this recipe, it’s a cinch!

Also, can we talk for a minute about how cute my new rolling pin is?! You can find it at Amazon or check our buying guide for more options.

If you’re not making these into knots and you’re doing rolls instead, you’ll skip this part. See the recipe instructions below.
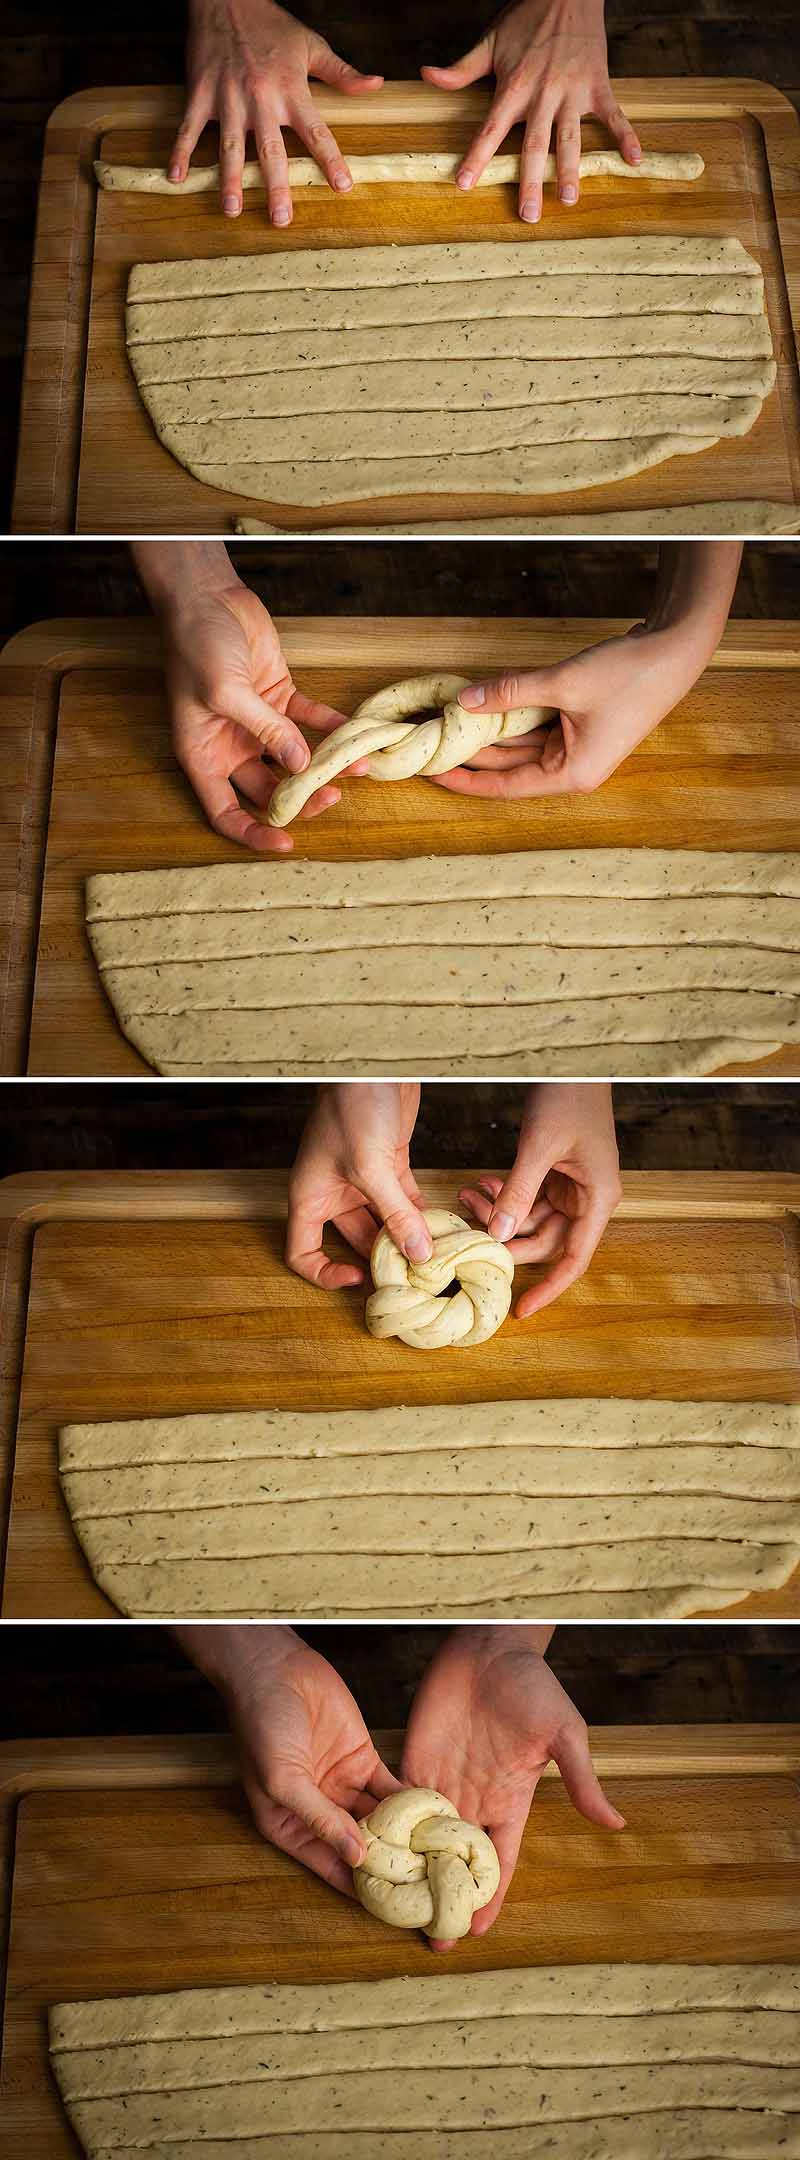
So, after you roll it out, you cut it into strips that are about 1 inch wide, make those into more rounded ropes, and tie the knots. Hopefully, these pictures will help you understand how to tie them, because explaining this in words in greater detail might be a bit difficult. Here we go!
How to Make Bread Knots:
Step 1: Create a rope by lightly rolling one strip of dough horizontally.
Step 2: Make a knot in the middle like you’d make the first knot when you’re tying your shoe.
Step 3: Take the end that comes out the bottom and bring it over the top and into the middle. Take the other end that comes out the top and wrap it under the bottom. Pinch to secure.
Step 4: Gently adjust so that it looks even and well formed.
Step 5: Repeat until (you get better at it and) run out of dough. Ta-da!
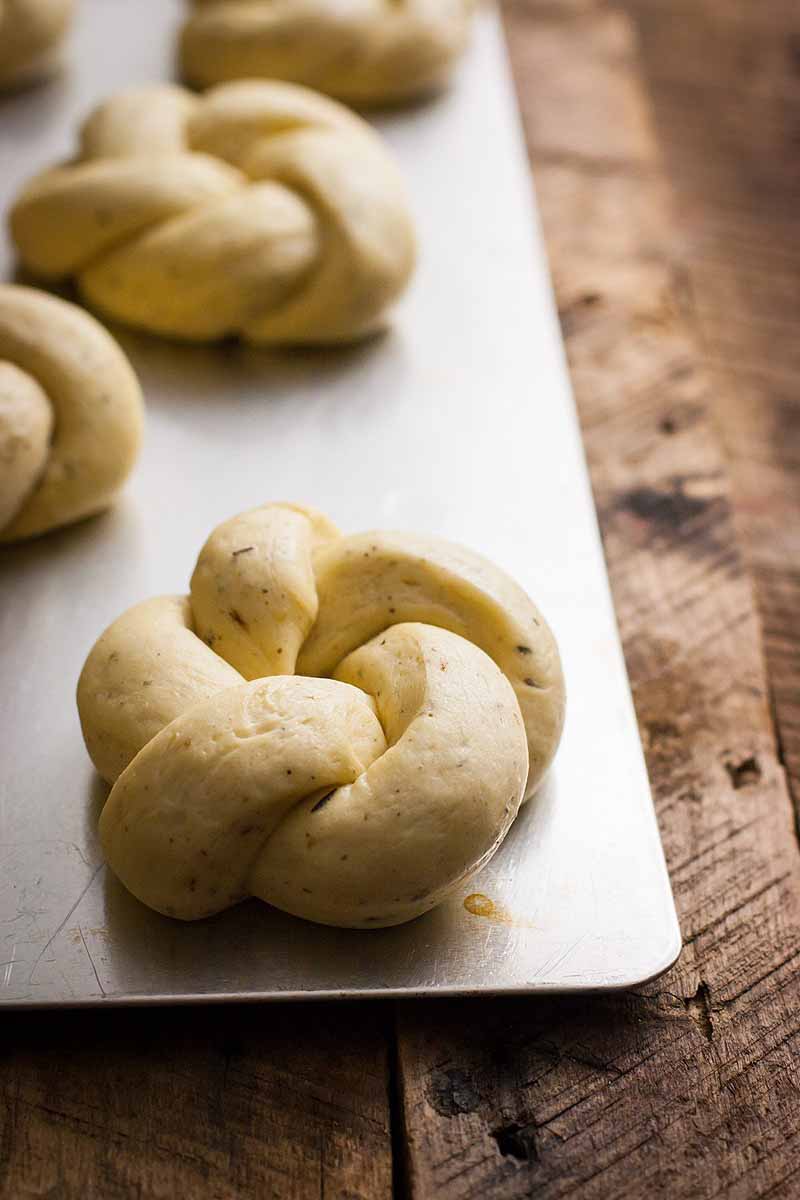
Finished shaping…

And after proofing. They look way prettier after proofing.
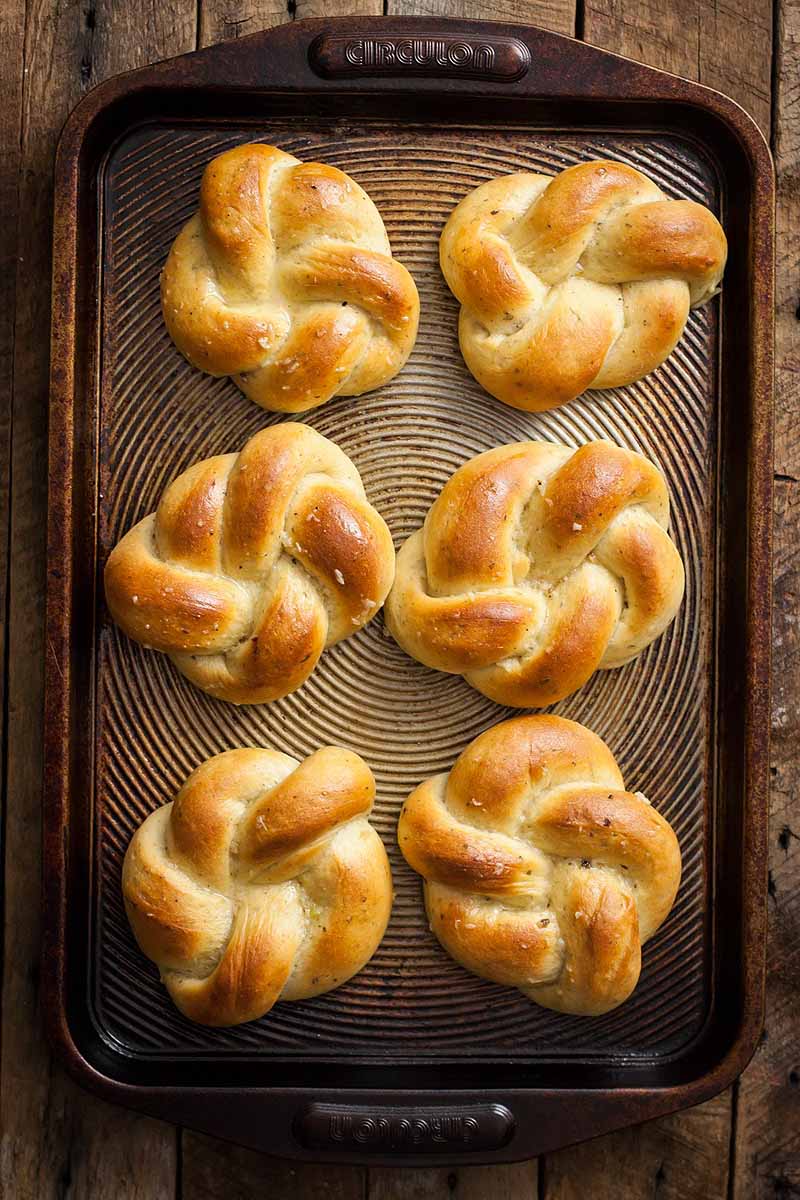
And then, after baking. And brushing with Amazing Roasted Garlic Melted “Butter” and sprinkling with a bit of sea salt. I’m not sure that it gets much better than this.
Ok, so now we have to talk about it. Thanksgiving is coming up. I know you didn’t want to talk about it because you’ve been avoiding thinking about 1) the traveling, 2) all the family time, or 3) all the food you have to make, but it’s coming up. We have to talk about it.
When your grandma tells you that you should bring over a nice appetizer for Thanksgiving, you should bring these. When your aunt tells you that you should bring a side dish, you should bring these. When your sister tells you that you should bring a salad, you should say screw off and bring these. Because there are never too many enough rolls on the table on Thanksgiving, and there certainly aren’t any as delicious as these.
Ok, we talked about it. We’re done.
One thing I didn’t mention, but that you probably noticed from the title is that these are vegan. If you’re not vegan, there’s no reason why you shouldn’t make these the exact same way, and you will still enjoy them.
But just in case you don’t have some of these ingredients on hand, if you insist, you can just use regular butter, and substitute 2 tablespoons of finely grated Parmesan cheese in place of the nutritional yeast. It’ll taste just as wonderful.
Spread them with more butter, or break off chunks and dip them in an herb-infused olive oil. Enjoy, bakers.
Print
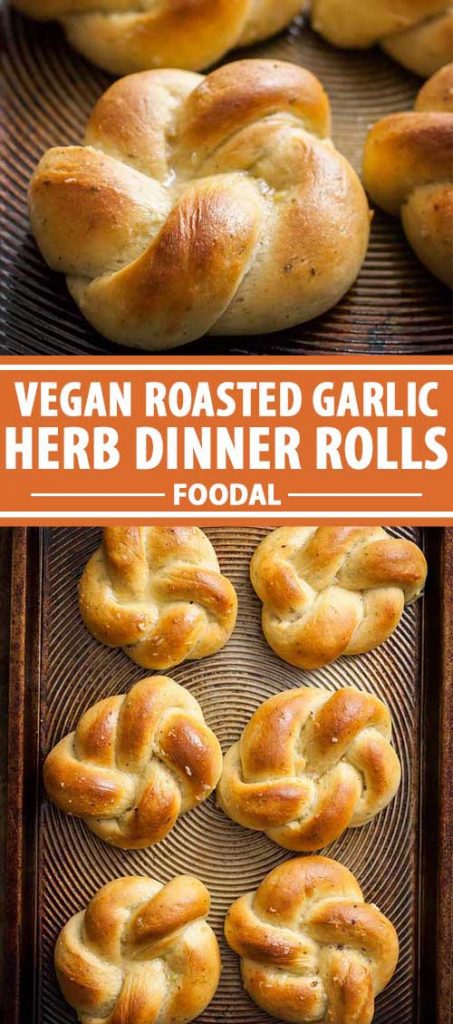
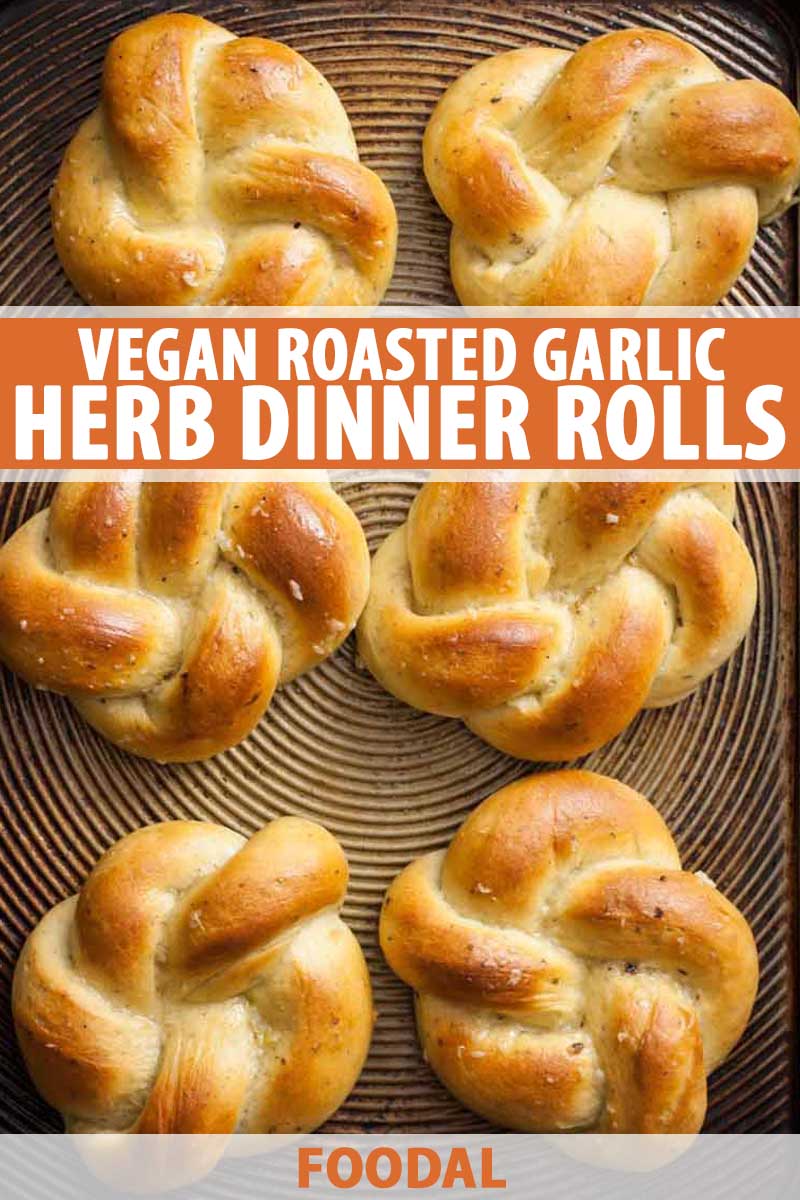
Vegan Roasted Garlic and Herb Dinner Rolls
- Total Time: 2 hours 50 minutes
- Yield: 10 rolls 1x
Description
These Vegan Roasted Garlic and Herb Dinner Rolls are so good! They’re also easier than you’d think to make, in a traditional roll shape, or into these pretty knots. I LOVE the knots – they look so fancy but really aren’t much more work at all!
Ingredients
For the Rolls:
- 3 cups (12 3/4 oz) all-purpose flour
- 4 Tbsp potato flour*
- 1 Tbsp granulated sugar
- 2 tsp active dry yeast
- 1 1/4 tsp salt
- 2 tsp dried Italian herbs
- 1 Tbsp nutritional yeast
- 2 Tbsp (1 fl oz) olive oil
- 1/2 cup (4 fl oz) lukewarm water
- 1/2 cup (4 fl oz) almond milk*
- 3 cloves roasted garlic, mashed
For the Roasted Garlic “Butter”:
- 2 cloves roasted garlic, mashed
- 2 Tbsp melted vegan margarine (I used Earth Balance)
- sea salt, to taste
Instructions
- Place all the garlic cloves (5 total) in a heavy skillet (I prefer cast iron or carbon steel) over medium-high heat. Cook, turning every few minutes, until blackened in spots on all sides. Let cool, then remove the skins.
- Combine the flour, potato flour, sugar, yeast, salt, herbs, and nutritional yeast in the bowl of a stand mixer*. Add the remaining bread ingredients, including the 3 cloves of mashed garlic, and mix together to form a shaggy dough (a Danish dough whisk is the best tool for this job).
- Attach your dough hook to your mixer and knead on medium-low speed for about 10 minutes, until a smooth dough forms*. Scrape the dough out of the bowl and use your hands (I recommend oiling them with spray oil) to shape into a ball. Oil the same bowl and place the dough in the bowl. Cover with plastic wrap and let rise in a warm place for about 1 hour, until doubled in size.
- When the dough is finished proofing, turn out onto an oiled cutting board. Use your hands to press into a rough rectangle,, then use a rolling pin to roll it out into a 13-by-10-inch rectangle. Cut the dough longways into 1-inch-wide strips.
- Follow the instructions and photographs in the text above to tie the knots. Arrange them on a baking sheet about 2 inches apart, then spray with spray oil and cover completely with plastic wrap.*
- Let rise until very puffy, about 1 hour. About 20 minutes before baking time, preheat oven to 350°F.
- Bake for 17 minutes, until golden brown on top.
- While the rolls bake, combine the melted margarine with the remaining mashed roasted garlic.
- When the rolls are done baking, transfer them to a cooking rack and brush with the roasted garlic “butter.” Enjoy immediately!
Notes
– Potato flour makes the bread more tender. If you don’t have potato flour, you can just replace it with an equal amount of AP flour.
– You can do this by hand, it’s just a bit messier. Kneading will take about 12-15 minutes.
– I combine the water and almond milk and then microwave for 45 seconds.
– To make these as more traditional round rolls, simply divide the dough after the first rise into 8 even portions. Roll into balls, then place in an oiled cake or pie pan with vertical sides. Proof until doubled again, then bake at 350°F until golden brown.
– If you want to make these ahead, freeze them on a baking sheet just after shaping. To cook, set out on a sheet pan for about 1.5 hours to defrost, then bake as instructed above.
- Prep Time: 2 hours 30 mins
- Cook Time: 20 mins
- Category: Breads
- Method: Baking
- Cuisine: Comfort Food
Did you try this recipe? Let us know in the comments below and give it a rating if you please. And be sure to check out the rest of bread recipes and other baking guides and tips.
For other bread ideas, any of these recipes will be the perfect side to a perfect dinner:
Photos by Raquel Smith, © Ask the Experts, LLC. ALL RIGHTS RESERVED. See our TOS for more details. Originally published on Novevmer 18, 2015. Last updated: April 5, 2022 at 13:43 pm.
Nutritional information derived from a database of known generic and branded foods and ingredients and was not compiled by a registered dietitian or submitted for lab testing. It should be viewed as an approximation.
About Raquel Smith
Raquel is a whole foods enthusiast, an avid mountain biker, and a dog lover. She works by day at Food Blogger Pro and formerly maintained her food blog "My California Roots" (now merged into Foodal).


Amazing, I like it sweetie!
I love your photography in this post! and these also look yummy!
Thanks so much, Erin! They were super tasty – you should try them! 🙂
Maybe I’m missing it, but after I roast the garlic, I peel and set it aside to cool, and then … I think I mash it up and add the 3 cloves worth to the bread batter. I hope that’s right, ’cause that’s what I’m gonna do … 😉
Haha, yep! I guess I didn’t say when to add the garlic. Oops! Recipe updated.
I don’t need a stand mixer, but have a bread machine. It’s there any reason I can’t prep the dough in that?
Yep, that would probably work!
OMG these look amazing! Great pictures and great recipes. Definitely trying this soon.
Thank you Brita! ?
Hi! I want to make these for my husband and I to go with a soup I’m making, but I was wondering how these would hold up being stored? Do you think they’d last sitting out on the counter for a couple days without the butter on top, which I could probably just add when serving? Any thoughts?
Hi Alli, my response here is probably too late, but they store well for a couple days at room temp in a sealed container. Heat for about 10-15 seconds in the microwave before serving. However, as with all fresh bread, they are best on the day they are made!
Hi. This recipe looks awesome. Can it be made gluten free?
Hi Lynn,
I haven’t tried a gluten-free version, so I’m not sure. The gluten is pretty important for the shaping of the knots/rolls. Sorry about that!
hey I was wondering if I can use a hand mixer
Hi Ciera, a hand mixer wouldn’t work. A stand mixer with a dough hook moves slowly and powerfully, so it would be impossible to keep it in place with a hand mixer. Just knead by hand!
These look delicious for Thanksgiving. Do you proof the yeast first? Thank you!
Hi Carol – I don’t, but if you tend to have yeast that is slow to activate or rise then it’s not a bad idea.
Isn’t butter dairy? Or are you using a dairy free butter in this recipe
Sorry about that, I mentioned that I used Earth Balance, which is a vegan butter, but I didn’t specifically say to use vegan butter….. however, feel free to use whatever kind you wish, any will work.
I tried these last weekend for my family to see if they would like them for Thanksgiving. I didn’t tell them that they were vegan, but they all loved them. I have a mixed group to cook for so when it doesn’t matter, I don’t tell. Tastes the same.
I will be making them for Thanksgiving this week and putting in the freezer.
My knots were very large when I only made 10, so I will be making them a bit smaller.
Love Love Love
Awesome! Glad you and your family liked these, Lynn. Enjoy them for Thanksgiving!
These look amazing! I love the idea of creating ‘knots’ so rustic and homey! Thanks for sharing 🙂
Thanks Morgan!
Hi there- this recipe looks lovely! I typically don’t use white flour or sugar. Can you recommend any substitutions? I’m wondering if almond flour or coconut sugar might work… Not sure how it would impact the taste…
Hi Rebecca – I’m afraid almond flour won’t work, as you need the gluten in the wheat flour to create the bread texture. Almond flour would probably result in dense rolls that fall apart. However, you could try this with a gluten-free baking mix that is intended to replace regular flour 1-to-1, and says on the package that it can work for bread. I can’t guarantee this will work at all since I haven’t tried it, but let me know if you do.
I imagine coconut sugar would work okay, but again, I haven’t tried it so I can’t guarantee anything.
Good luck!
Hi there! I am so happy I just found your site. The photography looks so awesome. I am thinking that I will make these for Christmas and not tell anyone that they are Vegan. I am just starting on my Vegan journey so I am looking forward to learning some new “tricks” I have a question….If you freeze after shaping is that after proofing or before right after shaping? Thanks so much!
Wondering the same!
That was fabulous! My adjustments to make these without oil and without butter on top TOTALLY worked! I replaced the oil with applesauce (same amount). And as for the butter topping (I was missing the salty buttery-ness) my daughter suggested salt water…PERFECT! No dairy, no fat, and not enough salt to fuss about for our family! Thank you so much for this recipe everyone enjoyed them. And you’re right, the knots were SO easy!
THIS is what has been missing in my life! Garlic + bread has got to be the perfect combination. So excited to make these 🙂 Thanks!
I made these today for Thanksgiving. They were wonderful. I made 14 and there were only 3 left and I did not have a big crowd. Your tips were great too. Thanks so much for adding this to Pinterest.
I used my bread machine to mix and knead the dough. Other than that I followed the recipe exactly. These are by far the best rolls I have ever had. It was really easy to make the knot (thanks for the great direction). I really impressed friends and family with these tasty rolls at Thanksgiving. Thanks for sharing this recipe. 😉
These were great. I wish I would have had potato flour. I used potato starch instead. I had to add more liquid to get to the correct consistency. I have used nutritional yeast for other recipes but never for bread. What a great idea!!!
I had to add about 1/4 cup more liquid
Made this bread twice recently. Must apologize but didn’t have the add’l time to be able to do the knots for buns, so mine were loaves. Truth be told, I was also thinking that my guests may have been more inclined to have a second SLICE rather than a 2nd bun. In the end, each had more than 1 slice so I think I made the right decision. I made it with the following variations:
The FIRST time I made it: I substituted apple sauce for the almond milk which I didn’t have, and used a WHOLE head of garlic (about 10 cloves), reserving two of the roasted cloves for the brushing. Rather than using butter to brush, I mashed the two roasted cloves with about 1 1/2 tsps of olive oil and brushed this on the loaf BEFORE baking. I also skipped the potato flour as I didn’t have any. The loaf was a delicious accompaniment to a vegan meal I’d hosted for a small group. My vegan friend was in heaven. The SECOND time I made it: I used almond/coconut milk. I was surprised that I couldn’t taste almond or coconut. And rather than making it vegan (though it was still vegetarian), I actually used butter with the 2 mashed roasted cloves, and it brushed it on the loaf after baking. Again, it was delicious. In both cases, the loaf needed to be baked for about 35 minutes in an oven slightly cooler than 350 degrees. Raquel… I SOOO appreciate you’re outlining clearly how to make the knots, and vow to try them one day when I have a bit more time.
can you sub the all purpose flour for whole wheat flour if so how much or can you use the same amount? i want to make this right now PLEASE HELP!
Loved reading your fun post. These sound like they’re filled with such great flavors! Can’t wait to try them and try your knot technique! 🙂
If I want to make a bunch how do I store them so I don’t have to make them the day of? 🙂
Thanks for your question, Tay! That depends on how far in advance you want to make them, and there are a few things you can do.
You could bake, cool completely, then freeze in zip-top bags with as much of the air removed as possible. Defrost and reheat in a low oven before brushing with garlic “butter” and serving. If you want to bake ahead without freezing, you can wrap airtight and store at room temperature overnight.
Or, make these up through the shaping and proofing phase, and keep the prepped dough in the refrigerator for 1-3 days. The dough can also be frozen on baking sheets after shaping for up to 1 month (transfer to zip-top bags once frozen solid, if you have a reliable freezer), just be sure to give them enough time to defrost fully before baking.
Hope this helps! Happy baking!
Thanks for the help!
These are really the best I’ve ever had and I’ve never made any type of bread before so it wasn’t difficult to follow. Everyone loved them last year (even non vegans) and I can’t wait to have them again this holiday season! Thanks for the share.
Is that the right liquid amount?
1 cup total liquid to 3 cups of flour?
I tried to make them but the mix was super dry! HELP!
Do you have a kitchen scale, Deborah? The most accurate way to measure flour and other dry ingredients for baking is by using a kitchen scale rather than cup measures. If you compare the two side by side, in part because compaction is likely with a scoop, 3 dry cups of flour might yield something closer to 18 oz while 12.75 ounces of flour are what’s actually required for this recipe.
Have you ever made these at high altitude? Any suggestions for cooking at 6000 ft?
Great question, James. Vegan baking is already carefully calibrated to provide the structure that you’re aiming for without any animal products and baking at higher altitudes adds to the list of variables to consider. We haven’t tried this ourselves, but King Arthur Flour provides some suggestions that you might want to try:
-Increase oven temperature 20-25 degrees
-Decrease bake time by a few minutes (and keep an eye on your rolls during the final minutes of baking)
-Increase liquid by a couple of tablespoons
-Add about 2.5 Tbsp of additional AP flour
-Decrease the amount of yeast by about 25%, and keep in mind that rise times will be quicker; an extra rise can help to improve the flavor
Hope this helps! It may require a bit of trial and error to get this recipe right- please let us know how it goes!
Do you have to use potato flour? Thank you
Potato flour is gluten-free, great for binding, and it doesn’t absorb much liquid until it’s heated. Substituting with regular all-purpose flour won’t impart the same qualitites to the mix, but you can substitute tapioca starch or arrowroot (or even corn starch, in a pinch). Hope this helps!
These are my absolute favorite rolls! I made them last Thanksgiving for the first time and didn’t tell anyone they were vegan until after the meal and people were definitely surprised. This year I’m not supposed to bring anything since I just had a baby but I HAD to have these – so they’re proofing now 🙂 Thank you for the great recipe!
Awesome! Happy Thanksgiving, KG!
Second time to make these delicious husband requested rolls. They are easy, different and very good. Be sure to sprinkle the coarse salt on top of the vegan butter spread at the end.
I made these for Christmas Eve and they turned out great. I made mine a bit smaller, therefore it made more, but still used the same shape. The shape made them look so fancy! Everyone was impressed. Great taste, and great look! Will be making again. Thank you!
Thanks so much Emily- so glad you enjoyed the recipe! If you wouldn’t mind, can you please leave a star rating below to show other readers that you loved it? Thanks a bunch!
Hi, is there a sour dough version? I have an amazing sour dough starter that I have used for all my breads.
hey there, is the dough supposed to be super tough to knead?
This should be a soft dough, Ashley. Did you start with room temperature ingredients and lukewarm water?
Hi! I want to try this out. I have a few different flours like oat, almond, garbanzo, white wheat along with whole wheat, AP and bread flours. Are there any other flours that will do what potato flour does? Unfortunately, I don’t have potato flour. It might be tough finding it where I live…… If not, then, of course, I will just use AP as suggested, but just in case, what do you think?
Potato flour has a high starch content, and you may be able to replace it with tapioca starch or corn starch/flour. Good luck!
IF YOU WANT TO IMPRESS, BAKE THESE!! All my life I’ve always been in charge of baking fresh bread for Thanksgiving, however, in the past, I was not vegan….
This was my first Thanksgiving vegan and let me tell you, I wish I was vegan my whole life if it involved these breads!! They are absolutely perfect!
Thanks, Kathleen, for the rave review! We are dreaming of sitting at your vegan fest table next year! Sounds so delicious!
Thanks for this amazing recipe, tried it today and it came out awesome, the whole family just loved it !!!
These are AMAZING! So delicious and sooo easy for a first-time bread baker. Definitely a new staple in my repertoire. Thank you!!!
My dough was extremely sticky. Any idea what could of caused this?
Fluctuations in the weather like high humidity in the summertime can certainly have an effect on your dough! I find measuring flour in cups rather than using a kitchen scale can skew the proportions of ingredients that I add in baking as well, resulting in a higher proportion of more accurately measured liquids. It’s alright if this dough is a bit sticky, but feel free to adjust and gradually add a bit more flour if you need to, to make it easier to work with.
just made these and they came out great. I live in a somewhat ‘damp’ environment (the Redwoods area) and so I started out with only 2 cups of flour and added less than an additional 1/2 a cup by the time I was done rolling them out. Turned out light and fluffy. The only other change I made was to cut my long strips of dough in half to make a little smaller rolls. Of course, now I will probably eat 2 rather than one roll at a time, ha ha. Thanks for putting this recipe on line. I can see this is one I will make multiple times.
Amazing taste and texture and easy to make. Well easy-ish. Knotting isn’t my forte so my knots are just knot-ish. 😂
Didn’t need to make these vegan so I used 3 tbsp of the giant Costco-sized Parmesan cheese we have in the fridge. Used dairy-free spread for the Garlic butter brush after baking and was a little heavy-handed on the salt there. 😫 😆 Thank you!
Thank you for these absolutely lovely rolls! I’m navigating my first holiday season as plant-based and these were a wonderful treat. I made one modification, and that was to mix up the dough the night before and allow it to do a cold rise in the refrigerator. I brought the dough out the next morning, allowed it to come to room temperature, then proceeded with the rest of the recipe.